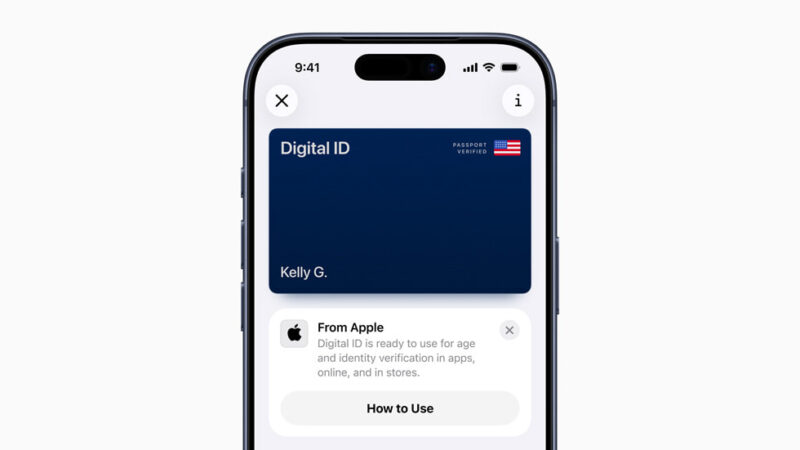
Apple recently launched its new Digital ID feature. This update allows US passport holders to add their passport details to Apple Wallet for easier identity verification at TSA checkpoints. Here is how you can get started adding your passport details to your phone.
Apple’s Digital ID Feature Overview
The new update lets you store a verified digital version of your US passport inside Apple Wallet. It creates a secure, on-device ID token that can be used for identity checks at TSA checkpoints across 250 airports.
Unlike state-issued digital IDs, this rollout applies to all US passport holders. Apple uses on-device processing, so your identity data never leaves your iPhone. It’s an early step toward a future where physical IDs may not always be required.
If you’re new to digital credentials, learn more about digital driver’s licenses and digital wallets to see how this fits into Apple’s broader ecosystem.
Device and Setup Requirements
You need an iPhone XS or later models with iOS 18.1 or newer to add your passport to Apple Wallet. An Apple Watch Series 4 or later also works for showing the ID during checks. Other basics include a current US passport, Face ID or Touch ID, Bluetooth turned on, and two-factor authentication linked to a US-set Apple ID.
If you’re setting up Wallet for the first time, our Apple Pay setup guide explains the basics.
Adding Your Passport to Wallet
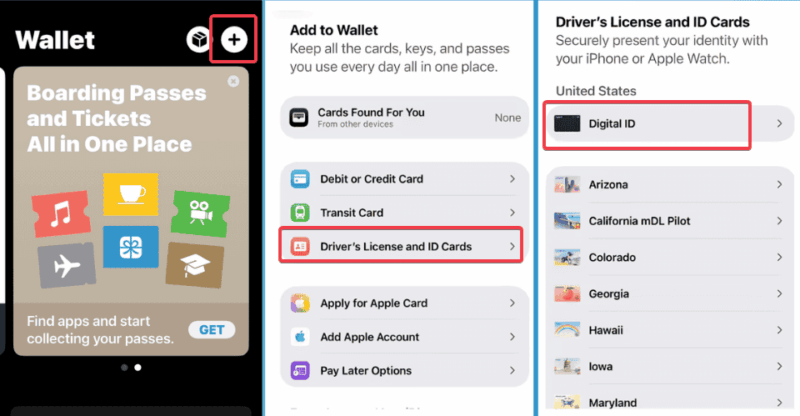
To add your passport to Apple Wallet, open the Wallet app and tap the plus (+) sign. Choose Driver’s License or ID Cards, then select Digital ID for your passport.
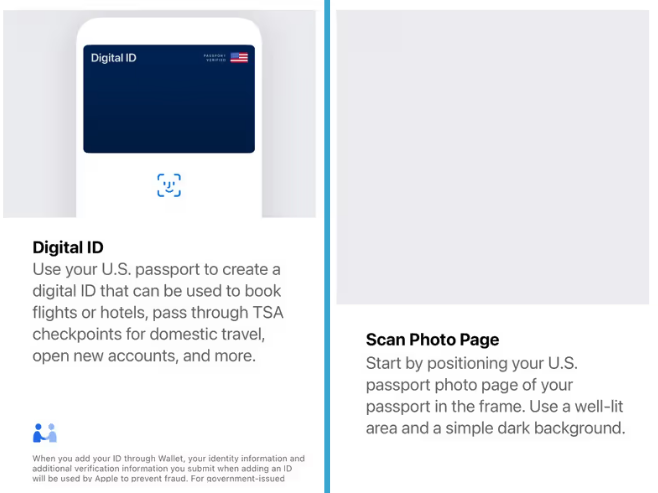
Use your iPhone’s camera to scan the photo page and hold it over the passport’s NFC chip.
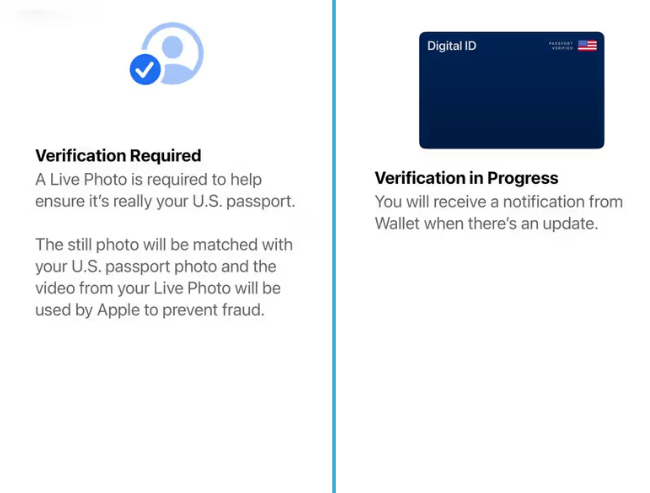
Follow the prompts to take a selfie and move your head for a quick identity check. Apple processes everything locally and deletes your facial data after approval. The process takes around ten minutes.
If verification fails, try again in better lighting or ensure your NFC scan is aligned correctly. If you run into setup issues, our Apple Pay troubleshooting guide covers similar Wallet fixes.
Using Your Digital ID
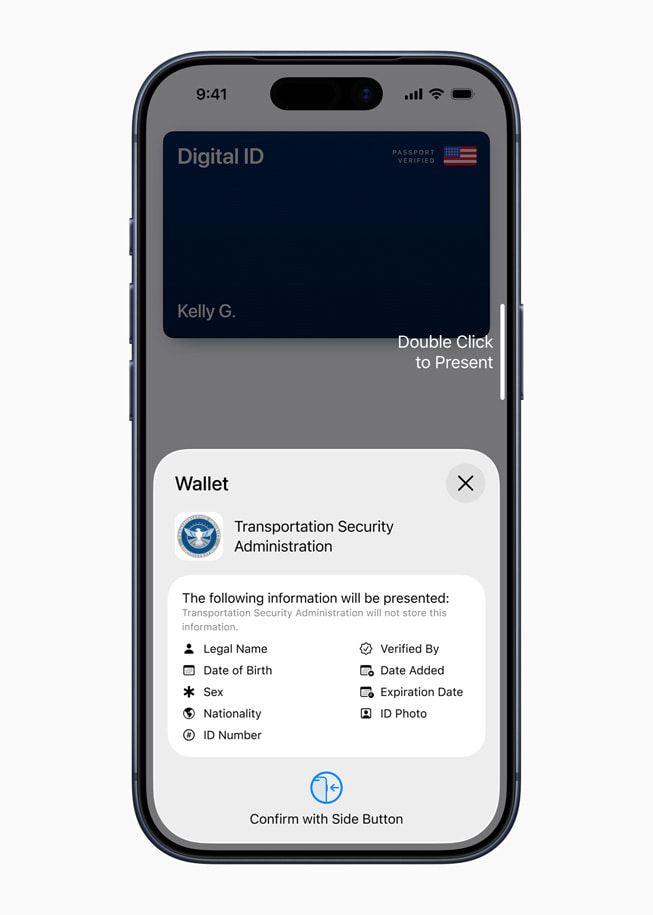
With your digital ID ready in Apple Wallet, double-click your iPhone’s side button. Select the ID, confirm with your Face ID or Touch ID, and hold the phone near a compatible reader at the TSA checkpoints. You pick what details to share, like your name or birthdate.
Right now, Digital ID works for domestic flights at select airports, but Apple plans to expand support to hotels, apps, and government services soon.
Extra: For Android alternatives, learn how to add your passport to Google Wallet.
Privacy, Security, and Limitations
One of the strong points of Apple’s Digital ID is privacy. Your passport data stays encrypted and stored only on your device, not on Apple’s servers. The company says it cannot see when or where your ID is used. Also, because verification relies on Face or Touch ID, only you can access and present it.
However, there are a few limitations to take note of. TSA acceptance varies, as not all checkpoints support Digital IDs yet, and even some listed airports may have limited functionality for now.
This raises questions about adoption speed. Hence, it’s best to treat this as a convenience feature rather than a full replacement for your physical ID for now.
Beyond that, this move ties more personal identity functions to Apple’s ecosystem, raising concerns about long-term user lock-in. Also, its tie to one device adds a layer of risk should something ever go wrong.
In my view, adding your passport to Apple Wallet simplifies TSA checks for domestic trips, improves security, and gives you more control over your data. Still, keep your physical copy handy as a backup until wider support arrives.