Managing users is one of the most important tasks for any Linux administrator. Whether you manage a single system or multiple servers, keeping user accounts organized helps maintain control over the system. Proper user management also plays a key role in system security. Administrators should only grant access to people who truly need it and only for the time they need it. Giving unnecessary privileges may expose sensitive data or critical system resources. Here, we will explore command-line tools that allow administrators to create, modify, and remove user accounts directly from the terminal.
Key Files for Managing Linux Users
Linux keeps user and group information in specific system files. These files store account details, passwords, and group settings, and administrators can use them to manage users and control access.
| File / Directory | Description |
|---|---|
| /etc/passwd | Includes UID, GID, home directory, and default shell. Readable by all, editable only by root/sudo. |
| /etc/group | Shows group name, GID, and members. Used to manage group memberships and permissions. |
| /etc/sudoers | Specifies which users/groups can run commands as root. It must be edited carefully. |
| /etc/shadow | Includes password hashes, expiration dates, and account info. Root-only access. |
| /etc/gshadow | Contains group password info and expiration data. Root-only access. |
| /etc/skel | Files like “.bashrc” and “.profile” copied to new users’ home directories. |
| /etc/login.defs | Manages password aging, expiration, and other security rules. |
Viewing Existing Users
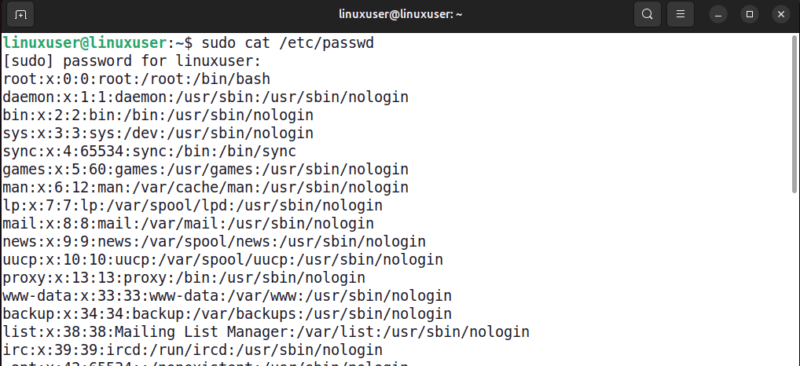
One of the quickest ways to view existing users on a Linux system is to examine the “/etc/passwd” file. This file stores basic information about all user accounts. You can view it using the following command:
sudo cat /etc/passwdHere, each line in the file represents one user account.
Alternatively, you can also check user information using the following commands:
id username
groups username
getent passwd username
The id command shows the UID, GID, and all groups the user belongs to. The groups command only shows the groups that a user belongs to. It does not display the UID or GID. While the getent command retrieves user account details from the system databases, including “/etc/passwd”, LDAP, or other configured sources.
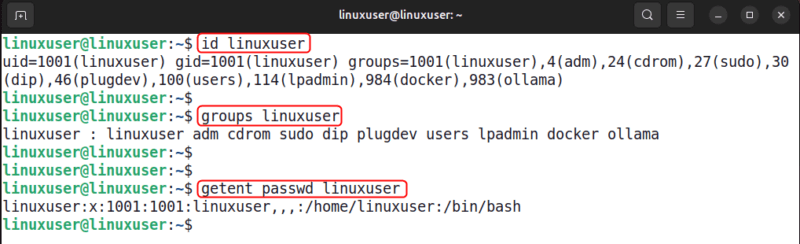
Note: Modern Linux systems do not store password hashes in “/etc/passwd”. Instead, encrypted passwords are stored in the “/etc/shadow” file, which can only be accessed by the root user.
Creating Users with the useradd Command
useradd is a low-level binary available on most distros. This command is typically less used because it is not as user-friendly and intuitive as the adduser command. However, there are very few differences, and either can be used.
To find out more about useradd, run the man command or add --help to get a quick overview.
man useradd
useradd --help
Run the following command to add a new user with a home directory:
sudo useradd --create-homeThis command creates a user and generates a home directory for it. However, if you skip the --create-home option, the user account will be created without a personal directory. After this, you can verify the user creation using the grep command:
grep /etc/passwd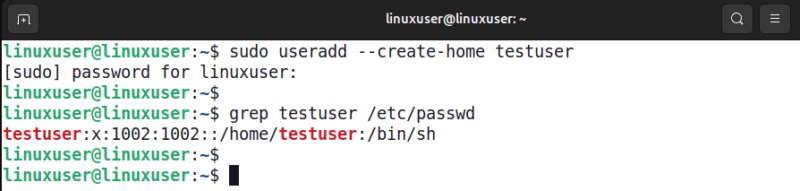
Creating Users With the adduser Command
The adduser command is a Perl script that will create a user similar to the useradd command. What makes it different is that it is an interactive command that prompts you to set the password, the home directory path, etc. On some distributions, such as Red Hat and CentOS, adduser is a symbolic link to useradd, and on other distributions like Arch Linux, adduser comes as a package that is not installed by default.
By default, using this command creates a group for the user with the same name as the user’s login. Other default settings are typically stored in the “/etc/default/useradd” file. In this file, you can configure defaults for users created with useradd, such as the default shell, home directory location, and other account properties.

Run the following command to create a new user:
sudo adduser testuserWhen creating a user, you will be prompted to set and confirm the password, provide optional user information, and confirm the account creation.

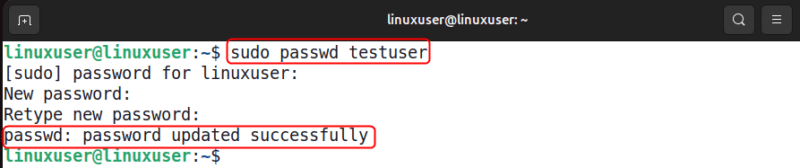
Setting or Changing User Passwords
After creating a user account, you can set or update the user’s password using the passwd command.
sudo passwdThis command prompts you to enter and confirm a new password. If a regular user runs the passwd command without sudo, they can only change their own password.
Password complexity requirements are enforced by PAM and are typically configured in “/etc/pam.d/common-password” on Ubuntu. For more information on updating password complexity rules, see the pam-auth-update man page.

Managing Linux Users Using the usermod Command
You can use the usermod command to modify existing user accounts. It can change attributes such as user IDs, login names, home directories, or group memberships. For example, the following command updates the user’s UID:
sudo usermod -u
Be careful when modifying critical attributes such as the user ID or login name. Changing these values may affect file ownership or permissions on the system.
Similarly, you can change a user’s Home Directory with the usermod command as follows:
sudo usermod -dIn addition to this, you can lock or unlock a user account using the -L and -U options respectively:
sudo usermod -L
sudo usermod -U
Finally, you can set the account’s expiration date using the --expiredate option with the usermod command:
sudo usermod --expiredateThese options allow you to control account access and manage user settings without deleting the account.
Adding Users to the Groups
Groups allow multiple users to share the same permissions. For example, users may need group access to manage files, run services, or perform administrative tasks.
To add a user to a group, run the usermod command with -a and -G options:
sudo usermod -a -GThe -a flag means append, which ensures the user keeps their existing groups. Without this option, the command may overwrite the user’s group list.

Alternatively, you can use the gpasswd command to add/remove a user to/from a group.
sudo gpasswd -a username groupnameTo remove a user from a group:
sudo gpasswd -d username groupnameRemoving Users
If a user account is no longer needed, you can remove it using the userdel command.
sudo userdel username
This command deletes the user account but keeps the user’s home directory. To remove both the account and its home directory, use the following command:
sudo userdel -r usernameNote that userdel will not remove a user if there are active processes running under that account.
Viewing User Login Activity
Monitoring login activity helps administrators detect unauthorized access and troubleshoot authentication issues. On Ubuntu and Debian systems, login attempts are recorded in “/var/log/auth.log”. You can view recent entries using the tail command:
sudo tail /var/log/auth.log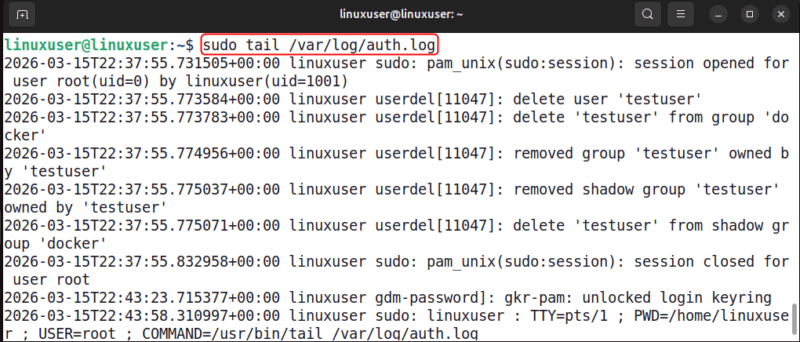
On Red Hat or CentOS systems, login records are stored in “/var/log/secure”. Systems that use systemd may also allow viewing authentication logs using the following command:
sudo journalctl | grep sshThis way, managing user accounts correctly keeps your system organized and prevents unauthorized access. To take your terminal experience even further, check out this guide on Linux terminal tools for utilities that make working in the terminal faster and more enjoyable.