Since 2016, Snapchat’s Memories feature has offered a simple way to save and revisit your snaps. That’s about to change. The company has announced it will start charging for storing Memories, prompting frustration among many long-time users. If you’d rather avoid the fee, then you’d be glad to know that there are ways to hold on to your favorite memories without paying, and we’ll discuss them in what follows.
Good to know: learn how to create a shortcut on Snapchat and easily interact with your favorite people on the app.
What Are Snapchat’s New Memories Storage Plans?
Snapchat’s Memories works as an archive feature, allowing you to save your snaps and stories for later viewing or use.
Note: check out how to use the Snapchat Memories to learn more about the Memories feature.
Snapchat just didn’t expect Memories to take off the way it did. Now, with so many users relying on it to store years of snaps, something had to give. That’s why the app is introducing new storage plans designed for users with larger archives.
Snapchat insists this change will only affect a small percentage of users, but judging by the deluge of complaints online following the announcement, plenty of people feel differently.
Thankfully, Snapchat isn’t locking all your Memories behind a paywall. The app will continue to provide 5GB of free storage, and only users who exceed that threshold will be asked to choose a paid plan, as follows:
- 100GB Memories-only option
- 250GB with Snapchat+
- 5TB with Snapchat Platinum
Even better, Snapchat isn’t enforcing this change right away. Users will have a full 12-month grace period, during which all Memories exceeding the 5GB limit will still be stored for free. You can choose to upgrade to a paid plan at any point during this time. Or you can start thinking about ways to back up your Memories archive using one of the methods outlined below.
1. Save Snaps One-by-One
If your Memories gallery isn’t too large, take a moment to go through it from top to bottom and save the moments you truly want to keep. Here’s how to save individual snaps.
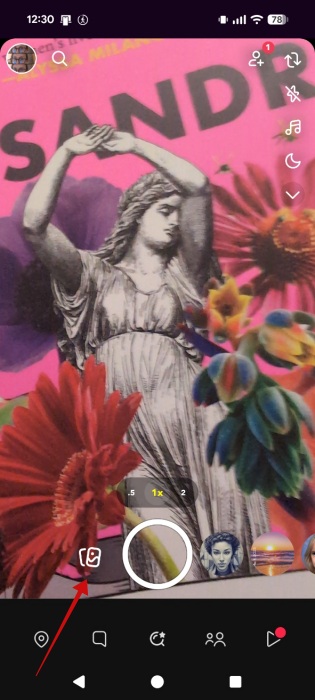
Open the Snapchat app on your device. Go to the camera screen and press the icon on the left side of the Shutter button. If you previously used a lens, you might have to swipe your finger to the left for it to appear.
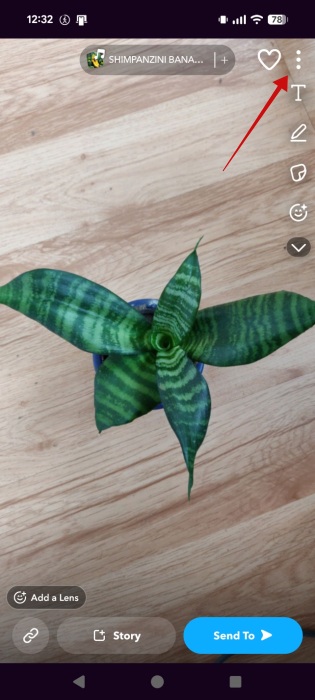
This will open up your Memories library. Find a snap that you wish to save. Tap on it to open it in full screen. Press on the three dots in the upper-right corner.
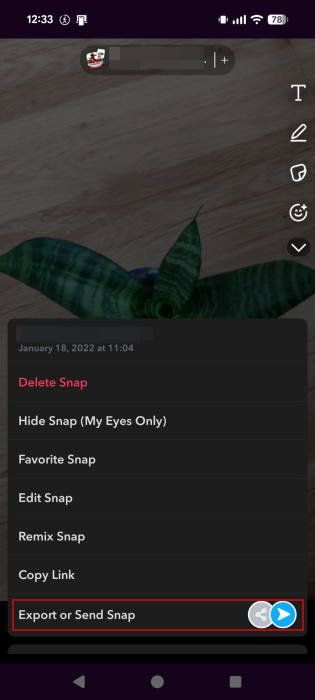
Select Export or Send Snap in the pop-up that appears.
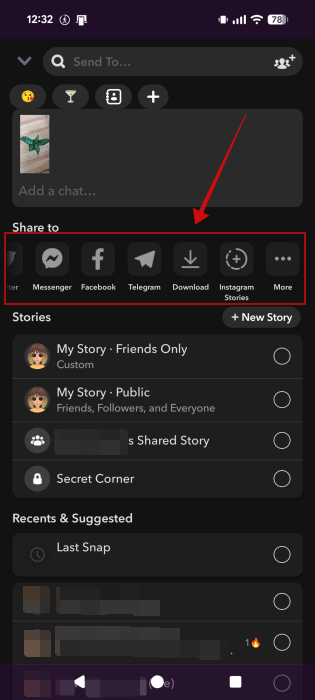
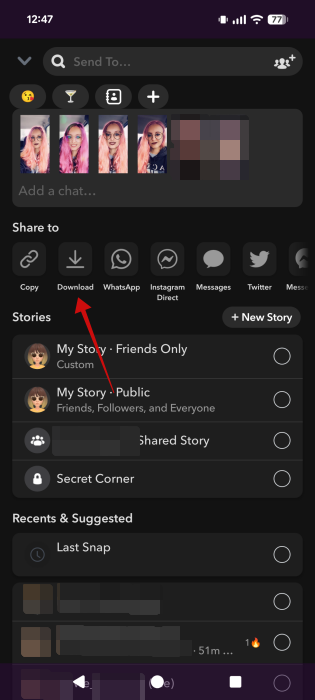
In the Share to section, swipe your finger to the right or left until you find the option to Download. The snap will be saved to your device.
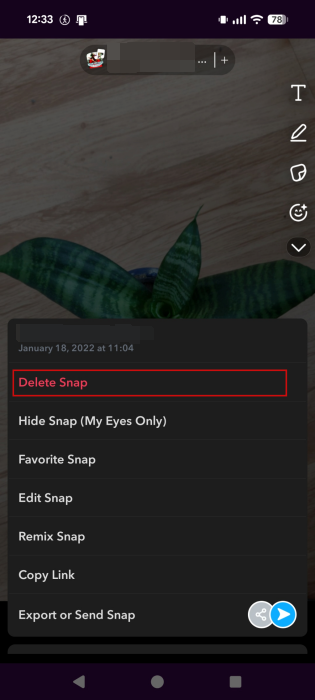
Now, you’re ready to take the next step. With your snap safely tucked away, press the three dots again and select the option to Delete Snap.
Tip: learn here how to create your own lens on Snapchat.
2. Saving Snaps in Bulk
Now, if your Memories library in Snapchat is larger, then you might need to save multiple snaps to save time.
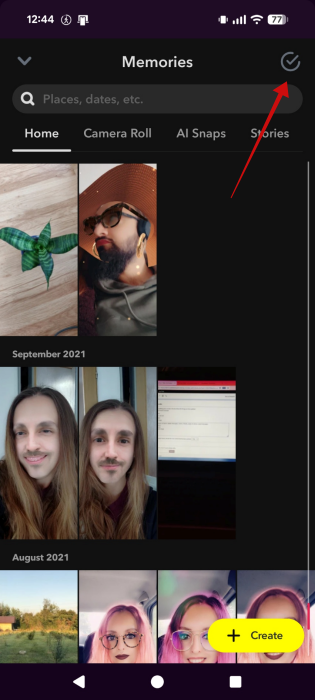
To do so, access Memories in your Snapchat app. Tap on the selection icon at the top.
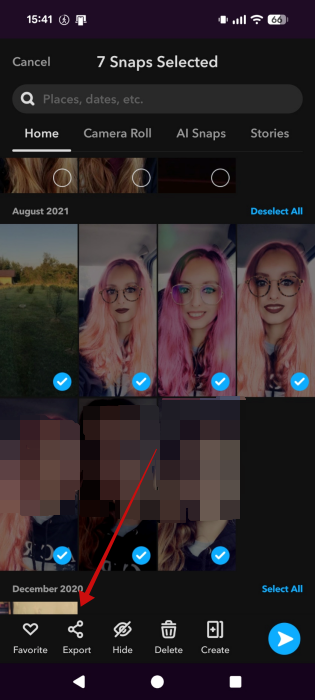
Now select all the snaps you wish to save from your library. You can select up to 100 memories at a time.
Tap the Export button.
Press on Download.
Once you have downloaded the Memories, you can go back, re-select the images, and delete them.
3. Request Your Snapchat Data
In case you don’t want to waste time exporting your Memories in batches, another option is to request your Snapchat data. This way, you can easily grab your entire Memories archive, not just the ones you want to keep.
Open the Snapchat app and go to your profile. Tap on the settings icon in the upper-right corner.
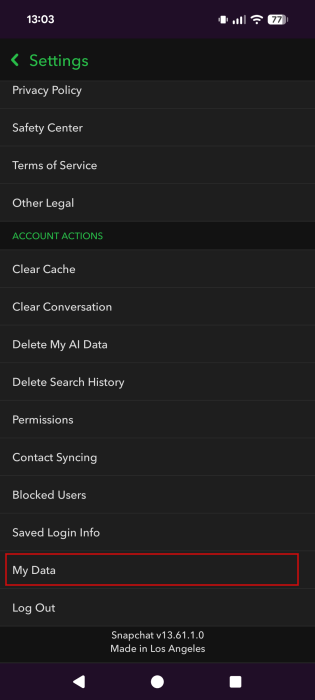
Swipe all the way down until you reach the Account Actions section and select My Data.
At the top, select whether you want to export an HTML or JSON file. There’s also a Packet Size option that compresses large packages into smaller files.
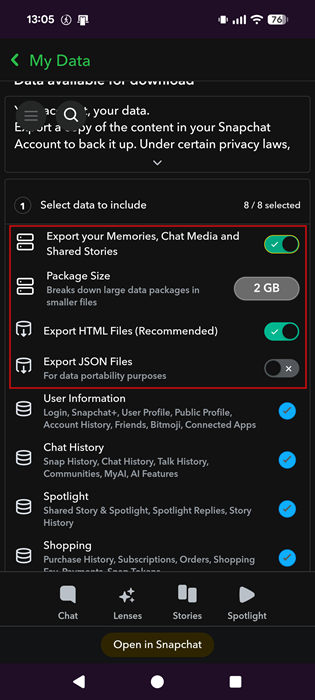
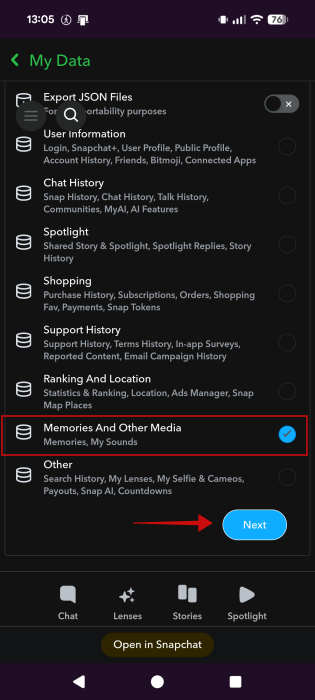
Anyway, you can opt to download just your Memories. Toggle on the option below and make sure the others are set to off. Then press Next.
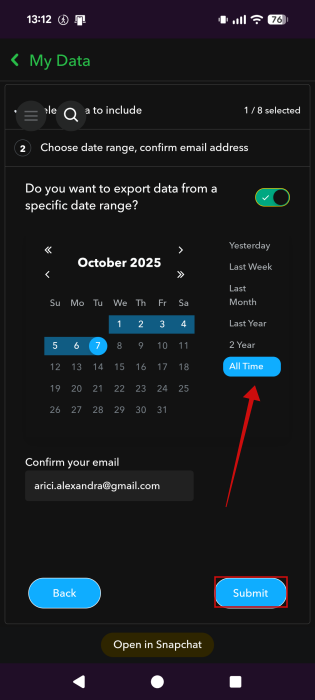
On the next page, select All Times. Confirm your email and then press Submit.
Once the file is ready (depending on the size of your library, it might take up to a few days), you will receive an email.
Stop Saving New Snaps to Memories
Moving forward, to prevent growing your library even further, abstain from saving any new snaps to Memories. Instead, opt to have Snapchat save them to your device.
Unlike Instagram’s archive feature, which is enabled by default, Snapchat doesn’t save your snaps automatically to Memories. You have to do so manually by pressing the Save button after you take a new photo. Luckily, you can change what happens when you press this button.
Open the Snapchat app and go to your profile. Tap the gear icon in the upper right corner.
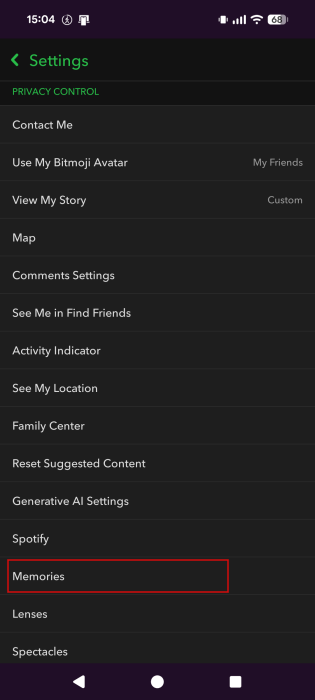
Find the Privacy Control section and tap on Memories.
Tap on the Save Button option.
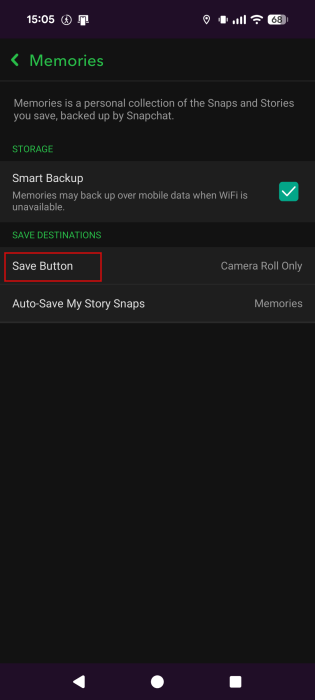
Switch to Camera Roll Only.

With this feature enabled, Snapchat will only save the snaps to your camera roll on your device. This gives you a convenient way to back up your snaps without saving them to your Snapchat account.
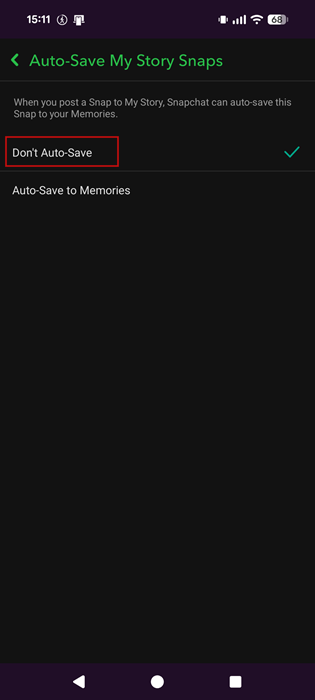
Now, when it comes to stories on Snapchat, the default option is to auto-save them to Memories. However, you can change that. Go back to the Memories section and press on Auto-Save My Story Snaps.

Switch to Don’t Auto Save. Now you will have to manually press the Save button on a story when viewing it, to save it to Memories.
In another twist, Snapchat gives you the option to save chats indefinitely instead of watching them vanish after viewing. It’s a surprising shift for an app for ephemerality, one that long-time users may find jarring.