On your Google Photos app in Android, you will find an “Ultra HDR” editing feature which converts any uploaded image files to the ultra HDR format. You get more naturalistic images that are brighter and more crystal clear than the original. Here’s how to enrich Your Google Photos pics with an ultra HDR makeover.
How Ultra HDR Enhances Google Photos
If your standard images appear dull, you can now use Google Photos to enhance them with the latest Ultra HDR feature. This improves brightness (measured in nits) across the darkest and brightest areas of an image. A higher HDR also enhances color and contrast, greatly improving the overall visual quality.
Currently, this feature is only available in Android for the Google Photos application version 7.24.0.747539053, and higher. They may be introduced in iOS or desktop browsers in the future, but there’s no official confirmation from Google yet.
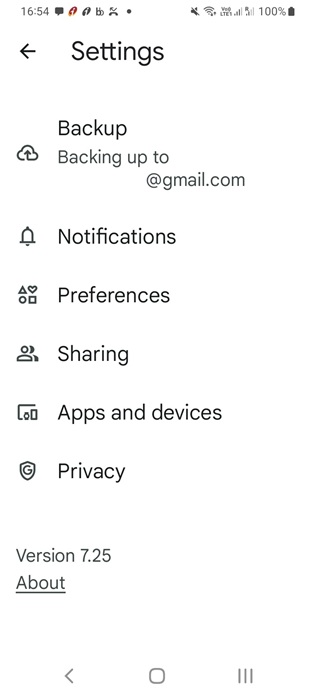
To know whether you need to update your Google Photos app’s Android version, click your user icon on top, select Photos settings, and scroll near About.
Here’s a very brief technical explanation of how this thing works. There is an HDR photography concept called “gain map,” where an image is upgraded for HDR screens by storing additional brightness and contrast information in each pixel. The image then adjusts luminance and tone mapping to give you a richer display.
Related: If you’re a Samsung Galaxy user, there are similar HDR features you can access in Samsung Gallery.
How to Convert Your SDR Images in Google Photos to Ultra HDR
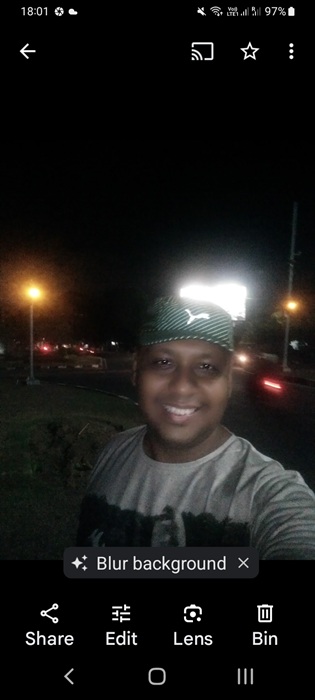
To convert your standard images to ultra HDR in Google Photos, launch its Android application. Make sure the app was updated to the required 7.24.0.747539053 version or higher, as discussed above. Now open any image and click the Edit button.
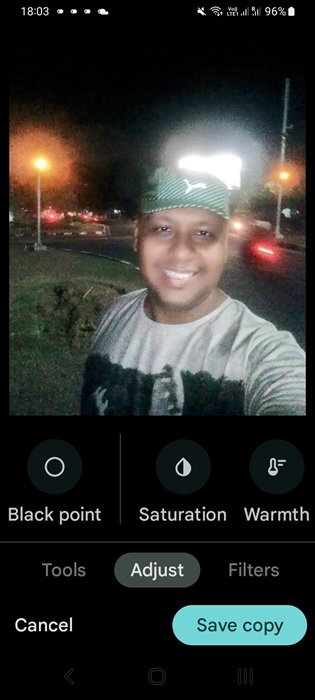
On a horizontal slider for Suggestions, you can see many options. Select Adjust -> Ultra HDR (there used to be a deprecated menu called “HDR Effects“).
After you convert the image to ultra HDR format, click Done, and the image will be upgraded automatically. To get the best experience from the new feature, try editing any nighttime photos uploaded to Google Photos. They will be visibly brighter with more natural lighting spanning the image area.
Finally, click Save Copy. It will automatically store a separate ultra HDR image file in Google Photos for the same calendar date. The image will also be stored in any Google Photos album from where you retrieved the original image. This consumes extra storage Google storage space. When you check the image EXIF metadata, you will find “ultra HDR” specified.
If you cannot view the Ultra HDR feature while editing your images even after updating your Google Photos app, just wait a while as Google rollouts can be slow. It will eventually be universally available.
The good thing about this new feature is it is backward compatible, allowing ultra HDR upgraded images to be viewable in standard SDR format on non-HDR screens. It also offers cross-platform compatibility with iOS 18 and all the major browsers on Windows and Mac. The only requirement is that the user’s screen must be HDR-capable and support the ISO 21496-1 standard.
Of course, editing so many Google Photos images to ultra HDR can affect your Google account storage limits. For those looking to downsize, consider deleting the duplicates of your images. You can also take a backup of Google Photos to your Windows PC.