If you use a Mac, you might have noticed that while the Finder shows the size of individual files in List view, folder sizes are hidden by default behind a pair of dashes (–). In certain situations, knowing how much space a folder actually takes up can be essential. In this article, we’ll show you how to view folder sizes in Finder and make better sense of your storage.
Good to know: with the latest macOS 26 Tahoe update, your Mac has finally gained the ability to display your clipboard history.
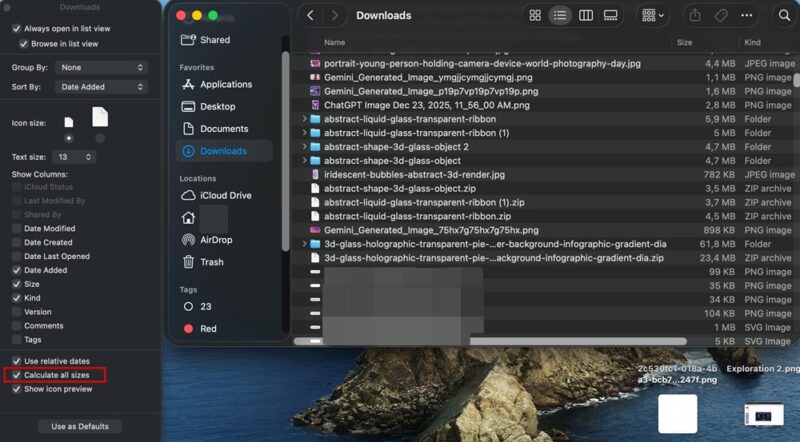
1. Use the Calculate all Sizes Option
macOS hides folder sizes in Finder to keep performance snappy. However, there will be times when knowing exactly how much space a folder occupies is genuinely useful. If you need to view the sizes of several folders at once, or you want to always view the folder size, you should activate the Calculate all Sizes option.

On your Mac, click the Finder icon in the dock at the bottom. Navigate to a directory that contains multiple folders.
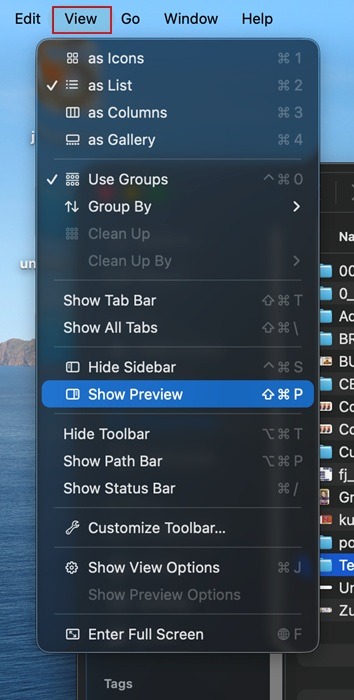
Select View -> Show View Options or press Command + J.
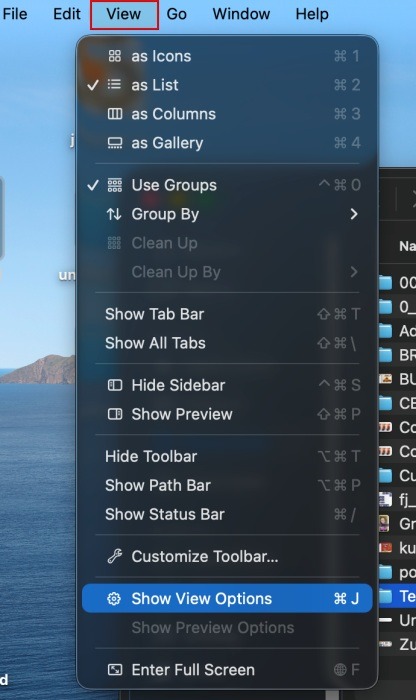
Check the Calculate all sizes option all the way to the bottom. The folder size info will now be visible.
Leave this window open, and you can now easily move to a different folder in your Finder window. Go ahead and enable the same option to view folder sizes at this location as well.
To reverse the folder size view, all you have to do is uncheck the Calculate all sizes option.
Tip: if Finder stops working on your Mac, try these fixes.
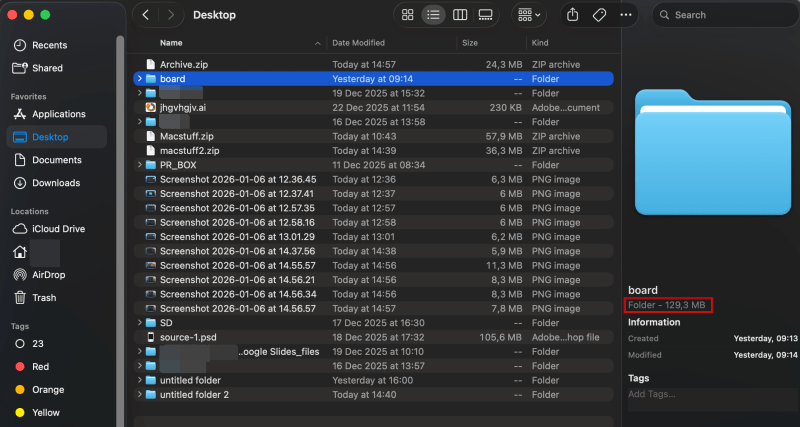
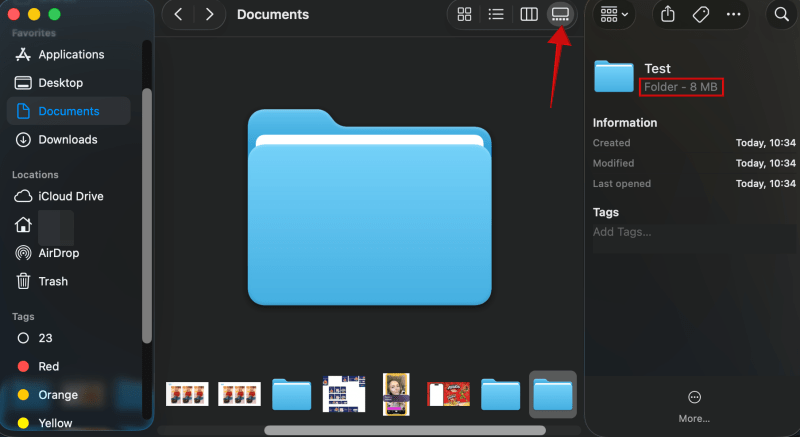
2. Switch to the Preview Panel
If you need to check folder sizes sporadically, you can quickly turn on the preview panel and view the info from there.
Select the folder in question in your panel and press Shift + Command + P. Or you can go to View -> Show Preview.
The Preview panel should appear on the right side of the display. You can view the file size directly under the name of the folder.
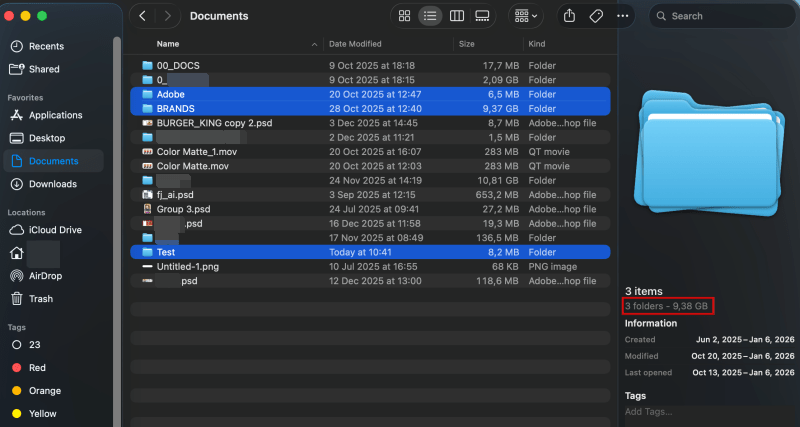
In addition, you can select multiple folders (select the first one then press the Command key and click to select the others). The Preview panel will show you the folders’ combined size.
Alternatively, you can press the last icon in the top right (the one that looks like a display standing on a table) to switch to gallery view, which also include info about the total folder size.
3. Via the Get Info/Show Inspector Option
You might not like the Preview panel taking the extra space in your Finder. What you can do instead is bring up the Get Info window.
Navigate to the folder in question on your Mac and right-click it. Then select Get info. Or press Command + I.
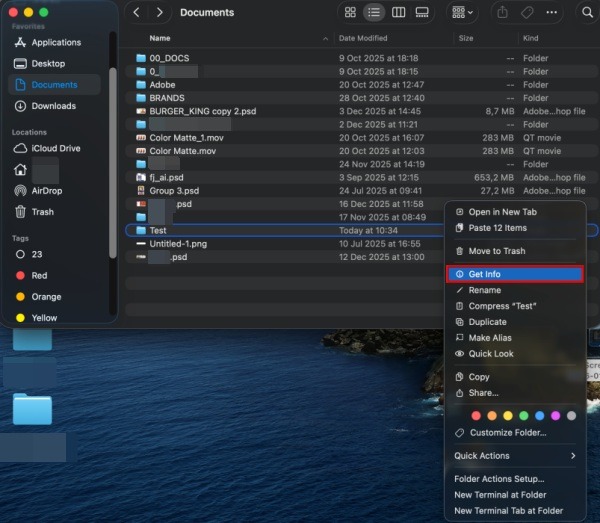
Check the Size field to view the info you’re looking for.
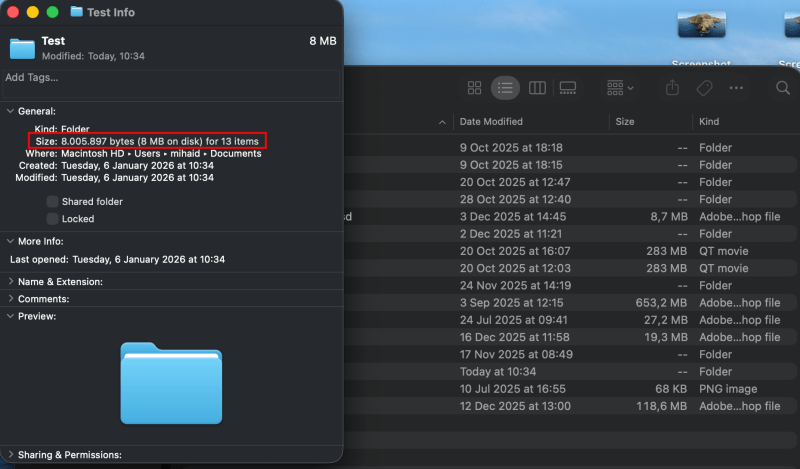
Now, if you need to check multiple folder sizes in a row, you cannot use Get Info. Instead, navigate to a folder and right-click it. Now press the Option button. You’ll notice the Get info option changing into Show inspector. Click it.
A similar panel to the Get info one will show up for you. Check Size for the info you’re looking for. However, this time, if you click a different folder, the window updates to display that folder’s information.
If, on the other hand, you’re looking for ways to hide folders from view on Mac, check our suggestions.
4. Use the Terminal
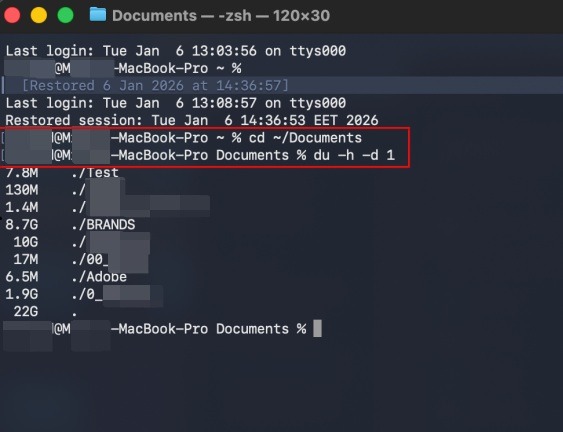
If you prefer to do things through the Terminal, here’s how to view multiple folder sizes at once.
Open the Terminal on your Mac (you can launch it through Spotlight). Change to a directory that contains several folders. Find out here how to launch Terminal in the current folder folder location on Mac.
cd ~/DocumentsNow, run the du command to view folder size for ALL the folders in your directory.
du -h -d 1You should see a list of all the folders with their respective sizes alongside them.
If you get the “du: operation not permitted” error in Terminal, it’s because macOS protects certain directories via Full Disk Access. These may include system folders and:
- ~/Documents
- ~/Desktop
- ~/Downloads
To fix this, you’ll need to grant Terminal full disk access. Click on the Apple logo in the upper left corner and select System Settings.
Go to Privacy & Security -> Full Disk Access.
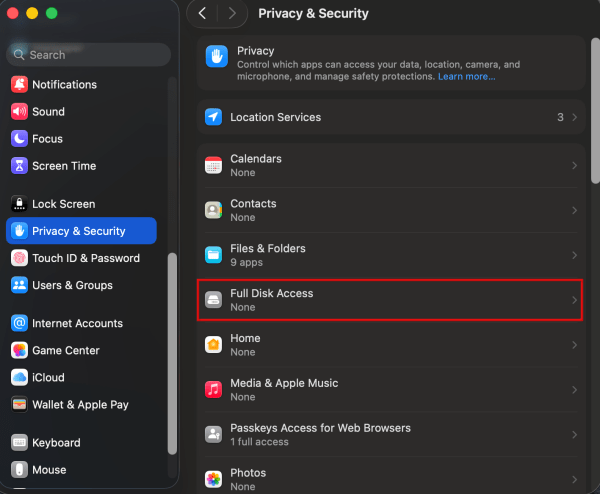
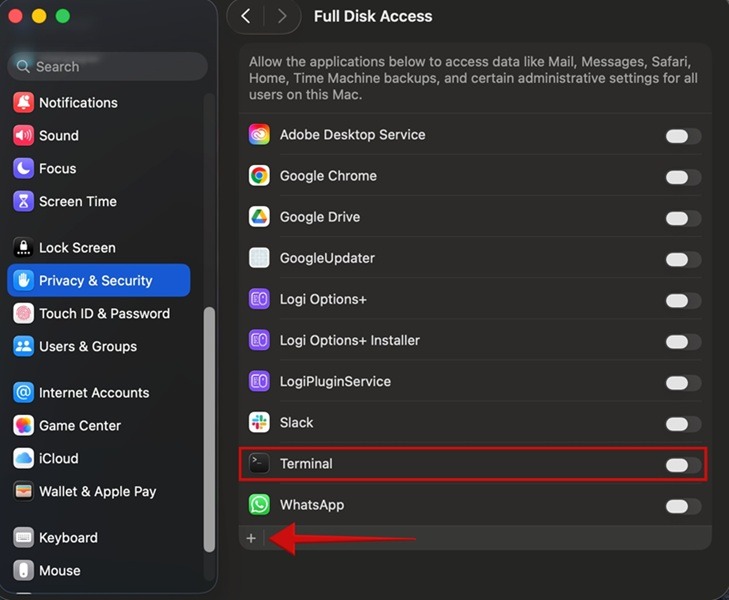
Check to see if there’s a Terminal option in the list. If so, toggle it on. If you don’t see it, press the + button.
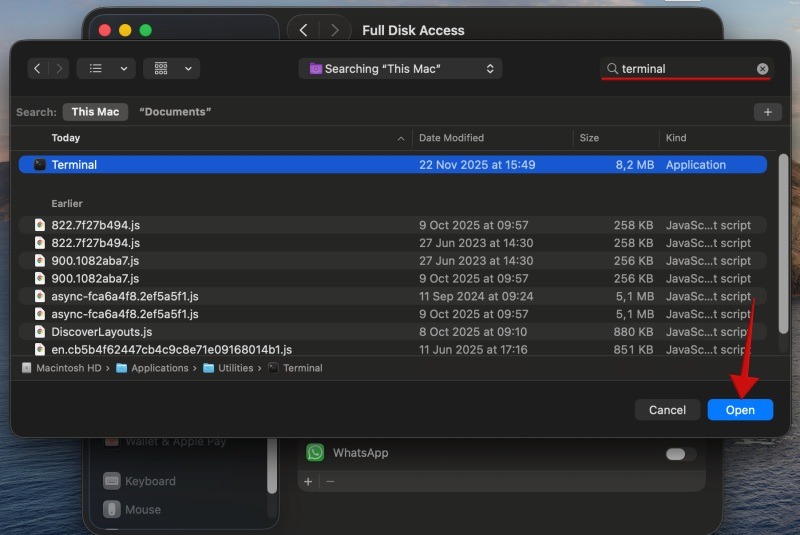
In the search bar in the upper right, search for Terminal. Press the Open button.
The terminal will ask to restart in order to apply the new settings. Now, try running the du command again. It should go through.
Now that you know how to view folder sizes in Finder on macOS, you might want to take things further. A good next step is learning how to bookmark a folder in Finder.