For years, RetroArch has been the indomitable platform of choice for discerning emulation connoisseurs on PC and mobile platforms. If you’ve downloaded Retroarch and don’t know your core from your content or just want to know which cores are best for running your favorite console games, read this RetroArch for Android guide for the instructions.
Note: before proceeding, you should consider the somewhat hazy legalities surrounding game emulation.
Installing RetroArch on Android
The first thing you need to do, of course, is install RetroArch on your phone. Depending on the Android device you have, there are two app versions available via the Google Play Store:
However, note that the official RetroArch website lists the two Google Play options as outdated. While the apps still work (as tested by us), they don’t contain all the cores available and might come with various issues. As a result, we recommend to opt for the APK download links instead.
In case you’re not familiar with how to install APKs, check our detailed guide on how to do so.
Installing RetroArch Cores
Once you have RetroArch on your device, launch the app, and you’ll be presented with the Main Menu, which may mean absolutely nothing to you if you’re unfamiliar with RetroArch.
First, let’s get some cores downloaded to your device. These are console emulators that have been adapted to work as plugins through RetroArch and can be downloaded directly through the app.
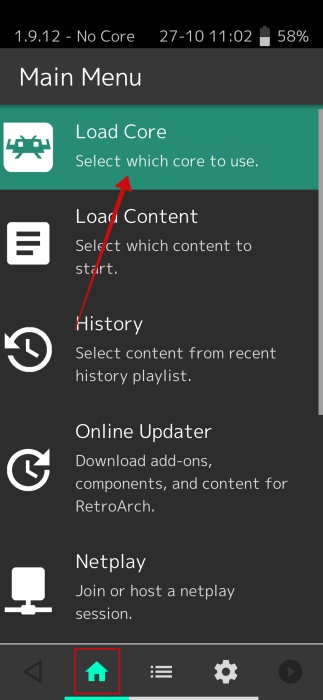
Press the home icon at the bottom to go to the app’s Main Menu. Select Load Core.
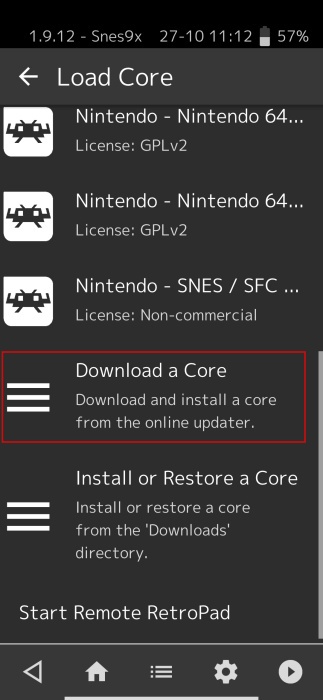
Tap on the Download a Core option on the next screen.
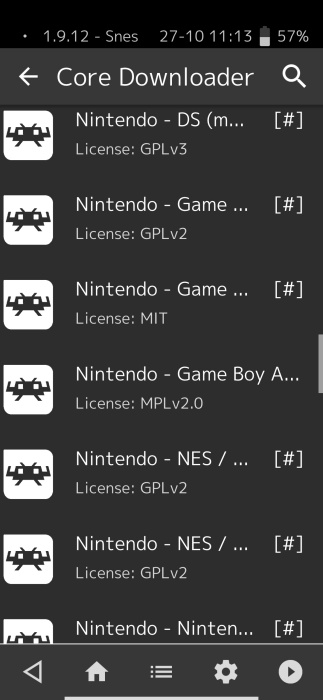
Browse through the list of available cores. As soon as you tap a core in the list, it will download to your device. You can install multiple cores if you wish, depending on the ROMs you have access to.
Best Cores in Retroarch for Android
Which cores are best for which console? Below are our core picks for the most popular consoles, based on the broadest compatibility and best performance with the most games. There will be certain games that don’t quite conform to this list, but for most people, we believe that it’s optimal.
Note: cores for more demanding consoles with 3D graphics and so on (N64, PS1, Sega Saturn) will be more straining on your device. They should work fine on relatively recent devices, but older/low-end Android devices may struggle.
- Game Boy Advance – mGBA
- Game Boy/Game Boy Color – Gambatte
- Nintendo (NES) – Nestopia
- Nintendo 64 – Mupen64Plus
- Sony PlayStation – PCSX-ReARMed
- Sega Genesis/Game Gear – Genesis Plus GX (PicoDrive from Sega 32X games)
- Sega Saturn – Yabause (very strenuous performance-wise)
- Super Nintendo (SNES) – Snes9X
Tip: you might also want to learn of the easiest way to play retro games on a Rasberry Pi.
Loading a ROM
After you have your cores all set up, to get RetroArch to detect your games, you’ll need to get the ROMs and ISOs for your games onto your Android device. We stress that these should be copies of games you already own. If you’re looking to legally obtain game ROMs, check our post to find websites that offer them.
We suggest you send yourself an email featuring the ROMs as attachments. Then you can easily download them on your smartphone. Alternatively, you can use other methods of transferring files to your Android. Just be careful where you store these files; you’ll need to find them later via the RetroArch app. If you follow our first suggestions, the ROMs will conveniently be placed in the Downloads folder on your phone.
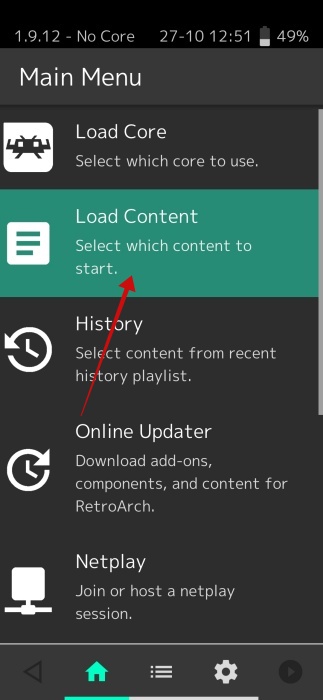
Once you have the games on your device, you can load them one by one by tapping on the home icon at the bottom and selecting Load Content.
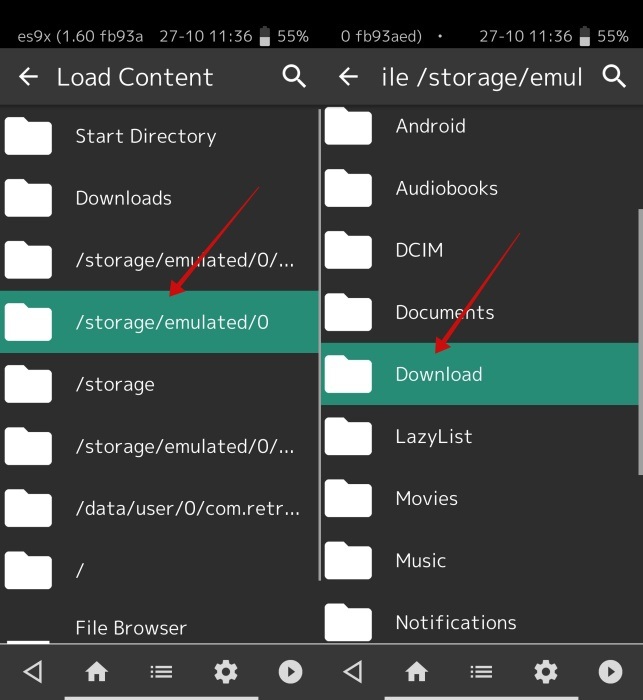
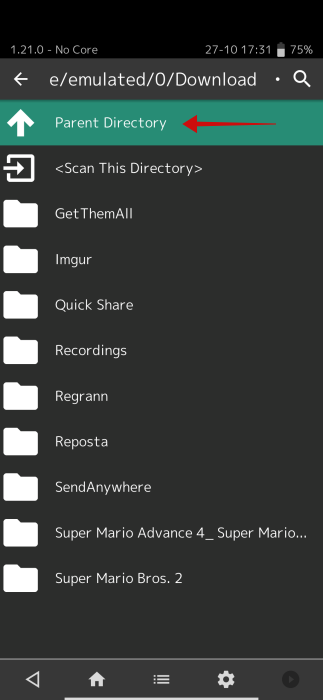
Go to the folder where the ROMs are. In this case “/storage/emulated/0/download” to find your ROMs.
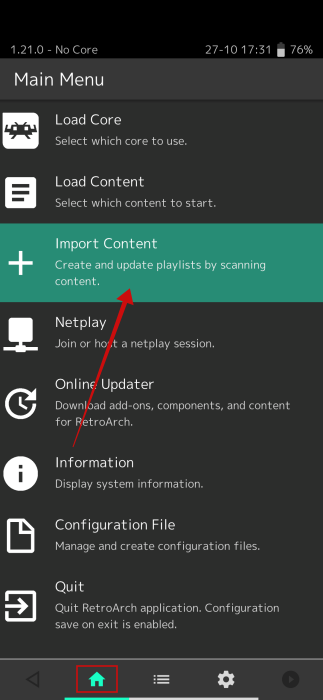
Alternatively, if you don’t want to load your games on-by-one, you can use this workaround – go to the Main Menu and select Import Content (in the Google Play version this is under the Playlists – which looks like a hamburger menu and is located at the bottom).
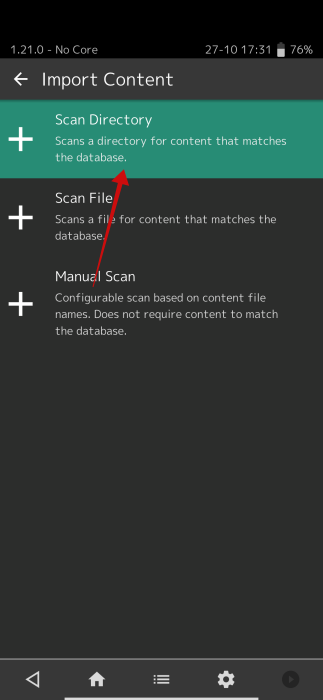
Select Scan Directory.
Find the directory where you keep your ROMs, then select Scan This Directory.
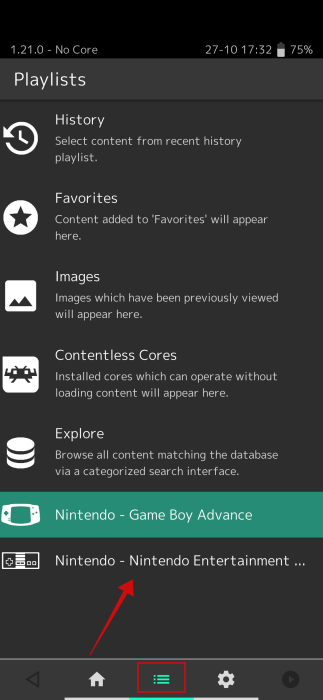
The ROMs for each console will now be neatly contained in separate folders in the Playlists menu. You can select and run your games from here.
Launching and Playing a Game
To launch a ROM, find it in the directory on your Android device and tap on it.
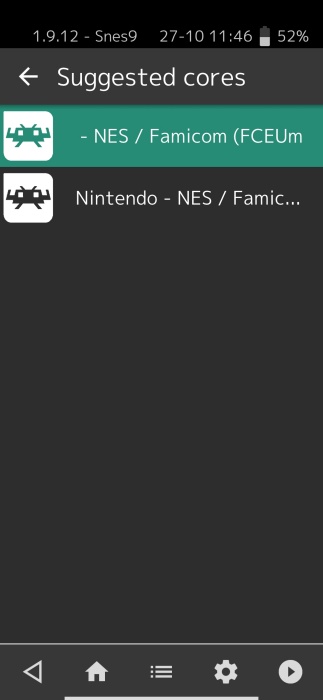
Select one of the Suggested cores, which you need to have previously downloaded.
Voila! The game screen should launch now.
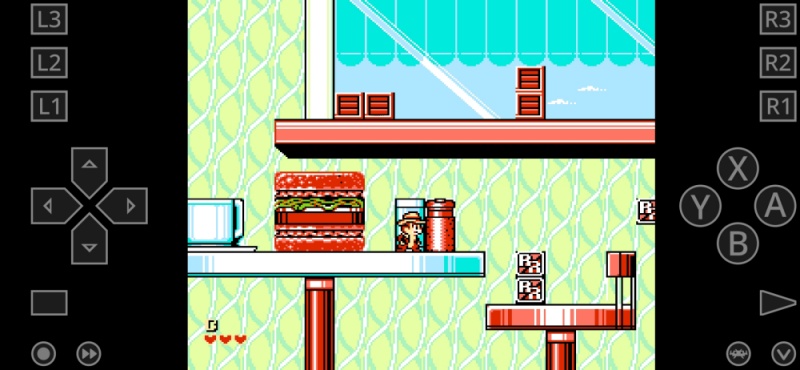
The onscreen controls should appear on your display, underneath the game screen. Make sure you turn your Android device to landscape mode for an improved gameplay experience. If the image doesn’t rotate, bring up the Quick Settings shade by swiping your finger from the top and verify the Auto-rotate toggle is on.
Deleting a core
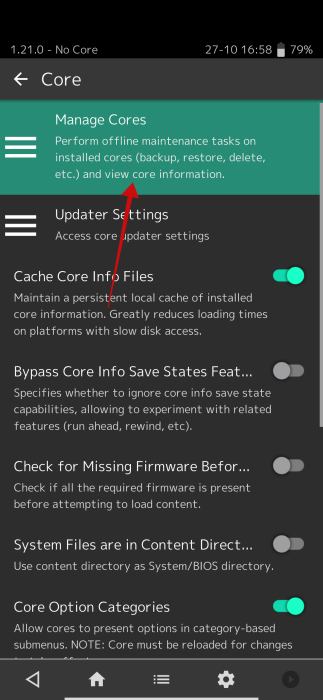
In case you wish to delete a core, you will need to navigate to the Settings menu by pressing the gear icon at the bottom.
Select Core from there.

Tap on Manage Cores.
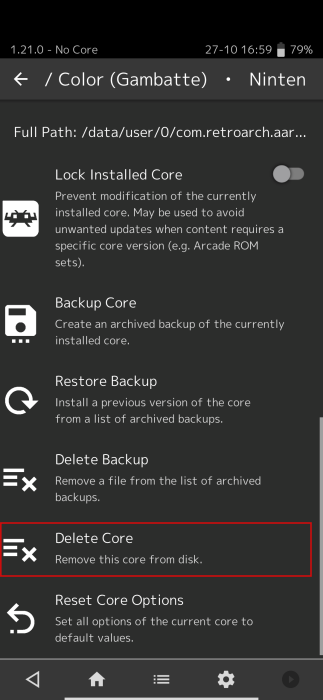
Select a core and swipe all the way to the bottom until you find the option to Delete Core.
Configuring Controls for Each Core
This bit can be confusing. If you’re just using the touchscreen, you don’t need to do much, as each core has its own customizable on-screen touch display to control games.
If you’re using a controller, however, you may want to do some tweaking. In case you need instructions on how to connect console controllers via Bluetooth, check out our guide on how to connect a PS4 controller to your Android device.
To make changes to controls and so on in each individual core, you first need to load that core by loading up a game, as shown above. Next, tap the Retroarch icon on the game screen to access the Quick Menu.
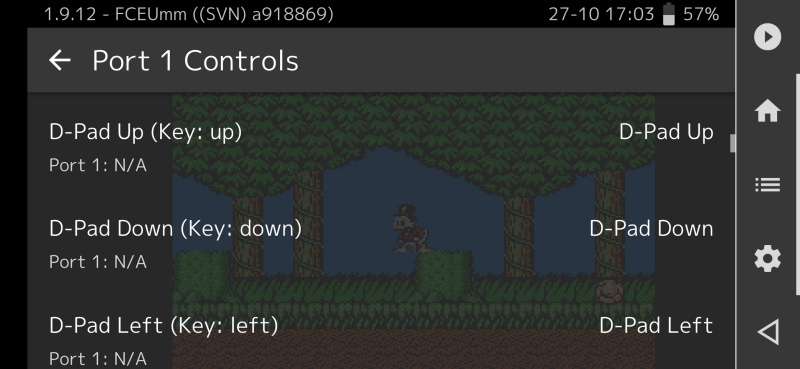
Tap Controls.

Proceed to scroll down to configure controls for that game.
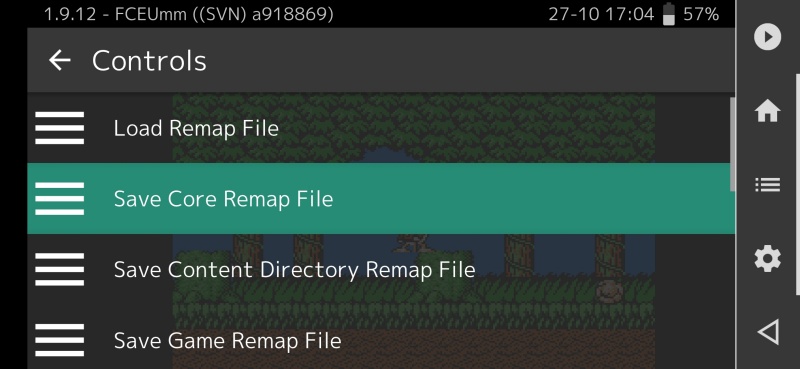
Here’s the thing: you can then save those controls to apply to all games on that core by using the Save Core Remap File option, or just to that individual game with Save Game Remap File. Select the save option that suits your needs – then you can get back to your game.
Use a Nice Frontend
RetroArch for Android actually has some nice UI touches – for example, grabbing box art and covers for games in your collection – but if you want a more flashy way of browsing your game collection, you should try using a frontend, which conveniently organizes your entire ROM collection.
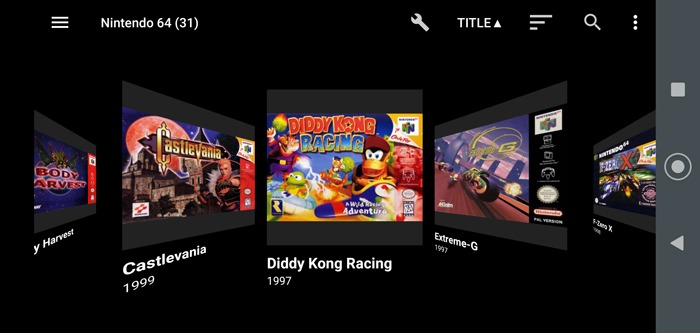
DIG is probably the best emulation frontend for Android, scanning your entire phone, then displaying all your games with some great presentation options. You still run your games through Retroarch, but browse and explore them through DIG, which looks much nicer, organizes your games by genre, year, etc., and gives you nice historical synopses on your games.
For a full guide on how to set yourself up with the DIG frontend, read our DIG tutorial.
Keeping Things Up to Date
There’s something important you need to consider when using Retroarch. You will need to remember to update any of the cores, assets, thumbnail lists, etc., from the app.
Every now and then, you should manually update your installed cores to make sure you’re running the latest version. This will inevitably improve stability, performance, and myriad other factors. In fact, if you run into trouble running a game, one of the first things you should do is update the cores.
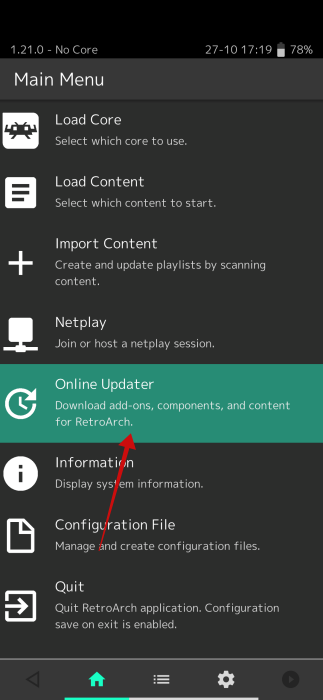
To do this, go to the Retroarch Main Menu, scroll down, and tap Online Updater.
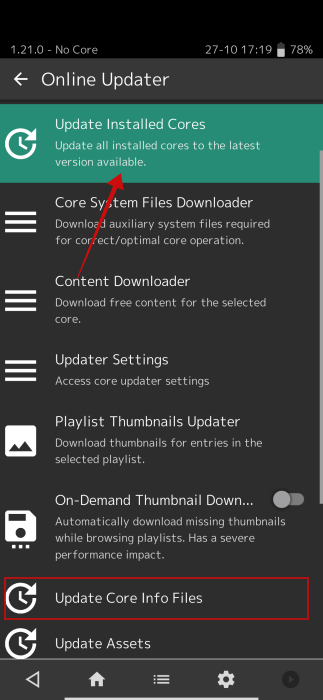
Tap Update Installed Cores and Update Core Info Files.
While you’re there, you should also semi-regularly tap Update GLSL Shaders to make sure you’re running the best versions of the shaders (more on those below). Also, check out the Playlist Thumbnails Updater, which will get you nice thumbnail pictures for your games if you don’t have them already.

Note: in case you installed the Google Play version, the first option will be Switch Cores to Play Store Versions.
Shaders
Shaders are filters that can be applied to various cores and individual games. They can drastically change the look of a game, for example, by filtering the textures to look smoother and less pixelated or by adding a CRT screen or NTSC filter over a game to replicate the kind of experience you had playing it back in the ’90s.
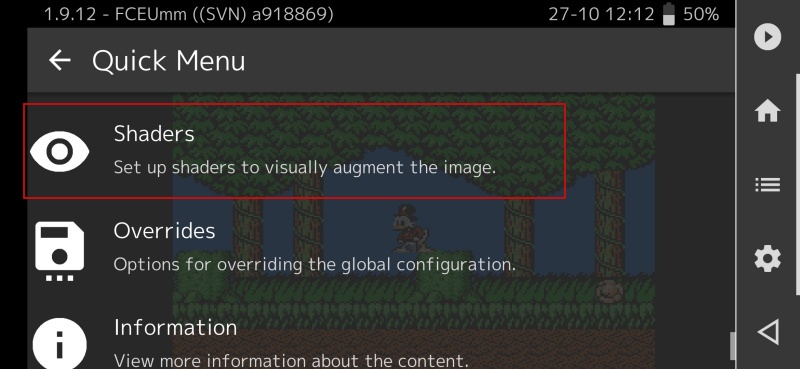
To use shaders, open a core along with a game, and press the on-screen RetroArch icon on the screen to enter the Quick Menu.
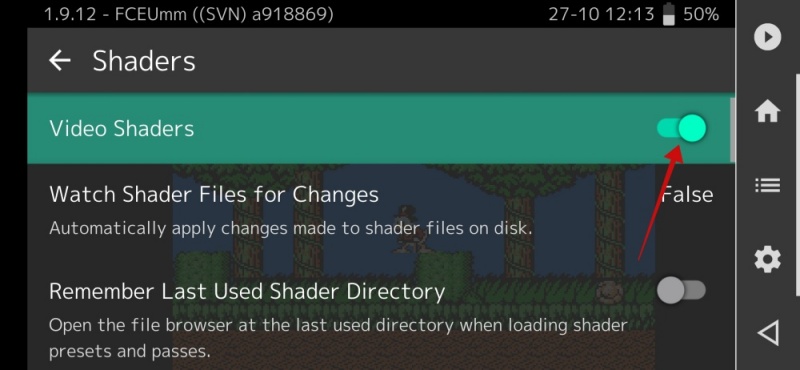
Swipe down until you find the Shaders option and tap it.
Toggle on the Video Shaders option at the top.
Tap Load.
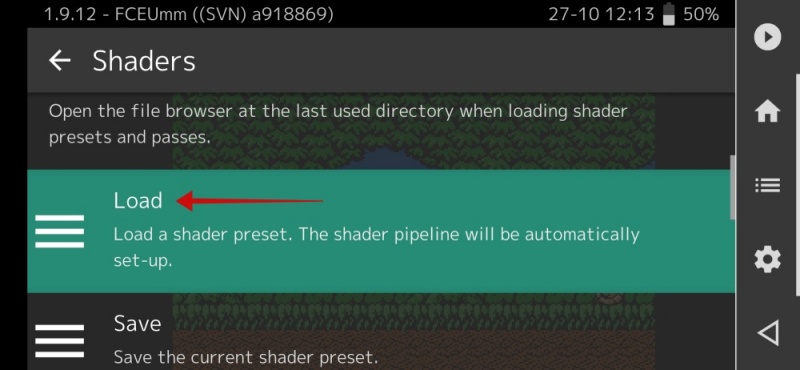
Select the shaders_glsl to access all the shaders you can use in Retroarch. There should be others to choose from, so you can go ahead and experiment with the ones you like.

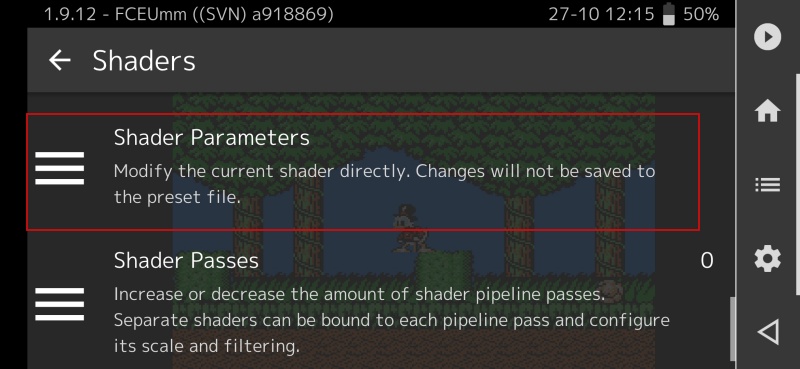
If you want to tweak a given shader, after selecting it, go to Shader Parameters in the Shaders menu to tweak its scanline strength, mask dots, and so on.
PS1/PS2 Emulation and BIOS
For the most part, you don’t need to worry about BIOS when running emulators and games because the relevant files are included in the emulators. BIOS files are pretty much the first thing an emulator looks for when running with a different BIOS file required, depending on the global region of the game you’re playing.
With PS1 and PS2 games, however, you’ll need to find the relevant BIOS files yourself (you can find them online) and put them in the system folder of Retroarch on your Android device.

You can find out more details about PS1 emulation on Retroarch in our guide. It’s for the desktop version, but the same general rules apply. When it comes to BIOS, the ones you’ll need are the following:
- scph5500 (NTSC – Japan)
- scph1001 (NTSC – US)
- scph5502 – (PAL – Europe)
- scph5552 (PAL – Europe)
Additional Settings
From the Quick Menu for a given core, you have all kinds of features. If you’re running a game, you can go to the Quick Menu to Save State and Load State (a godsend if you’re playing saveless NES games).
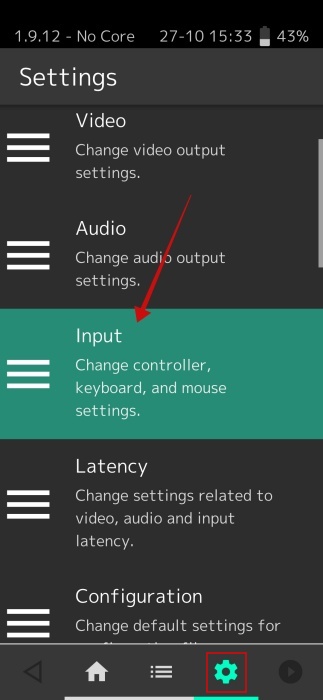
If you don’t have a core loaded, tap the Settings icon in the bottom menu and select Input.
Select Hotkeys.
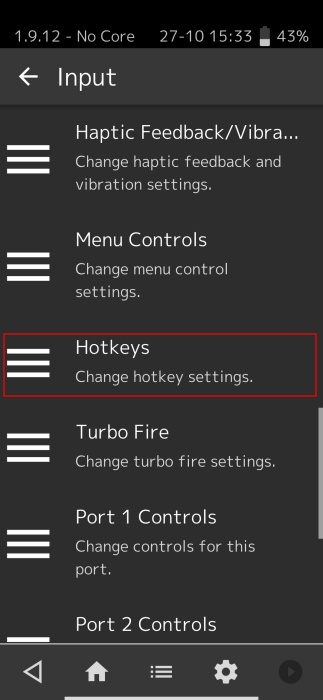
Here you can set quick buttons for things like Save State, Rewind, and, crucially, Menu toggle, which takes you to the Retroarch menu. On a PS4 controller, we like to set this as the PS button.

Among the many other interesting features in the Settings menu is Achievements, which links Retroarch with retroachievements.org, unlocking achievements for thousands of retro games!

Troubleshooting
RetroArch and emulation are both complex things – you’re essentially mimicking entire hardware using only software, so inevitably, things may go wrong during this process. Here are some of the ways to fix RetroArch when it’s not working properly on Android.
1. Games not running
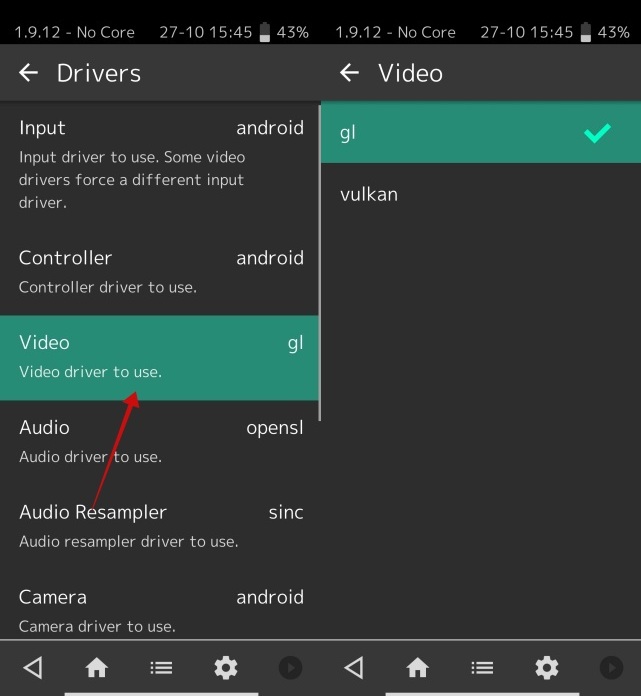
The most common reason for a game not running on RetroArch is that you’re using the wrong video driver. Your two options in RetroArch are Vulkan and OpenGL, and it really varies between cores with regard to which is best to use.
To switch your video driver: in RetroArch, go to Settings -> Driver.
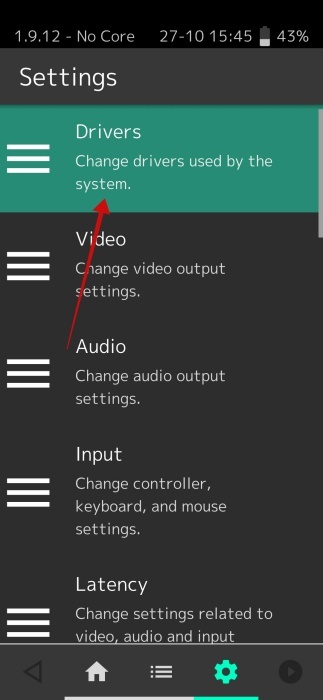
Under Video, switch your driver between vulkan and gl.
2. RetroArch not finding games
If you use the Load folder option to look for ROMs or games on your system, then it’s possible RetroArch won’t find them. This could be because the games don’t quite use the same file format that RetroArch is scanning for.
The good news is that you should still be able to run these games – you just need to load them manually.
Tap Playlists -> Import Content, then opt for the Manual Scan option.
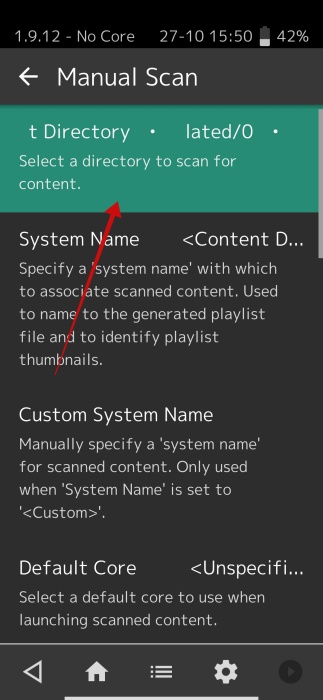
Here you can select the directory to scan, which system or core to associate scanned content with, as well as the file extensions to scan for. You may want to check the file extension of the ROMs you’ve been struggling to scan and enter it here.
Once you’re ready, scroll to the bottom and tap Start Scan.
3. Not downloading cores
In case this happens, it might be possible you’re running the wrong version of the app for your device. For instance, if you had the 32bit version so far, try switching to the 64bit one.
4. General bugginess
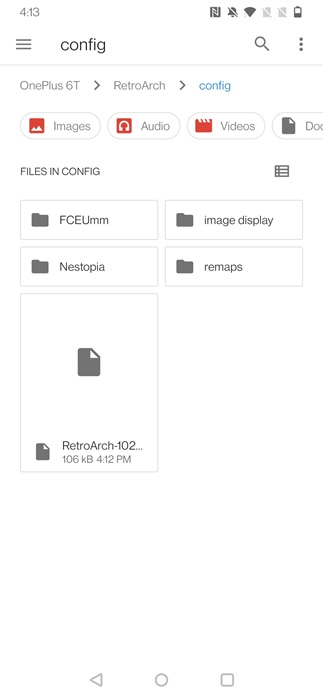
If RetroArch is crashing, bugging out by not showing on-screen controls, and other minor frustrations, you may want to delete the RetroArch config file to refresh the app.
To do this, using a file manager app, navigate to the RetroArch directory on your phone. Find the Retroarch-1234-56789.cfg file in the config subfolder (the numbers will be random) and delete the file.
Note: you might need to go to the Main Menu -> Configuration File -> Save new configuration for the file to appear.
Restart the app, and it should hopefully run smoothly.
If you’re using Retroarch on Windows, check our list of fixes for the desktop version of Retroarch not working, some of which can be applied to the Android version.