
Many Linux enthusiasts say that the terminal has always been the best way to do things on Linux. Don’t get me wrong, I love the command line as much as the next Linux user. But sometimes you just want to click a button and see what’s happening without memorizing a dozen flags and parameters. There are many ways you can use Linux without touching the Terminal. Here are some GUI alternative tools that can replace your terminal-based ones.
1. Compare Files Easily With Meld
Sometimes you need to spot the differences between two versions of a file, a script, or even whole directories. On a Linux terminal, the diff command can compare files, but its output is often hard to read. It relies on the line numbers and cryptic symbols, shows only fragments of files, and doesn’t handle tasks like three-way merges.
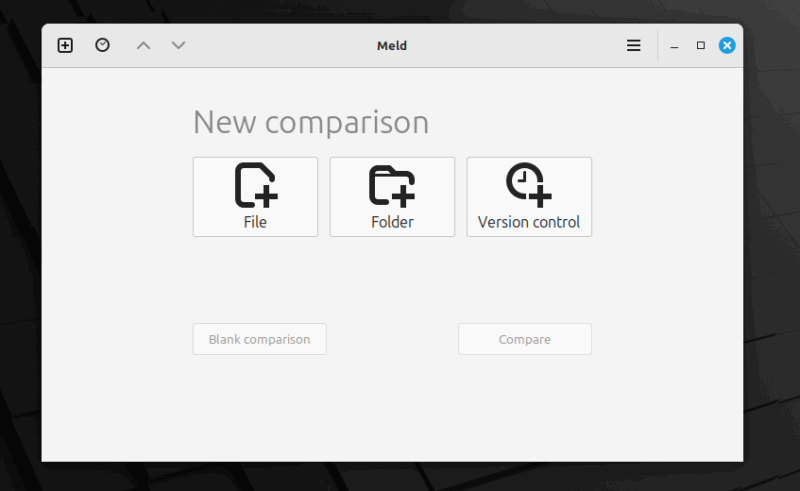
A simpler option is Meld, a visual diff tool. Meld displays files side by side in a clean, intuitive interface. Changes are color-coded, which means the lines that are added, removed, or modified stand out at a glance. You can also merge changes with a click, edit directly in the app, and compare entire directories, not just text files.
Most distros offer Meld in the Software Center. You can also install via package manager such as to get it on Debian/Ubuntu, run this:
sudo apt install meldOn Fedora Linux, you can run:
sudo dnf install meldIf you are Arch Linux users, run this:
sudo pacman -S meldAfter installing, launch Meld and choose File Comparison or Directory Comparison. Drag and drop files or folders to see differences instantly.
You can refresh while editing to review changes, copy chunks from one side to the other, or switch to three-way view for resolving conflicts.
2. Clean and Optimize Your System With Stacer
Keeping a Linux system fast and clutter-free often means juggling multiple terminal commands. Enter Stacer, the visual system cleaner and optimizer for Linux system. It’s a stunning, all-in-one application that puts all your system maintenance tools into a single, beautiful GUI.
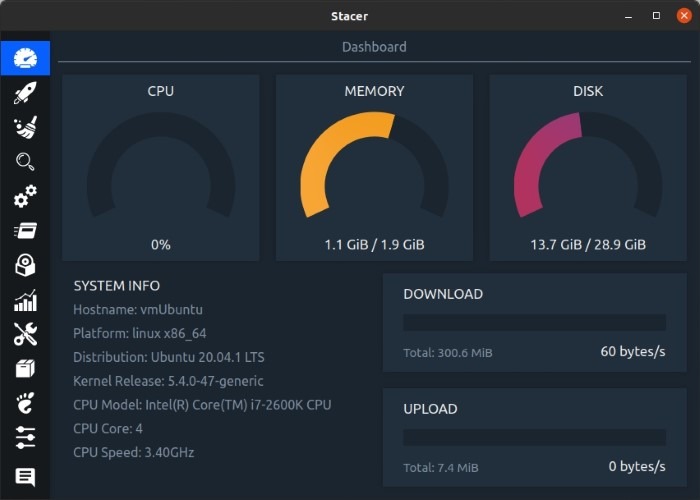
Stacer gives you a beautiful, graphical overview of your CPU usage, memory consumption, and disk usage. It’s all there in real-time with sleek graphs that actually make monitoring enjoyable.
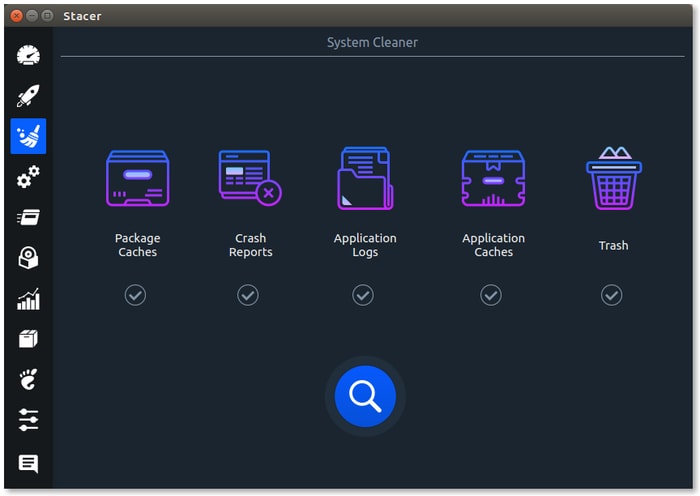
But the dashboard is just the beginning. Stacer has dedicated sections for various tasks, such as system cleaner, startup apps, services, and process manager. Take the System Cleaner for example. In a couple of clicks, you can find and clear out things like old package caches, crash reports, and log files. Stacer even shows how much space you’ll get back before you confirm.
However, most distros don’t ship Stacer in their Software Center, but you can install it via package managers or official releases. For example, on Debian/Ubuntu/Linux Mint, run these commands:
sudo add-apt-repository ppa:oguzhaninan/stacer
sudo apt update
sudo apt install stacer
On Fedora Linux, run:
sudo dnf install stacerIf not found, download the .rpm package from Stacer’s GitHub releases and install with sudo dnf install ./stacer-.rpm.
Further, if you are Arch Linux users, you can install it with this:
sudo yay -S stacerYou can also replace yay with your preferred AUR helper, such as paru.
3. Grsync: A User-Friendly Front-End for Rsync
Many Linux users rely on rsync to back up files and keep folders in sync. However, the downside is, this command looks intimidating. Also, you have to remember what its options like -a, -v, and -z mean, including many others.
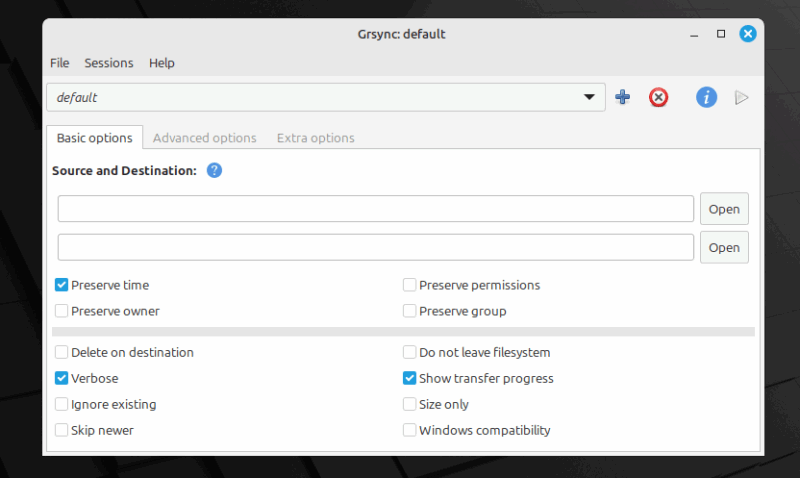
Grsync is a simple graphical front-end for rsync. It doesn’t replace rsync, it just gives you a clean interface to use it. Instead of typing commands, you click checkboxes and choose options.
When you open Grsync, start by choosing your source and destination folders. Common options like archive, compress, and preserve permissions are just a checkbox away. You can also add exclusion patterns in a simple list.
Further, Grsync shows you the exact rsync command it’s going to run. The simulation mode lets you preview all changes, files to be copied, deleted, or skipped without touching your data.
You can also save different backup configurations as sessions. For example, one for documents, another for projects, and another for syncing across devices. Each session remembers its paths and options, so you don’t have to reconfigure every time.
Grsync is typically available through your package manager. On Debian/Ubuntu/Linux Mint, run:
sudo apt install grsyncOn Fedora Linux, run:
sudo dnf install grsyncIf you are Arch Linux users, run:
sudo pacman -S grsync4. Visualize Disk Space With Disk Usage Analyzer (Baobab)
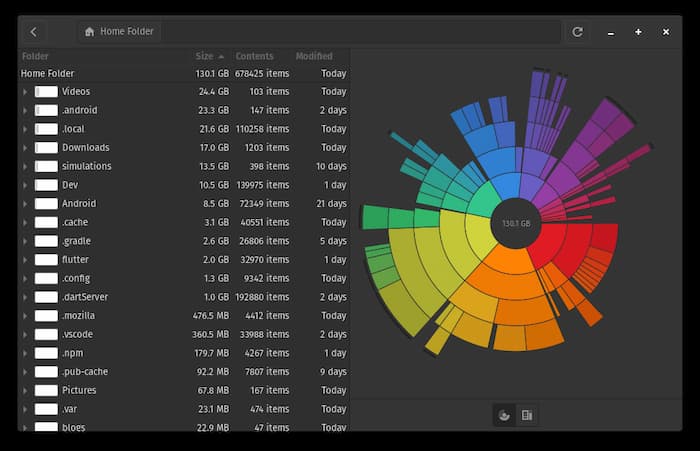
One terminal command I used to rely on for checking disk space was du -sh *. It worked, but it was slow, repetitive, and honestly a little painful to dig through when chasing down space hogs. That changed when I switched to Disk Usage Analyzer (Baobab), the GNOME-based GUI alternative.
Instead of scrolling through text, Baobab gives you interactive ring charts and treemaps that highlight the biggest folders instantly. Wasted space jumps out visually, and you can click through to drill down as deep as needed. Plus, Baobab also works with mounted drives and remote locations, making it more versatile.
You can install it from your distro’s repositories if it isn’t already included. For example, if you are Debian/Ubuntu users, you can run this:
sudo apt install baobabOn Fedora, use this:
sudo dnf install baobabSimilarity, Arch linux users can use this:
sudo pacman -S baobabIf you’re running GNOME, it may already be installed under Disk Usage Analyzer. Replacing du with Baobab has made cleaning up disk space far less tedious.
5. Backup and Restore Your System With Timeshift
A single bad update once broke my graphics drivers, leaving me with a black screen. Manually rolling back changes from the command line was a nightmare. I knew there had to be a better way, and that is Timeshift.
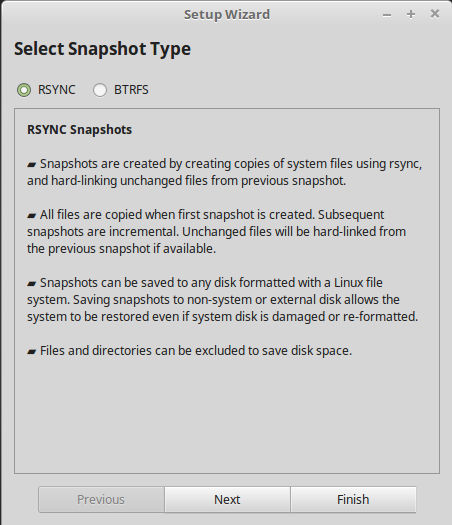
Timeshift is to Linux what System Restore is to Windows or Time Machine is to macOS. It’s designed to back up system files and configurations, not your personal documents. The idea is simple: keep your data separate while giving you a safe way to restore your system if something breaks.
Timeshift takes incremental snapshots of your system at regular intervals (daily, weekly, etc.). Since it uses rsync or Btrfs under the hood, the snapshots are efficient, as it only saves changes after the first backup.
Say a driver update kills your audio: open Timeshift, select the earlier snapshot, hit restore, and your system is back to normal, without touching your personal files.
By default, Timeshift backs up only system files, keeping snapshot sizes small. For personal data, you can pair it with other backup tools. Together, you get complete protection.
You can install it from your distro’s repositories, such as on Ubuntu/Debian, run this:
sudo apt install timeshiftOn Fedora, use this:
sudo dnf install timeshiftSimilarly, on Arch Linux, run this:
sudo pacman -S timeshift6. Partition and Manage Disks With GParted
Using fdisk or parted in the terminal works, but one wrong keystroke can erase your data. GParted gives you the same power with a safer, graphical view of your disks. It shows your drives as colored blocks, showing size, filesystem, and mount point. You can instantly spot full partitions, unused space, and the overall layout.
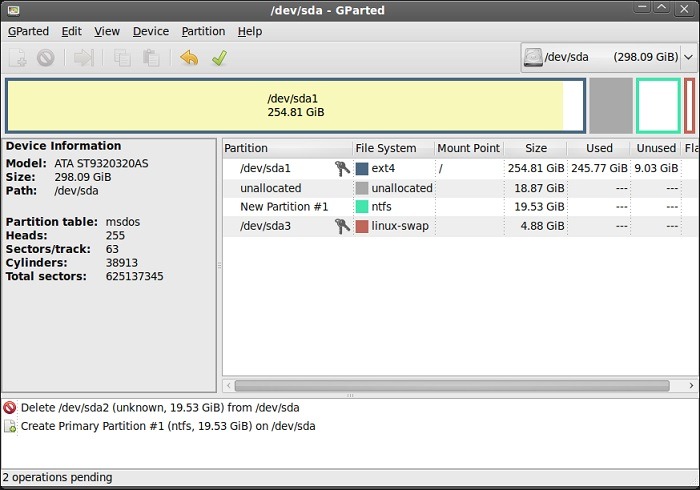
In GParted nothing changes until you hit Apply. That single confirmation step prevents disasters that happen when terminal commands run instantly.
GParted also handles complex tasks automatically. Shrinking one partition and growing another, converting from MBR to GPT, or aligning partitions for SSDs — all are handled in the correct order with a few clicks.
The live USB version is especially useful. If your system partition needs resizing or your partition table is corrupt, you can boot straight into GParted and fix things without touching the installed OS.
To get GParted, you can use default package manager, such as for Debian, Ubuntu, and Linux Mint, run this:
sudo apt install gpartedFor Fedora, you can use this:
sudo dnf install gpartedFor Arch Linux, run this:
sudo pacman -S gparted7. Monitor System Performance Through a GUI
top and htop are powerful terminal tools to monitor system performance, but walls of numbers refresh too fast to tell the bigger story. GUI monitors solve that by showing trends over time. For examples, spikes, memory creep, or background network activity pop out instantly when you see them as graphs.
Most Linux desktops come with a system monitor preinstalled, such as GNOME System Monitor, KDE’s KSysGuard, or similar. Alternatively, you can also get other GUI based Linux system monitor such as Cockpit, Mission Center and other. They usually offer three main views, a processes, resources, and file systems.

These tools are simple but revealing. For example, with memory graph, you can get to a backup process that was slowing everything down. This is something you would’ve missed staring at raw numbers in htop.
Final Thoughts
The terminal is precise and scriptable, but GUIs help you work faster and avoid mistakes. The smartest move is using both. GUIs won’t replace the command line, but for some occasion, they will make your workflow smoother and your system safer.


