Google Colab, also known as Colaboratory, is a free online tool from Google that lets you write and run Python code directly in your browser. It works like Jupyter Notebook but without the hassle of installation, since everything runs in the cloud. Colab is especially useful for machine learning and data science because it comes with a ready-to-use setup and even gives you free access to GPUs for faster processing. Let’s explore how you can use Google Colab for your projects.
Who Should Use Google Colab?
Google Colab is useful for anyone exploring Python, data science, or machine learning without a powerful computer.
- Students and beginners can use Colab to explore Python and data science directly in the browser without any installation or setup.
- Data science and machine learning enthusiasts can speed up model training with Colab’s preinstalled libraries and free access to GPUs and TPUs.
- With Google Colab, researchers and professionals can quickly test ideas and collaborate through cloud-based notebooks without worrying about local setup.
- Users with limited hardware can run resource-intensive tasks without needing a high-end computer.
Access Google Colab
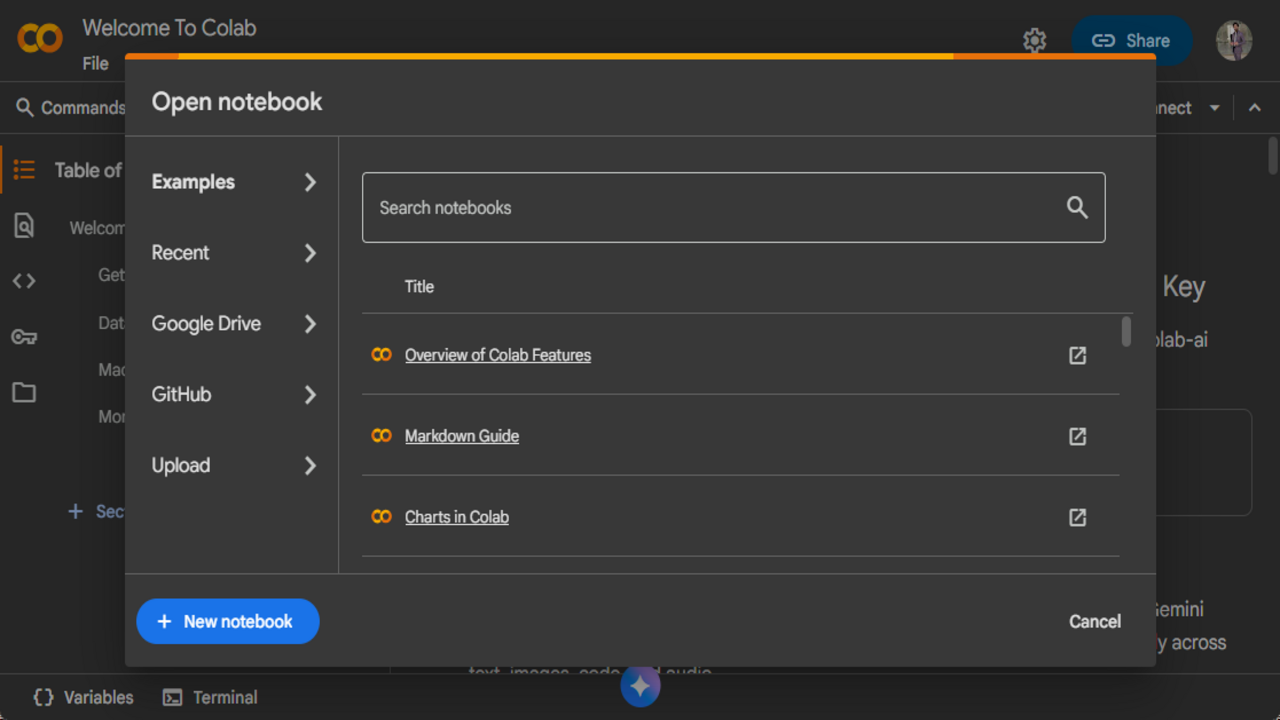
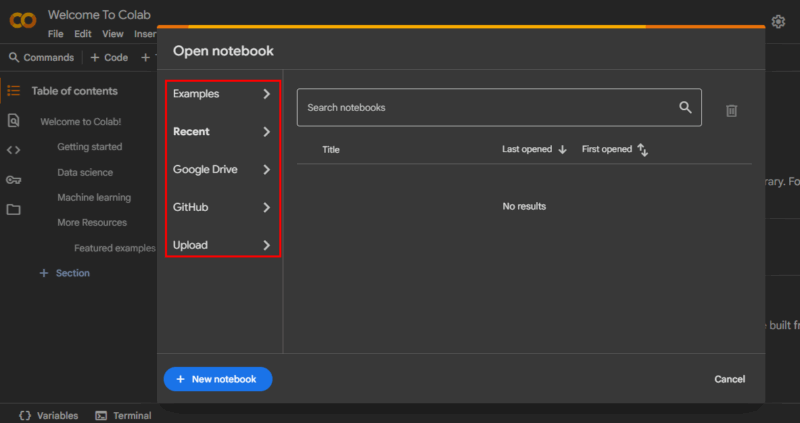
To use Google Colab, visit the Google Colab website, then sign in with your Google account. Once the page opens, you’ll see a pop-up window with different options.
- The Examples tab provides ready-made Jupyter notebooks you can explore.
- The Recent tab shows the notebooks you worked on most recently.
- If you have saved notebooks in your Google Drive, you can access them through the Google Drive tab.
- You can also connect Colab to your GitHub account to open notebooks stored there.
- Finally, the Upload option lets you add a notebook directly from your computer.
Run Your Python Code in Google Colab
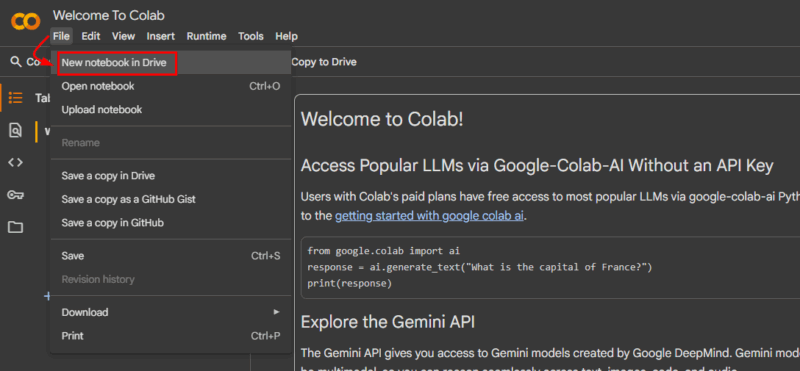
Click the New Notebook button at the bottom-right of the pop-up window to create a new notebook.
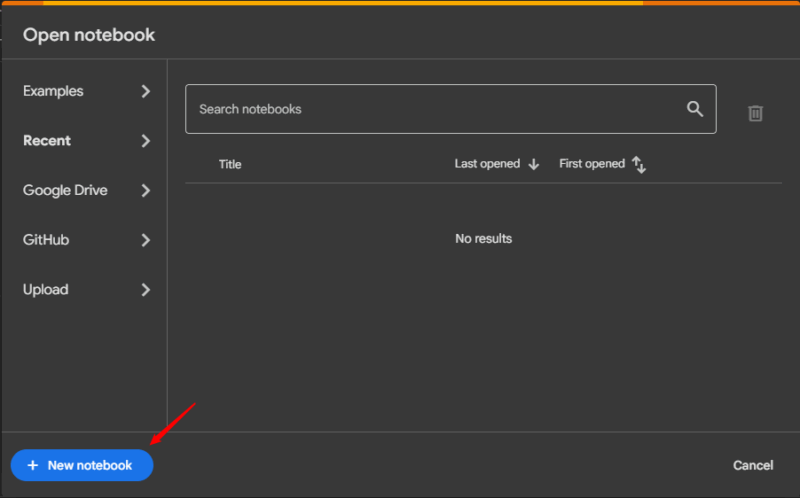
Alternatively, you can go to the main page and select File -> New Notebook in Drive from the menu bar.
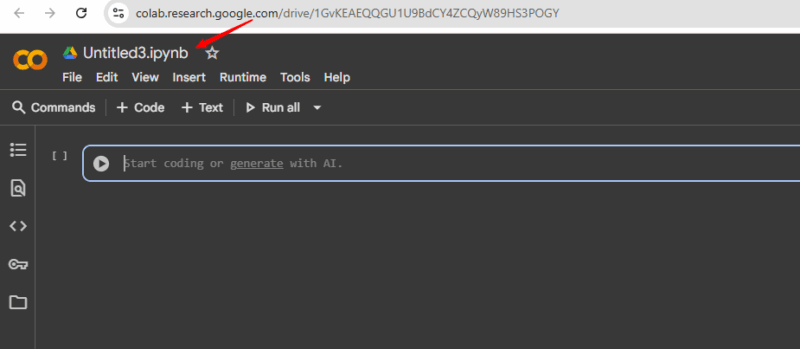
By default, the notebook will be named “Untitled.ipynb” and saved to your Google Drive. You can click on the title at the top-left to rename it and then start writing your Python code.
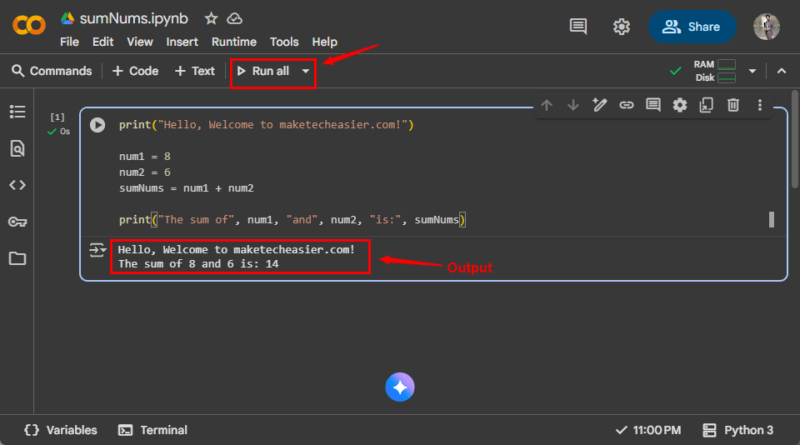
Once you are done writing the Python code, press Shift + Enter or click the Run all button to execute your notebook.
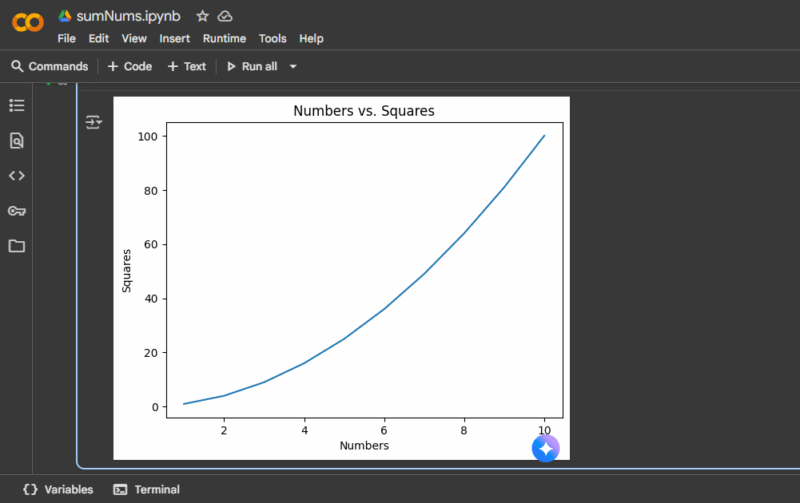
One useful feature of Google Colab is its AI coding assistant. Instead of writing your code from scratch, you can ask AI to suggest functions, fix errors, or create sample programs.
For example, I prompted Colab’s AI feature with: “Write Python code to plot numbers 1–10 and their squares“, and it generated the code instantly.
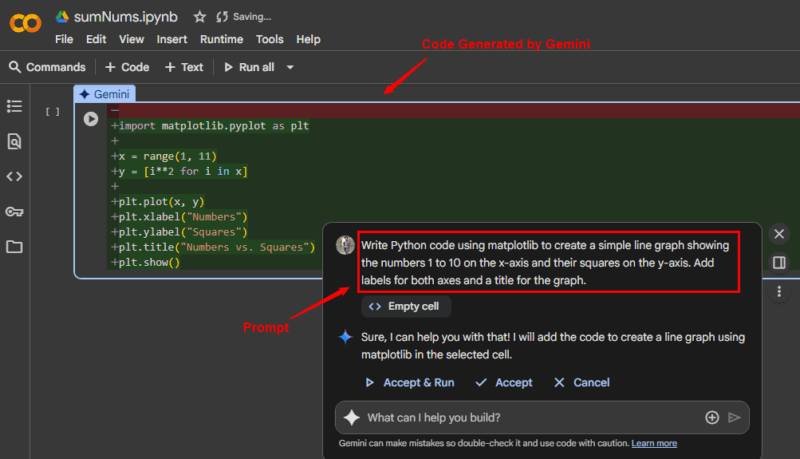
However, you should go through AI-generated code carefully before running it in your notebook. AI may introduce errors, miss important details, or use commands that don’t match your exact needs.
Organize and Manage Your Notebooks
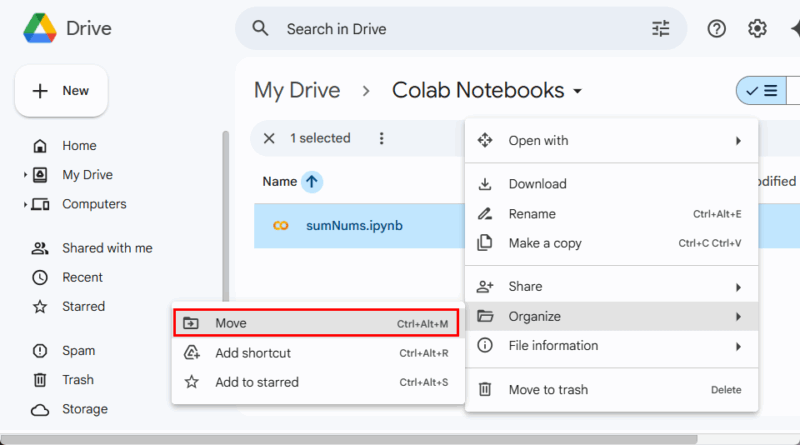
In Google Colab, keeping your work organized is simple since all notebooks are stored in your Google Drive. You can move a notebook into any folder in Drive just like regular files. This makes it easier to separate projects and keep everything in order.
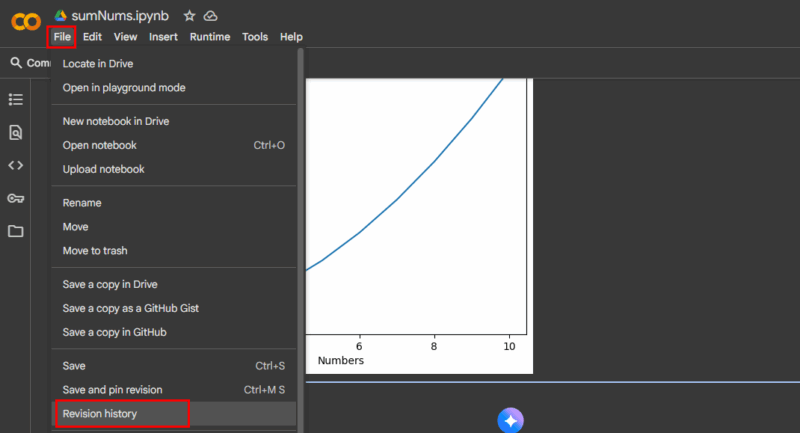
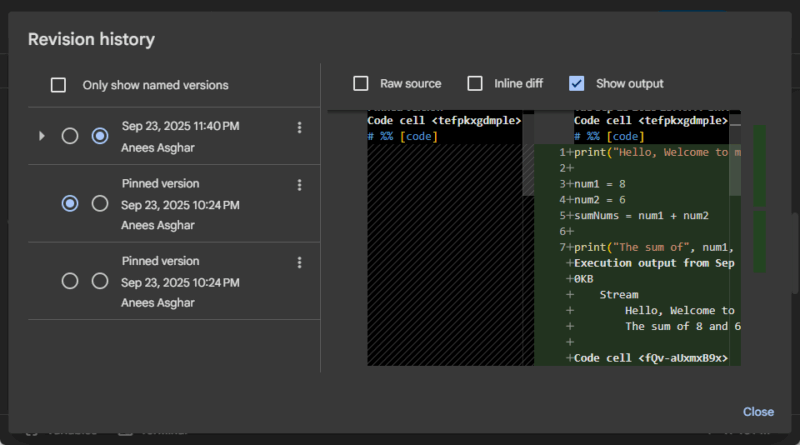
Another helpful feature is version history. Colab automatically saves your progress, and you can use version history to go back and restore previous versions of your notebook if something goes wrong. To do this, simply click File and then select Revision History from the dropdown list.
You can revisit your earlier work and restore it if needed.
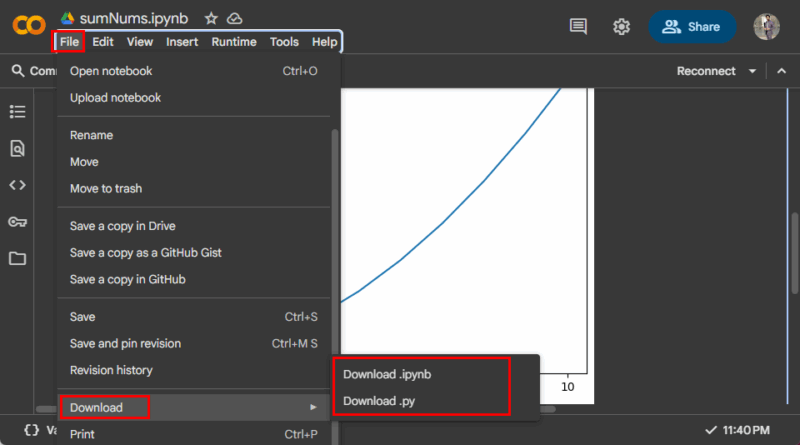
Additionally, Colab gives you the option to download your notebooks in different formats. For example, you can save them as “.ipynb” files to open later in Jupyter Notebook, or export them as “.py” files if you want to run the code directly in a Python environment outside Colab. To do this, navigate to File, hover over the Download option, and select the download format of your choice:
Manage and View File Hierarchy
Colab also provides a built-in file manager. On the left side of the notebook, just below the toolbar, you can click the Folder icon to view the file hierarchy.
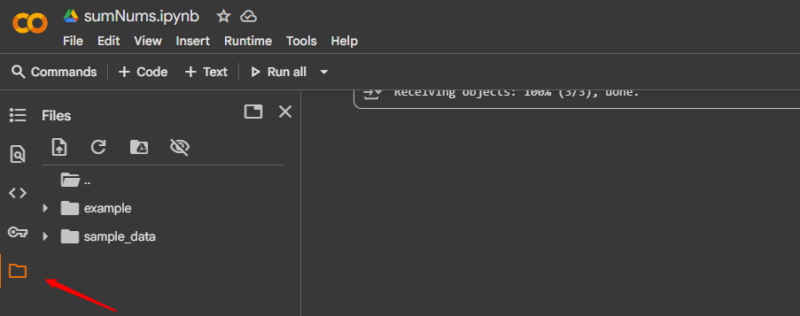
From here, you can see uploaded files, Drive-mounted directories, and even create or delete folders.
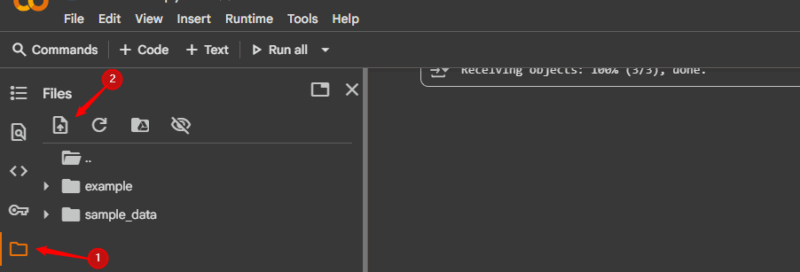
Upload Files to Google Colab
You can upload files to Colab either through the File Explorer or with Python code. To use the File Explorer, click the folder icon on the left sidebar, press the Upload button (upward arrow), and select a file from your system.
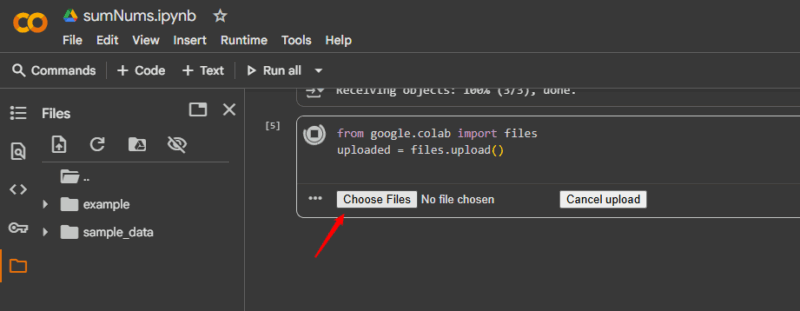
Alternatively, you can use Python code with the files.upload() function from Google Colab, which opens a dialog box allowing you to choose and upload files directly into Colab.
from google.colab import files
uploaded = files.upload()
When you run this notebook, it prompts you to upload a file. Click the Choose file button to select and upload any file you need.
Once uploaded, you can read and process the file in your notebook. Moreover, you can mount Google Drive in Colab by running the following code.
from google.colab import drive
drive.mount('/mntDrive')
Of course, you have to grant permission for it to access your Google Drive.
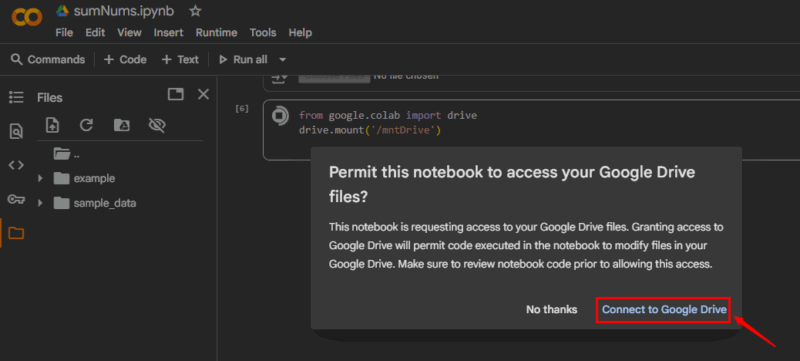
Once mounted, you can access your Drive files just like local files.
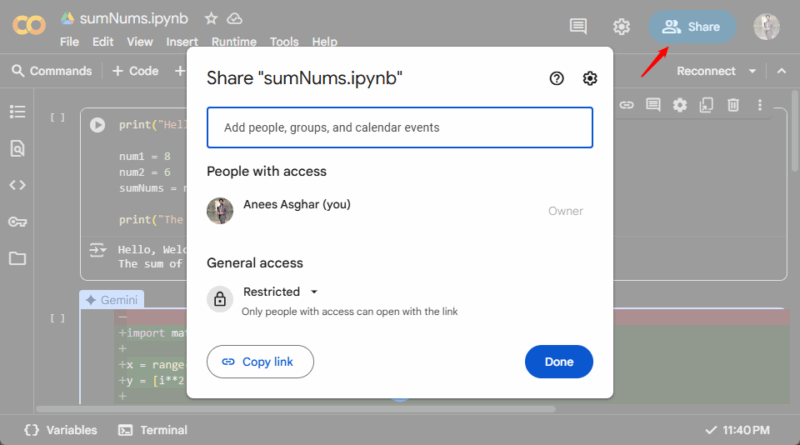
Share Notebooks with Others
Same as sharing a file in Google Drive, Google Colab allows you to share your notebook by entering email addresses or by generating a shareable link that others can use to view or edit, depending on the permissions you choose.
Enable GPU/TPU to Speed up Tasks
One of the biggest advantages of Google Colab is that it provides free access to powerful hardware like GPUs (Graphics Processing Units) and TPUs (Tensor Processing Units). These accelerators reduce the time it takes to train machine learning models compared to running them only on a CPU.
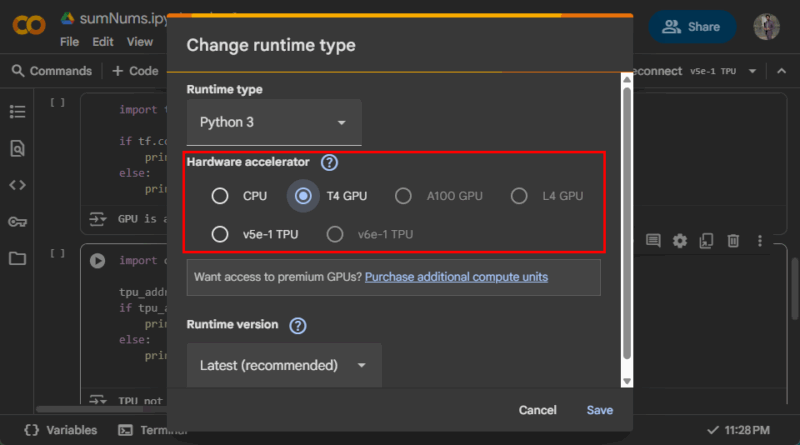
To enable them, go to the Runtime menu and choose Change runtime type.
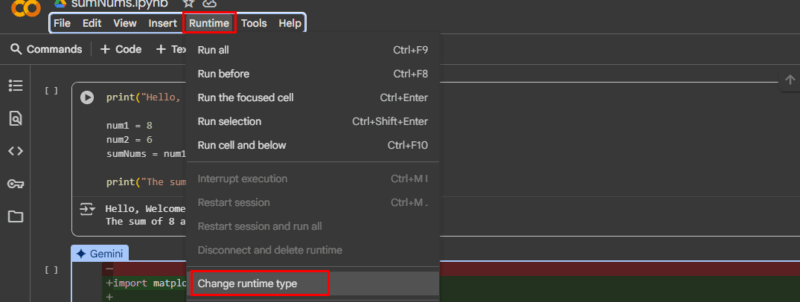
Under the Hardware accelerator dropdown, select the Hardware accelerator of your choice.
Once you’ve enabled GPU or TPU in Google Colab, it’s a good idea to verify that your notebook is actually connected to the selected hardware. For example, to check for GPUs, you can run a simple test with TensorFlow:
import tensorflow as tf
if tf.config.list_physical_devices('GPU'):
    print("GPU is available")
else:
    print("No GPU detected")
If a GPU is active, it will confirm availability; otherwise, you’ll see a message saying no GPU is found.

Import Libraries in Google Colab
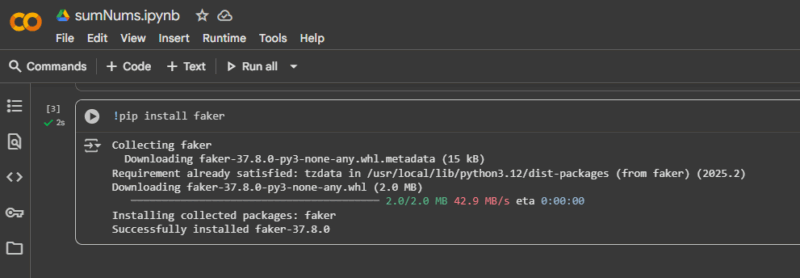
One more handy feature in Colab is that you can install Python packages with pip, just as you would on your local computer. This makes it easy to bring in any library you need. For example, if you want to use Faker, simply run:
!pip install fakerThe desired library will be installed in your Colab environment and ready to use right away.
Working with GitHub Repositories
You can directly clone GitHub repositories into your Colab environment. This helps you bring in existing projects, test them, and even make modifications without having to manually download and upload files. For example, if you want to use an existing project from GitHub, you can clone it by running the following command in a Colab cell:
!git clone https://github.com/Anees1214/mte.git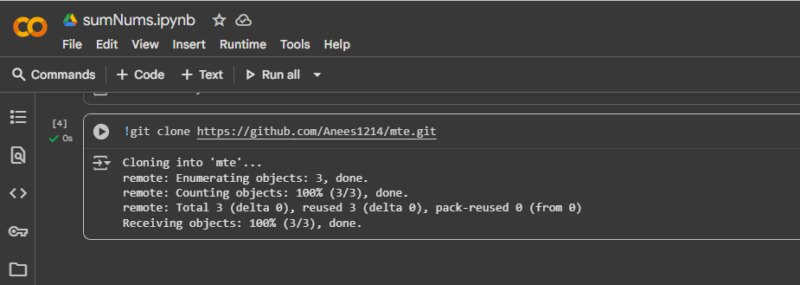
After the cloning is complete, you’ll see a new folder named “mte” in your workspace.
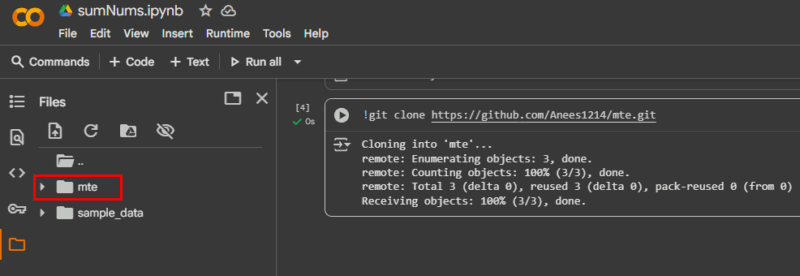
This way, you can directly access the code, notebooks, and other resources from the repository inside Colab.
Wrapping Up
All in all, Google Colab provides access to Python in the cloud, along with tools for running code, managing files, and even using GPUs and TPUs. Local setups still have their place, but Colab removes the heavy lifting and keeps things simple. It’s a great option when you want to get started quickly or share your work seamlessly.