You can set up automatic forwarding in your Gmail account to forward all your emails or filter certain types of emails to be forwarded. With automatic forwarding set up, you can organize emails you receive to go to different email accounts you have access to.
Tip: Do you have multiple email accounts? Learn how to manage them all with one Gmail account.
How to Turn on Automatic Forwarding in Gmail
You can turn automatic forwarding on in the web version of Gmail by following these steps:
- Open your web browser and go to Gmail.
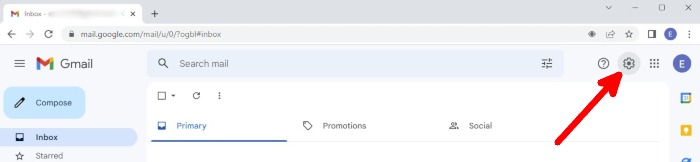
- At the top right of the Gmail page, click on the gear icon.
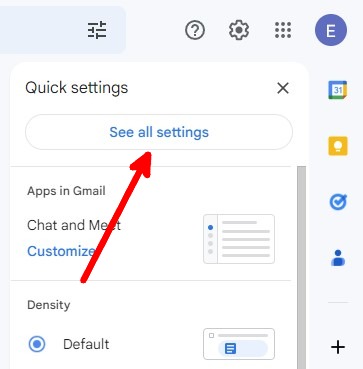
- Click on “See all settings.”
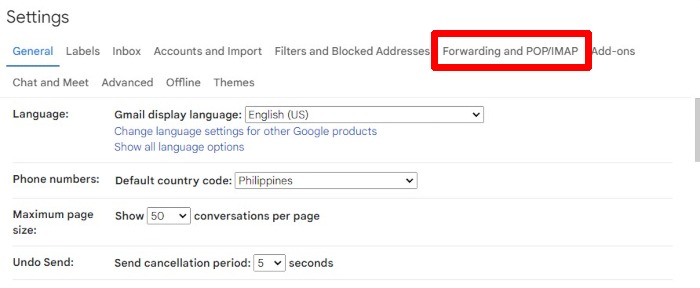
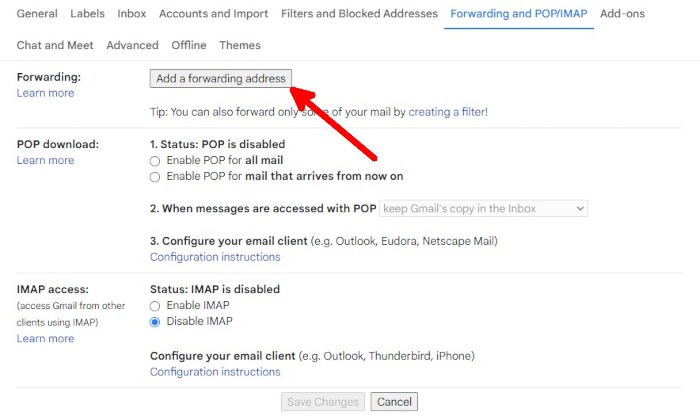
- In the Settings page, go to the “Forwarding and POP/IMAP” section.
- Under Forwarding, click on “Add a forwarding address.”
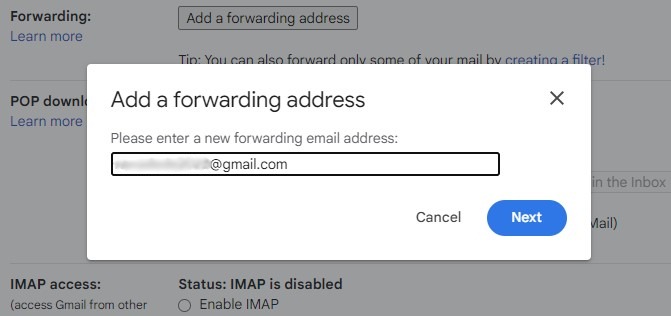
- Type in an email address that you’ll use as a forwarding address.
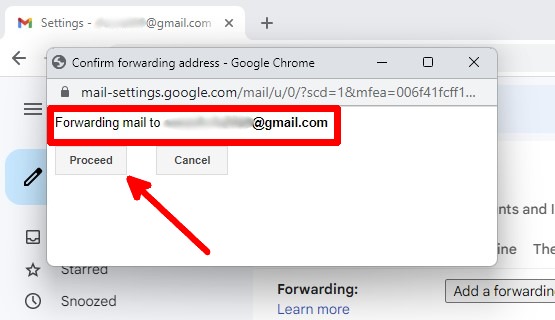
- When the pop-up browser window opens, confirm the email address you typed and click on “Proceed.”
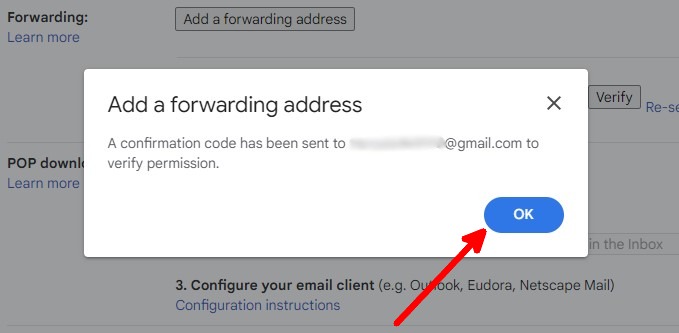
- Once you’re back on Gmail’s page, you’ll get a notification that the email address you typed in will receive a code. Click on “OK.”
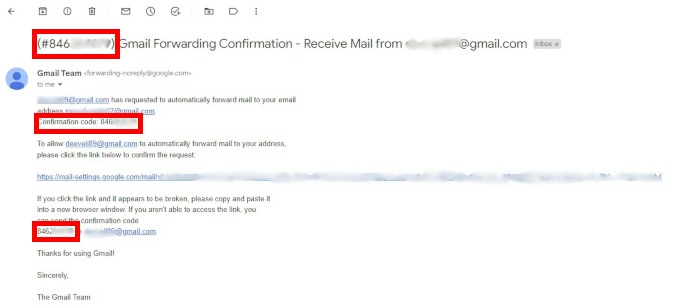
- Go to the inbox of your forwarding email address and look for an email from Google with the subject “(#xxxxxxxxx) Gmail Forwarding Confirmation – Receive Mail from xxxxx@gmail.com.” Copy the code in the email. You’ll find it in the email subject and body.
- Go back to your main Gmail account where the email will come from.
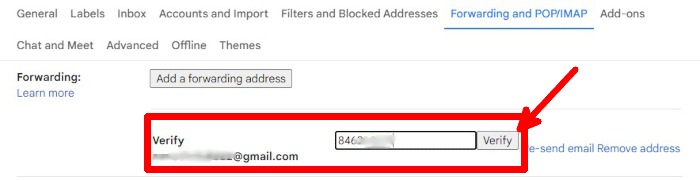
- In the Forwarding and POP/IMAP section, under Forwarding, paste the verification code from the email you opened in step #9, and click “Verify.”
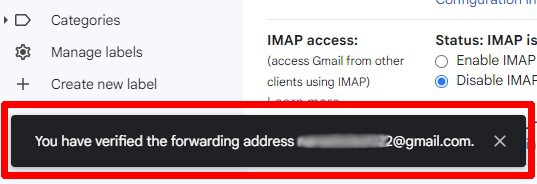
- At the bottom left of the Settings page, you’ll get a notification saying you’ve verified the forwarding address.
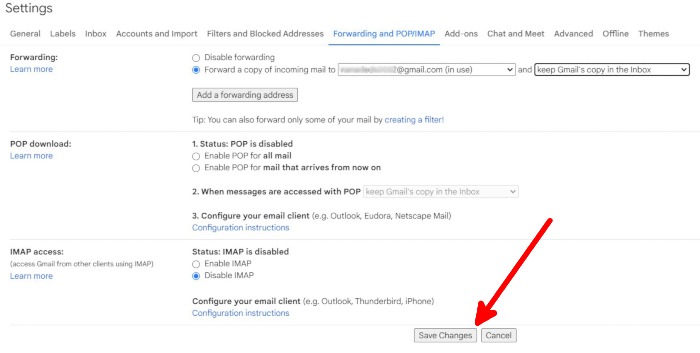
- Go back to the Forwarding and POP/IMAP section and click on the button for “Forward a copy of incoming mail to,” select a forwarding address, and select if you want to keep, mark as read, archive, or delete forwarded emails.

- After setting up your forwarding settings, make sure to click on “Save changes” at the bottom of the Settings page.
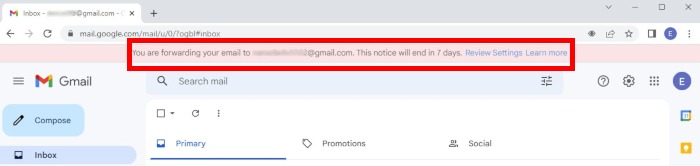
- When automatic forwarding is enabled, you’ll see a banner in your Gmail account saying you’re forwarding email to a certain email address. This will appear for 7 days.
Good to know: Do you want to stop using all Google services? Here’s how to delete your Gmail account permanently.
How to Turn Off Automatic Forwarding in Gmail
Here’s a step-by-step for disabling automatic forwarding in your Gmail account:
- Open your web browser and go to Gmail.
- At the top right of the Gmail page, click on the gear icon.
- Click on “See all settings.”
- In the Settings page, go to the “Forwarding and POP/IMAP” section.
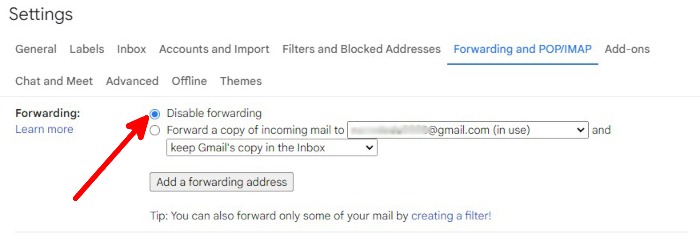
- Under Forwarding, click on the button for “Disable forwarding.”
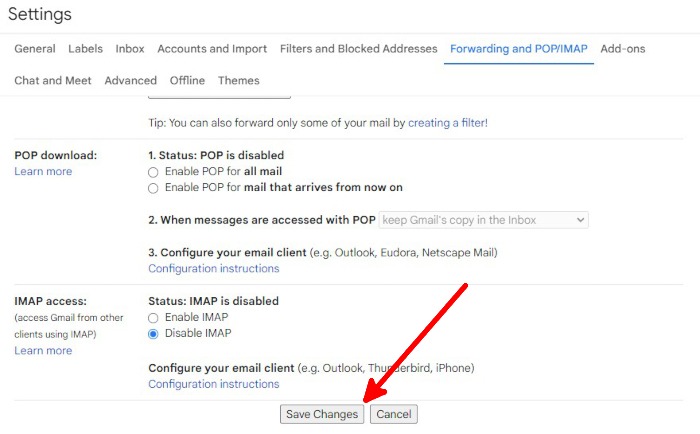
- Scroll down to the bottom of the Settings page and click on “Save changes.”
Tip: Are you going on a break? Make sure to set up an autoresponder in your Gmail account to let people know you won’t be able to respond to their emails right away.
How to Create Automatic Forwarding Filters in Gmail
Gmail lets you choose if you want to forward all incoming emails or only forward ones that meet the filter you set. Here’s how to create automatic forwarding filters:
- Open your web browser and go to Gmail.
- At the top right of the Gmail page, click on the gear icon.
- Click on “See all settings.”
- In the Settings page, go to the “Forwarding and POP/IMAP” section.
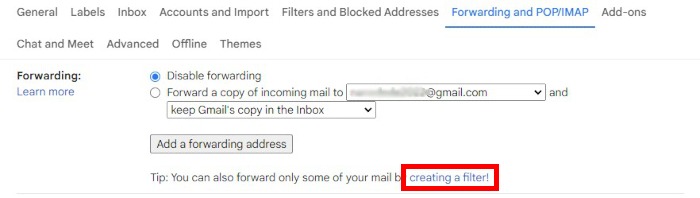
- Under Forwarding, click on the “creating a filter” hyperlink.
- Add filters. You can filter by sender, receiver, subject, keywords, and others. When you’re done adding filters, click on “Create filter.”
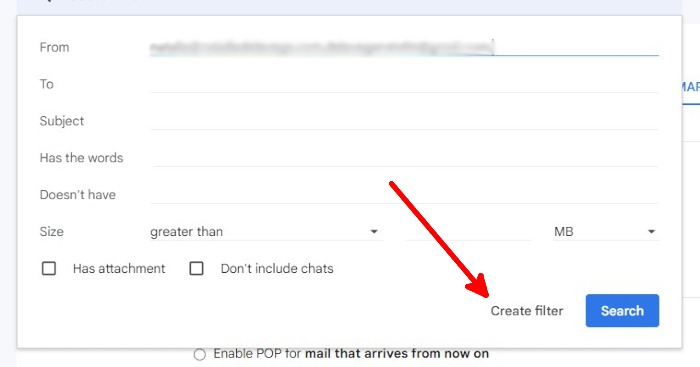
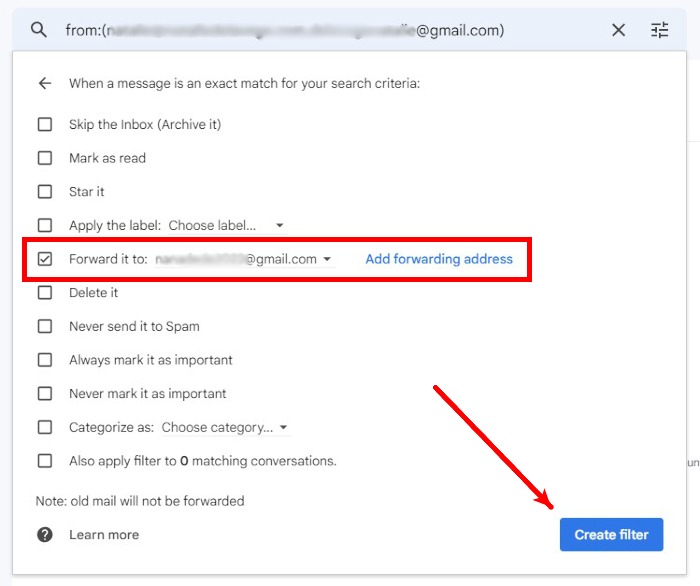
- In the next screen, check the boxes for the actions you want Gmail to do with filtered emails. Click on “Create filter” after selecting actions.
Important note: To forward filtered emails to a forwarding address, check the box for “Forward it to” and select an email or add a new one.
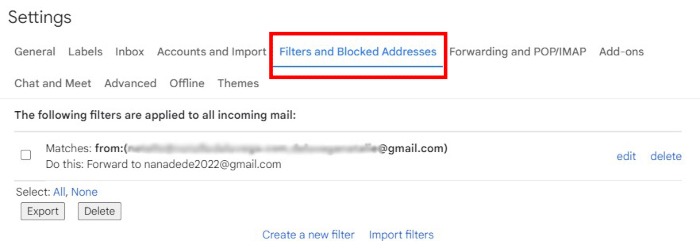
- If you want to check if you’ve successfully created a filter, go back to the Settings page, then go to the “Filters and Blocked Addresses” section. You can also edit, delete, export, and import filters in this section.
Tip: Keeping your Gmail and other Google information secure is essential. Here are the settings you should look at to keep your Google account secure.
Frequently Asked Questions
How many email addresses can I set as forwarding addresses?
You can only set up to 20 filters, which means you can only forward to 20 email addresses. Even if you use the same forwarding address in multiple filters, they all count as individual filters.
So if you have five forwarding filters for one forwarding address, you’ll have 17 other filters you can use for the same or other forwarding addresses.
Can I forward emails to non-Gmail addresses?
Yes. You can forward emails to Outlook, ProtonMail, and other email providers. As long as you can get the verification code for each email address, you can forward emails to them even if they’re not Gmail.
Can I forward emails to email addresses that aren’t under my name?
Yes. If you want to forward emails to an email account you don’t own, ask the owner to provide you with the verification code they’ll receive when you add their email address.
Image credit: StartupStockPhotos via Pixabay. All screenshots by Natalie dela Vega.