
We all feel the desire to automate everything: our cars, houses and especially our computers. Wake-on-LAN is the perfect way to automate turning your PC on. While this guide focuses on how to enable Wake-on-LAN in Ubuntu, you can apply it to any Linux distro, and even find the feature in Windows.
What Is Wake-on-LAN?
Wake-on-LAN is a networking standard that allows you to turn on or awaken your computer by a network message. This message, called a magic packet, is sent from another device on the same local network, or even through wirelessly.
The magic packet contains the MAC address of the target computer’s network interface card (NIC), which uniquely identifies the hardware. When the NIC, which remains in a low-power state even when the computer is off, receives this packet, it signals the motherboard to power up the system.
Prepare Your Setup for Wake-on-LAN
Before jumping in, make sure you’ve met these basic requirements:
- Wired Ethernet connection (Wi-Fi WoL is limited and often unreliable)
- A compatible motherboard and network card (most modern ones support it)
- BIOS/UEFI settings that support WoL
- Administrative access to your Ubuntu machine
Check your hardware and BIOS settings
Firstly, you need to ensure your hardware supports Wake-on-LAN. Most modern desktops, and many laptops do, but it’s still worth double-checking.
Restart your computer and press the appropriate key to enter BIOS/UEFI (usually F2, F10, Del, or Esc – watch the screen during boot). Look for options like Wake-on-LAN, Power on by PCI-E, PCI Power Up, or Allow PCI Wake-Up Event. The exact name varies by manufacturer. Set the option to Enabled.
You may also need to disable a feature called ErP Ready or Deep Sleep, as these power-saving modes can completely cut power to the network card, preventing it from receiving the magic packet. Some laptops also require settings like Always On USB to keep the network card powered while off or hibernating.
Check if your network card supports Wake-on-LAN
For Wake-on-LAN to work, your Ethernet card needs to support the feature. It has been standard for at least 10 years, so chances are high your card will, but it is always good to double-check.
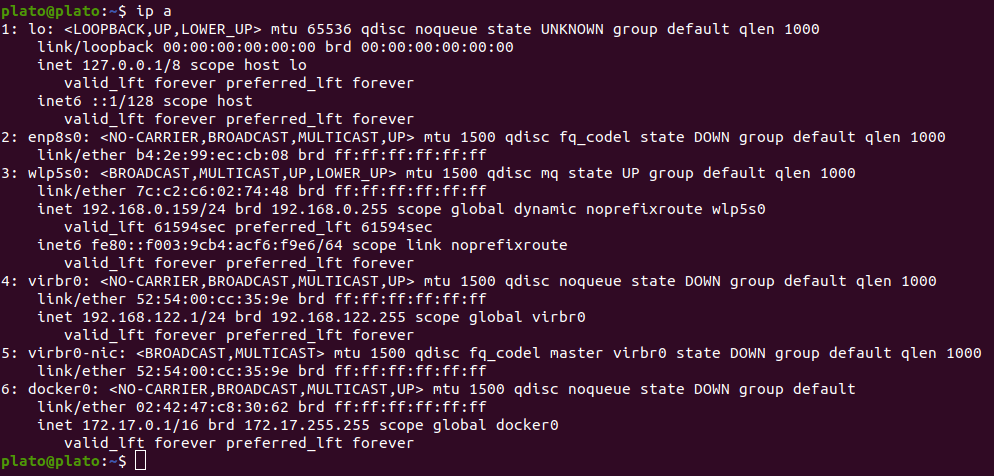
Your Ethernet interface is the network card of your device. Every card has a unique name found with the following terminal command:
ip aThe name you’re looking for is similar to enp8s0. This was the unique ID of the network card used in this tutorial.
Ethtool is an open-source application that allows you to change network driver settings. For wake-on-LAN, it allows your PC to understand the data it’s receiving.
The command to install ethtool is:
sudo apt install ethtoolNext, find out whether your network card supports wake on LAN.
sudo ethtool You’ll be given detailed information on your Ethernet interface hardware. We are looking for:
Supports Wake-on: g
Wake-on: g
The first line tells you whether your PC supports Wake-On-LAN. There might be other letters along with the g. For now, we only need the g.
The second line shows whether Wake-On-LAN is enabled. Don’t worry too much about that, as our next task will be to enable it.
Enable Wake-on-LAN Temporarily
Enabling Wake-on-LAN tells the NIC to wake the system only when it receives the specific magic packet.
To enable Wake-on-LAN temporarily, run:
sudo ethtool -s wol g This enables WoL until the next reboot. To verify it worked, run:
sudo ethtool If you see Wake-on: g, it means WoL has been successfully enabled. However, the setting applied by ethtool is not persistent and will be lost after a reboot.
Enable Wake-on-LAN Permanently
For Wake-on-LAN to be truly useful, you need it to remain enabled even after your Ubuntu machine restarts. We can achieve this by creating a systemd service that automatically runs the ethtool command at boot. This is a common and robust way to ensure settings persist in modern Linux distributions.
First, let’s create a new systemd service file. We’ll use nano, a simple text editor, but feel free to use Vi or any other editor you prefer:
sudo nano /etc/systemd/system/wol.serviceIf you’re unsure where ethtool is installed, run:
which ethtoolPaste the following into the service file:
[Unit]
Description=Enable Wake On Lan

[Service]
Type=oneshot
ExecStart =  --change  wol g

[Install]
WantedBy=basic.target
Once you’ve pasted the content and replaced
Finally, we need to tell systemd to enable this new service so it runs at every boot. This creates a symbolic link that activates the service:
sudo systemctl enable wakeonlan.serviceAfter enabling, you can optionally start the service immediately without rebooting with this:
sudo systemctl start wakeonlan.serviceNow, your Ubuntu Server or Desktop, should have Wake-on-LAN persistently enabled across reboots.
Using the Advanced Network Connection Editor
For most Ubuntu desktop users, the graphical Network connection editor provides the simplest way to enable Wake-on-LAN.
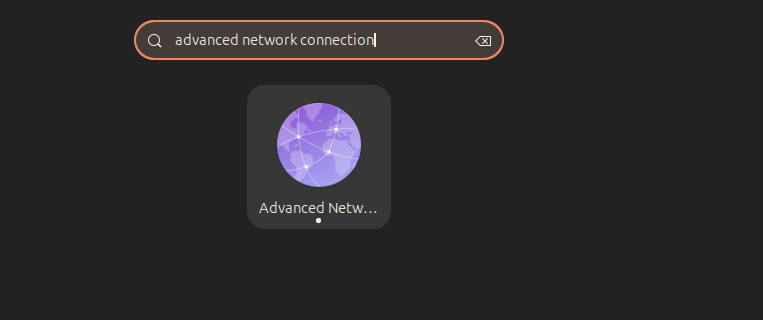
Simply, open the Advanced Network connection Settings from the Applications’ Menu.
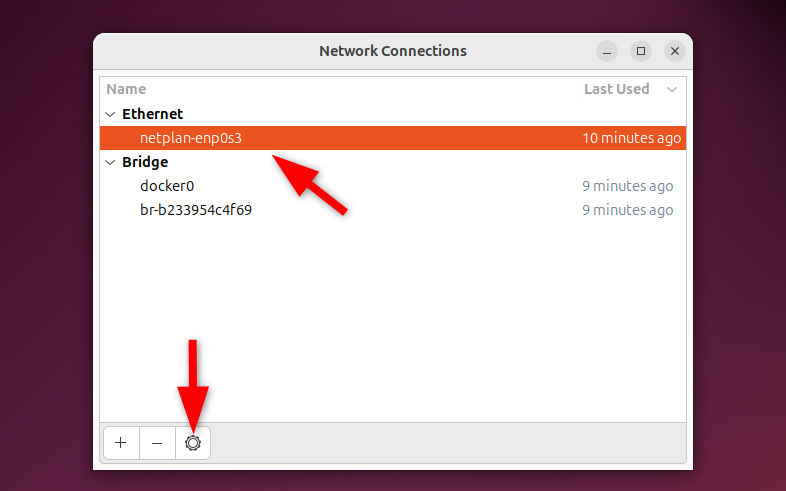
In the Network panel, you’ll see your wired connection listed. Click on the gear icon and open the connection’s settings.
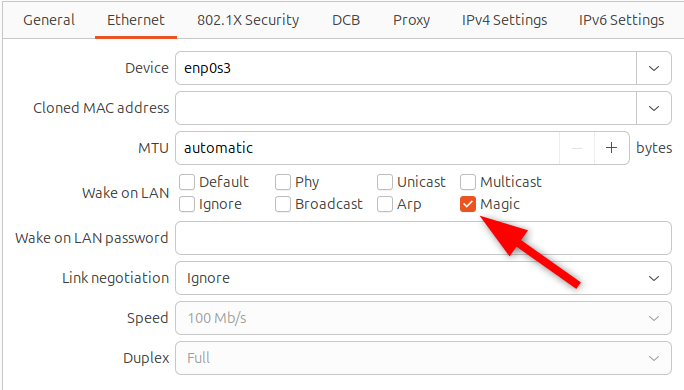
In the Ethernet settings tab, look for Wake on LAN. Check the box labelled as Magic or MagicPacket and hit Apply.
That’s it! You’ve successfully enabled Wake-on-LAN. To verify, run:
sudo ethtool enp0s3Look for Wake-on: g in the output.
Enabling WoL with nmcli (Command Line Network Manager)
If you’re primarily using Ubuntu Desktop, chances are you’re already familiar with NetworkManager. It’s the graphical tool that makes connecting to Wi-Fi and wired networks a breeze. While it’s graphical by default, it also supports command-line configuration via nmcli.
First thing first, we’ll need to know which network connection we’re dealing with. For that, we will list all the active connections:
nmcli connection showIf the output shows 802-3-ethernet.wake-on-lan: default, WoL remains disabled. If it shows magic, then congratulations, it’s already enabled.
To enable Wake-on-LAN using NetworkManager, we’ll modify the connection setting to listen for the magic packet:
nmcli connection modify 802-3-ethernet.wake-on-lan magicAfter running this, your Ubuntu Desktop machine should now be configured to respond to magic packets! It’s usually that simple. You might not get any immediate feedback, but the setting has been applied.
Disabling it is just as easy. Instead of magic, simply use ignore:
nmcli connection modify 802-3-ethernet.wake-on-lan ignoreThis command tells your network adapter to disregard any incoming magic packets, effectively turning off the Wake-on-LAN functionality for that connection.
Testing Your Wake-on-LAN Setup
To test WoL, shut down or suspend your Ubuntu machine. Then, from another device (PC, phone, Raspberry Pi, etc.), send a magic packet to the machine’s MAC address. There are plenty of apps and command-line tools for this, search for Wake-on-LAN tool in your app store.
If you have another Linux or macOS machine on your network, you can send a magic packet directly from the terminal. You’ll need a small utility called wakeonlan.
On Debian/Ubuntu-based systems:
sudo apt install wakeonlanOnce installed, sending a magic packet is as simple as:
wakeonlan Replace with the MAC address of your Ubuntu machine.
Also, for Windows users, there are several free utilities available. A popular choice is WakeMeOnLan by NirSoft. It’s a small, portable application that scans your network and allows you to send magic packets. Alternatively, you can use PowerShell for a more command-line approach, though it requires a bit more setup. Many users find the dedicated utilities simpler.
How to Enable Wake-on-WiFi (WoWLAN)
Now you can turn on your PC via LAN, but what about wireless wake-on-LAN or woWLAN? As of this article, there is only one snap application (network-manager) that allows you to do this.
You can install this from the snap store or the terminal using the following command:
sudo snap install network-manager
Beware, as this application is only rated one star in the store. During testing, the application ran as expected in the terminal, and it has full-length documentation by Canonical.
You can attempt to enable woWLAN using another network manager, but the default (networkd) has no method of enabling it.
You can enable wireless wake-on-LAN using this command:
sudo snap set network-manager wifi.wake-on-wlan=magicIf you’re on an open network or wary of security threats, you can set a password using:
sudo snap set network-manager wifi.wake-on-wlan-password=There are some advantages to using this method over ethtool. It’s quicker to install and allows wireless wake-on-LAN. It has kernel level access, so if the computer loses power, you can still use wake-on-LAN when power returns.
The issue is that Canonical only recommends it for Ubuntu core users. There is no specific reason for this, but it’s likely to keep the application contained and to prevent users from breaking their OS.
Frequently Asked Questions
Can I power down my PC using Wake-on-LAN?
You can only wake your PC from standby or a power-off state. There are methods of doing this, and they do not use wake-on-LAN.
Is it a security risk to enable Wake-on-LAN?
Nothing is 100% safe. However, only devices on the same network can power on your device using wake-on-LAN. Ubuntu also requires you to authenticate after powering on. As long as you avoid unsafe Wi-Fi networks, and secure all your devices (strong passwords, encrypt confidential data, etc.) connected to your local network, it is quite safe to enable wake-On-LAN.
After my device lost power, Wake-on-LAN no longer works. How can I fix this?
Ethtool does not persist when power is lost. Logging in again should re-enable the service. If you used the network-manager method, it will persist when you lose power.


