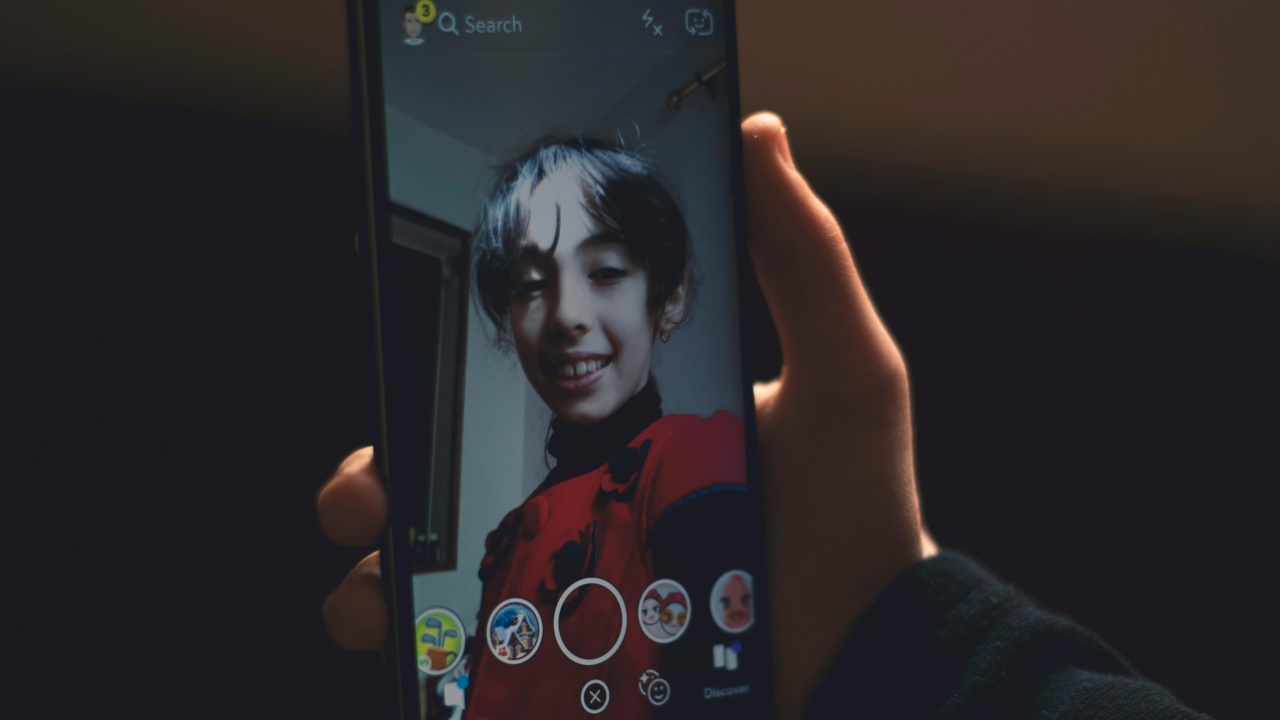
Snapchat’s Lens Studio for desktop lets you design custom filters, known as Lenses, but it can be challenging for beginners. Thankfully, Snapchat now offers a simpler alternative for smartphone users: the Lens Studio mobile app. Here’s how to make the most of it.
Good to know: upgrade your Snapchat privacy with these tips.
Lens Studio by Snap Availability
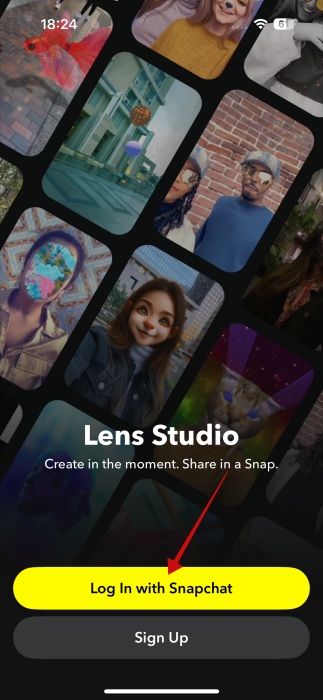
Before you get all excited, keep in mind that, for now, the mobile Lens Studio app is only available for iOS users. You’ll need to download it from the App Store as Lens Studio is not part of the Snapchat app per se, but a separate entity.
Once you have it on your phone, you can use your Snapchat credentials to log into the application.
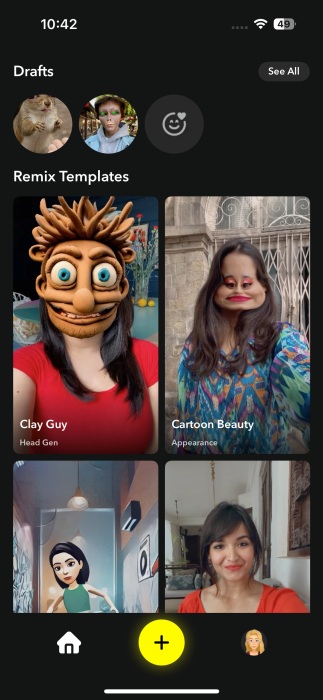
Modify Snapchat Lens Templates with Lens Studio
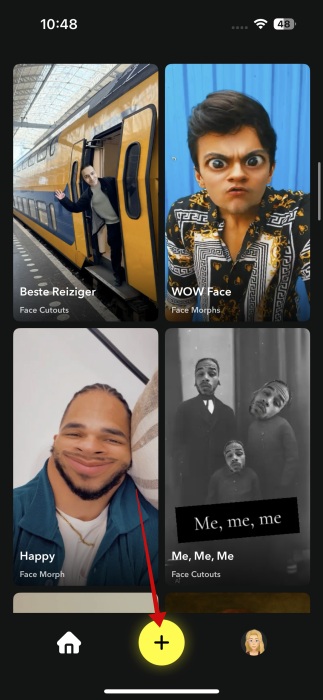
The easiest way to create a custom Snapchat Lens with the app is to modify one of the existing templates, which are shown on the main screen. Find a template that appeals to you and tap it to start editing it.
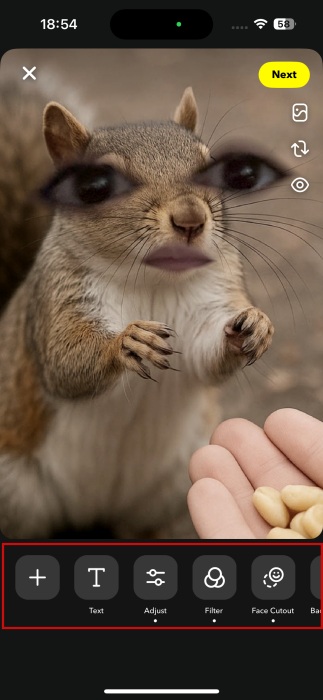
Check the menu at the bottom for options to add Text, Filters, or Adjust the filter parameters, including Contrast, Saturation, Vibrance, and more. For some filters, you might notice a Face Gen option which uses AI to create various facial effects (check more details in the next section). In addition, you can add more effects to the existing Lens by pressing the + button in the lower left.
Tip: here’s how you can determine when someone was last seen on Snapchat.
Create a Custom Snapchat Lens with Lens Studio
Of course, you can create your own Lens from scratch if you prefer. In the Lens Studio app, press the + button at the bottom.
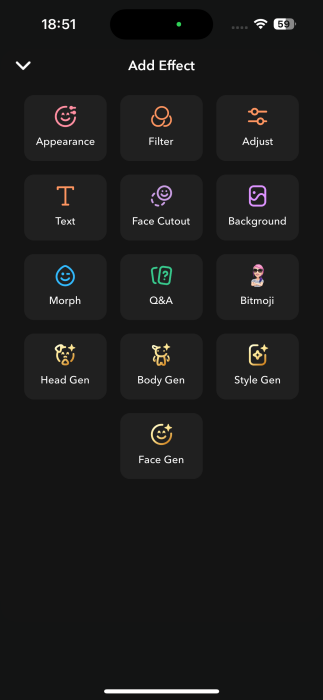
On the next screen, go ahead and select your effect from one of the following:
- Appearance – lets you modify and enhance aspects of your face including Eye, Teeth, Lip Color, Eyebrow and more.
- Filter – offers access to various filters
- Adjust – enables you to modify the camera view by allowing you to adjust parameters such as Saturation, Exposure, Tint, Grain, and more
- Text – allows you to add text on your Lens
- Face Cutouts – lets you cut parts of your face for effect, including Eyes, Lips, or Nose
- Background – lets you add a background either from your gallery or a photo you just snapped. There’s also an AI generation option. Several pre-made selections are available, but you can also get creative and write your own prompts
- Morph – allows you to comically stretch facial features for some unusual results
- Q&A – enables you to add a Question and Answer card on your Lens
- Bitmoji – if you’ve created a Bitmoji avatar in Spanchat, you can import it into the Lens Studio app and add it to your Lens
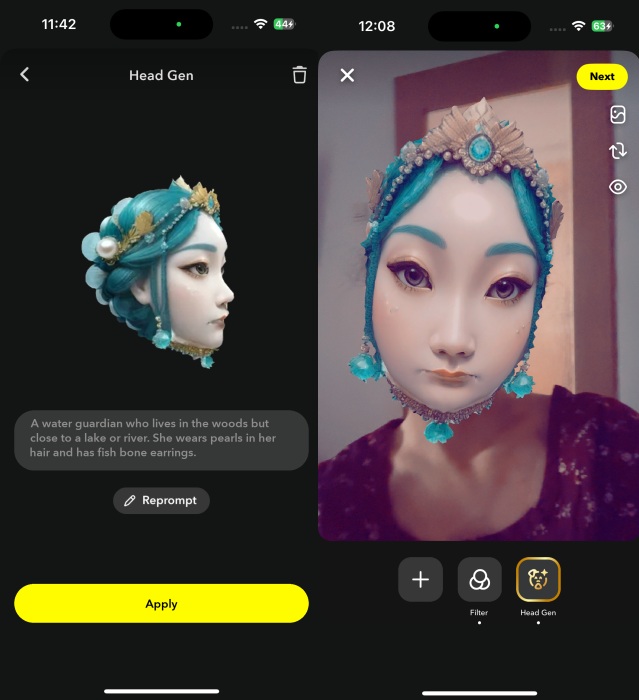
- Head Gen – the following four options all use AI to generate assets based on your inputs. The first one can help you generate head filters. It can take up to 20 minutes for Snapchat to generate one. A few pre-made samples are available to experiment with.
- Body Gen – creates full-body filters
- Style Gen – creates filters in different art styles. Includes a large sample gallery
- Face Gen – generates face effects based on images you upload. In this case, Snapchat can take up to a few hours to create the effect for you.
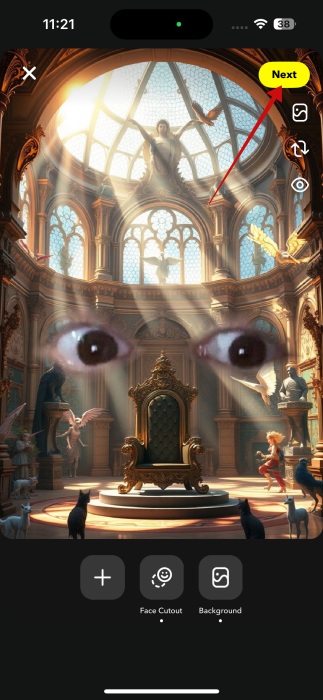
To create a new Lens for Snapchat, select any effects from the list above and modify them according to your tastes and preferences. For this Lens, I’ve used the Background AI generation tool to create the backdrop for my Lens.
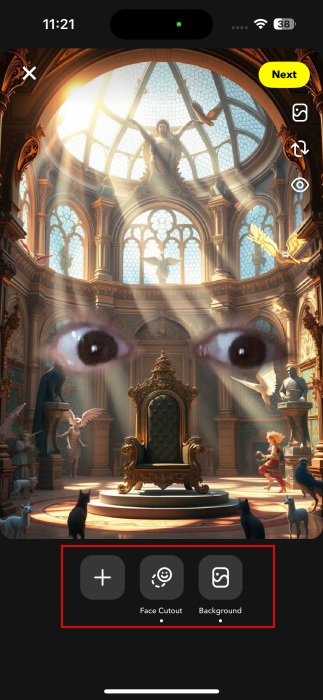
I’ve also experimented with the Face Cutouts tool and used it to superimpose my pair of eyes onto the background. Once you add an effect, you can easily add another by pressing the + button at the bottom.
I also want to share with you a Lens I’ve created using the Face Gen tool. While the result doesn’t follow my prompt 100%, I was pretty happy with the result.
When you are finally satisfied with how the new Lens looks, press Next.
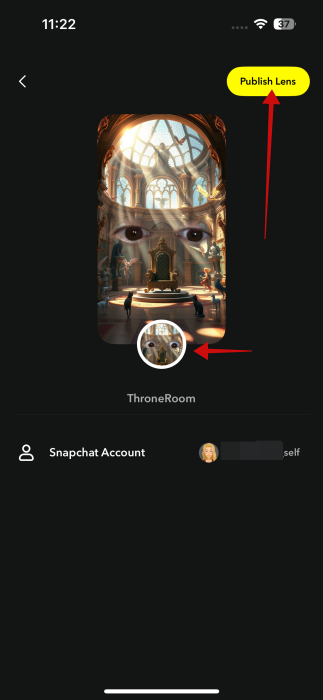
Here, you need to name your Lens, create a preview, and select an icon for it. Then you can press Publish Lens.
The new Lens will be available once it is approved by Snapchat. The process might take a few minutes, so you can continue experimenting with the tools in the app while you wait.
You will receive an email that includes a link to your Lens when verification is done. Tap it.
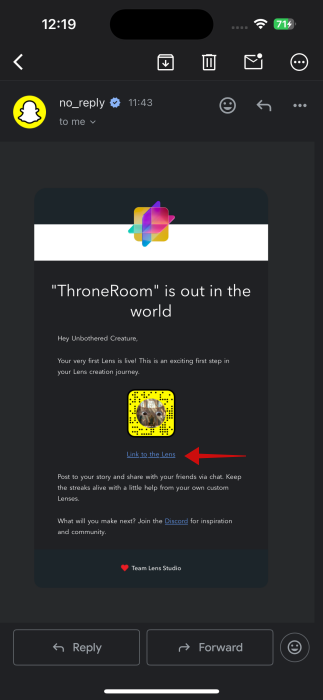
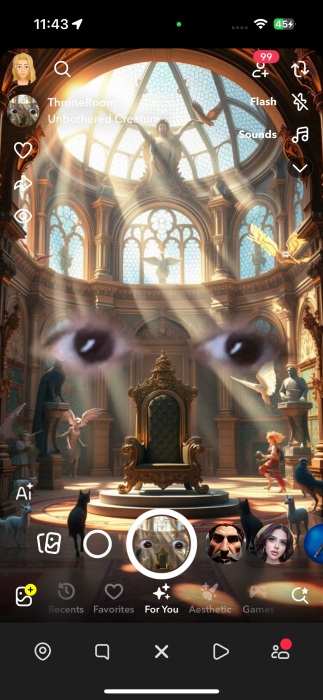
It will open the Lens for you in the Snapchat app and add it to your roster.
Now, keep in mind that the Lenses you can create in the Lens Studio app are not going to be as advanced as the ones you can design in the desktop version. But if you simply want to try your hand and have some fun in the process, the mobile app is certainly your best option.
If you’re a constant Snapchat user, then you might want to continue getting up to speed on how you can easily find someone on Snapchat. Alternatively, here’s how to use Snapchat location to find friends and stories near you.