Who else hates trying to remember lengthy passwords for the hundreds of sites and apps you use? I can’t remember them all either, which is why I use Keepass2Android to access my KeePass database in Android and enable the autofill feature. With this app, you will be able to use KeePass password manager on both your desktop and Android devices.
Choose the Right Version of Keepass2Android
Keepass2Android is the Android version of the popular open-source desktop password manager, KeePass. Unlike KeePass, which requires a plugin to autofill passwords, Keepass2Android does it with just a few changes to your system settings.
I personally prefer local storage to keep my data more secure, which is why I chose the offline version, called Keepass2Android Offline. The obvious downside is your passwords don’t sync between devices. It’s best if you’re only using one Android device.
But, if you need to autofill passwords in Android using KeePass across multiple devices, opt for the cloud storage version Keepass2Android Password Safe. Your passwords are stored in an encrypted vault. I like that you can choose where to host your vault, such as NextCloud, Dropbox or Google Drive.
Both versions support KeePass 1.x and 2.x databases, so it’s all about personal preference. I prefer the local storage myself, but for this tutorial, I’m using the cloud storage version. Both versions work the same and they’re completely free.
Keepass2Android Autofill Limitations
I love making technology as easy to use as possible, but Keepass2Android doesn’t work quite as smoothly as traditional cloud-based password managers. This is especially true when using it to autofill passwords in Android browsers.
I’ve run across several issues that you should be aware of before setting everything up.
- Autofill often only fills in just the username or just the password. You have to manually tap to fill in the remaining field. It’s an extra step, but still easier than trying to remember everything on your own.
- Autofill doesn’t work by default. You have to change a few system settings to get it to work.
- Sometimes, Keepass2Android doesn’t automatically recognize login fields. You have to manually tap the field(s) and choose what to enter from your database.
- It’s common to have issues with Gboard and Swiftkey keyboards, even after you enable the autofill feature. The only workaround is to switch to the Keepass2Android keyboard.
- There isn’t a built-in cloud-storage service. You must connect to another provider to store your database to sync passwords. Otherwise, you have to store your database locally.
One more limitation to note is if you store your Keepass database locally, make sure you keep a backup. If something happens to your phone, all your passwords are gone. I suggest using a USB drive for Android like the SanDisk 128GB 2-in-1 drive. You can also back it up to your computer using a USB cable or even O+ Connect.
For me, it feels like trading slightly more time for better privacy and control.
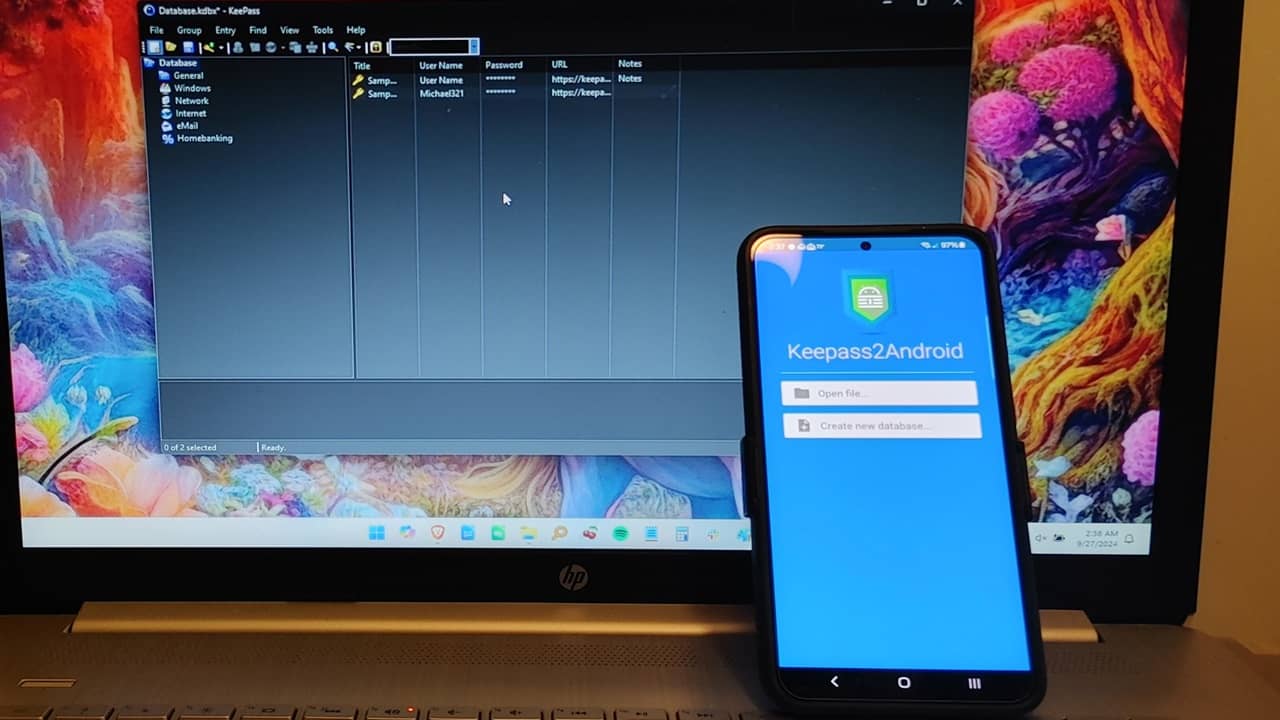
Setting Up Your Keepass2Android Database
Once you have installed Keepass2Android, open it, and connect to your KeePass database. Select the database file from the local storage or any of your cloud storage accounts.
If you’re using KeePass for the first time, select Create new database instead. During creation, choose between local or cloud storage.
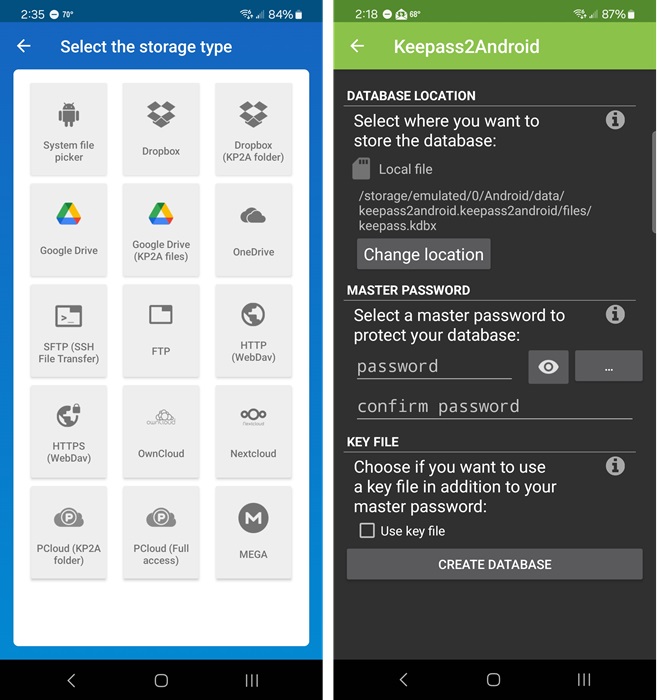
Once you’ve created a link between your desired service and Keepass2Android, enter your master password (and any other steps required based on your settings) to unlock the database. I’m using Dropbox as an example, mainly because I really don’t trust storing any password databases on Google Drive.
If you want to keep things even more secure, opt for storing your database on your own server. Even an older PC you’re not really using anymore works well for this. If you map a WebDAV drive in Windows, you can share a database between your desktop and Android device(s).
Autofill Password in Android
Keepass2Android isn’t set up to autofill a password in Android by default. I personally like that it prompts you to set it up and doesn’t just assume. The first time I unlocked my database in the app, I was prompted to enable autofill at the bottom of the screen. Of course, you can revoke this permission is you decide you don’t want to autofill anymore.
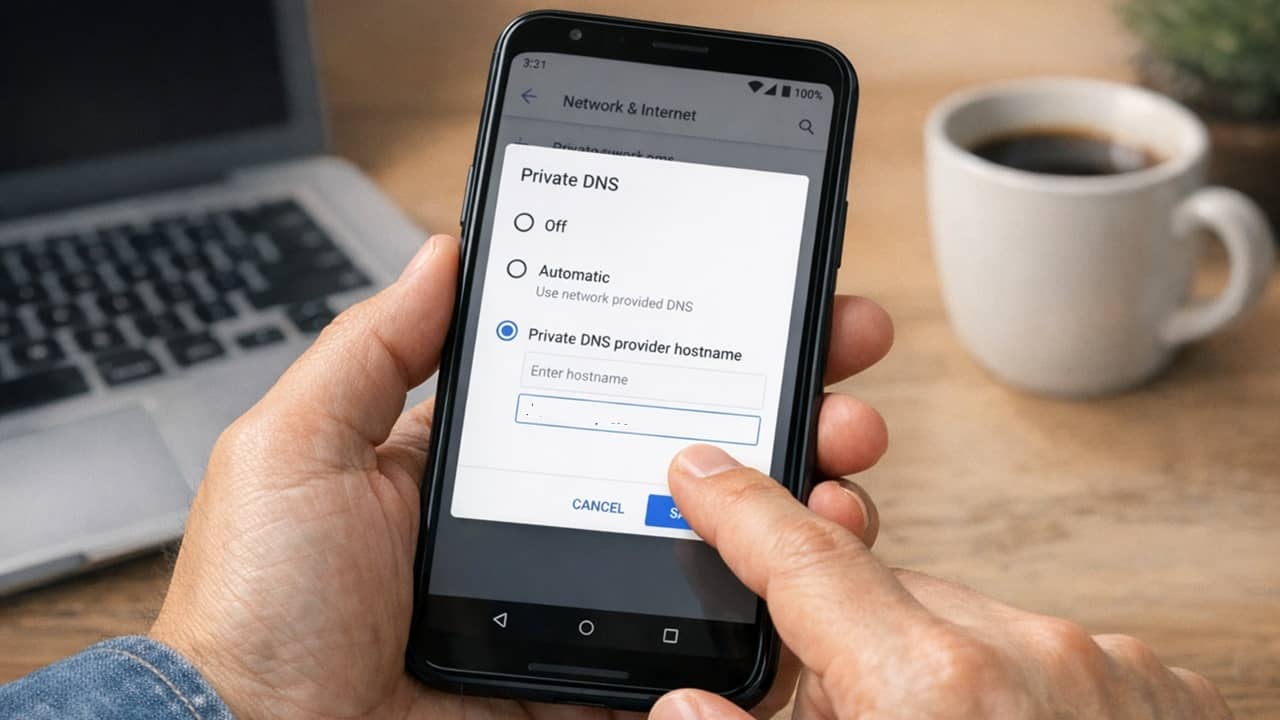
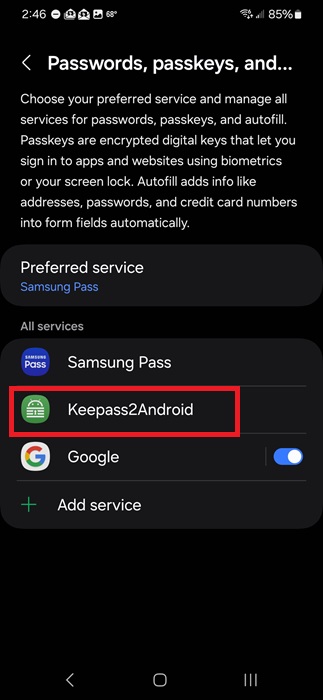
If you don’t see the prompt, open Settings on your phone, and go to General management. Depending on your device, it may also be Language & input. Scroll down to Passwords, passkeys, and autofill. If you don’t see this setting, use the search feature in Settings to search for autofill. Out of three Android phones, the steps were slightly different for each during testing. Select Keepass2Android.
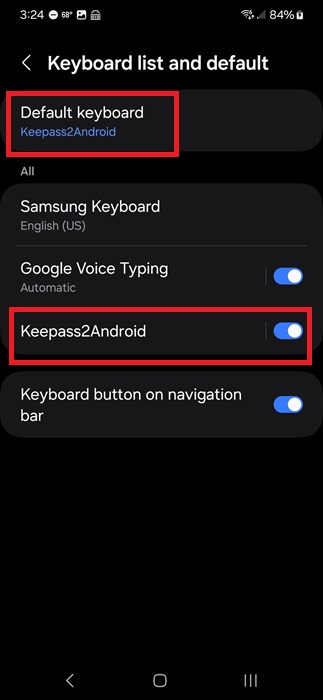
Go back to General management, and tap Keyboard list and default. Turn on Keepass2Android. At the top of the window, tap Default keyboard, and select Keepass2Android. This enables an autofill button on the keyboard. Handy, right?
I had to confirm I wanted to use Keepass2Android twice, but this may vary based on device type.
Once everything’s set up, open your favorite mobile browser and navigate to a site to log in. Alternately, open Keepass2Android, select an entry, and tap the URL to go directly to the login page. Only do this for a site in which you’ve already saved your credentials.
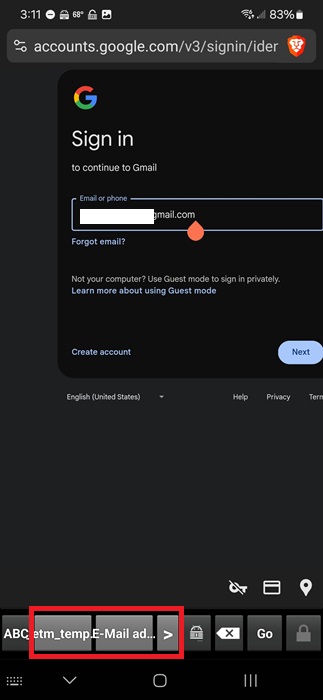
Tap the username and password fields on the site, then tap the cute little droid icon in the bottom row of the keyboard. Depending on your device, you may only see a Fill with Keepass2Android button just above the keyboard.
To make life easier (who doesn’t love that!), the app only requires you to enter the last three characters of your database’s master password to access it. If you’ve had your device off, you may need to enter the master password to unlock the database.
Select the entry when prompted, then tap the username field on the site. The keyboard switches to a single row. Use the arrow button, and select either username or email address. If you’re logging in to your email account, like I am in the example, choose email address.
Once you’ve used Keepass2Android for the first time, some sites display a pop-up when you tap a login field to autofill passwords on Android with Keepass2Android. This doesn’t always happen, but it’s another way to select an entry.
Tap the password field and repeat the process. For me, once I entered the email address, a pop-up to fill in the password appeared as well, but I haven’t had that happen on all sites.
Also, if you tap the droid icon, it brings up a list of fields. I’ve never had that work to autofill the username on any site, but it did work for the password. It’s an odd glitch, but you should be aware of it.
I know it seems a little confusing and complicated at first, but trust me when I say that after using it a few times, it gets much easier to autofill passwords in Android.
Plus, unlike other password managers, you have full control over where your database is stored.
Enable QuickUnlock
Other than the feature to autofill passwords on your Android device, Keepass2Android also has a QuickUnlock feature that allows you to quickly unlock an opened database without having to enter the full password again. For me, it was on by default, but if you followed the steps above and wondered where this easy unlock option was, I have you covered.
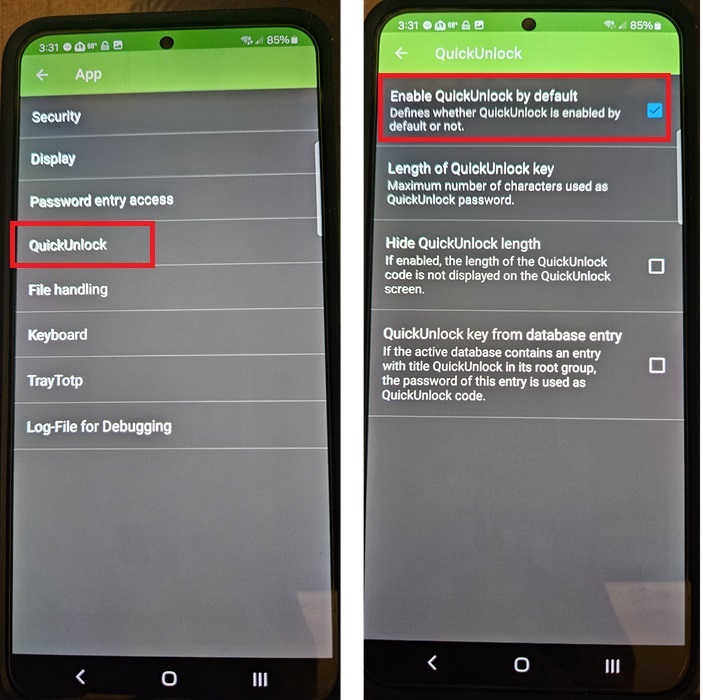
Open Keepass2Android, log in to the database, and tap the three-dot menu in the top right. Select Settings -> App -> QuickUnlock. Turn on QuickUnlock. You can also adjust the length of the required password and hide the length.
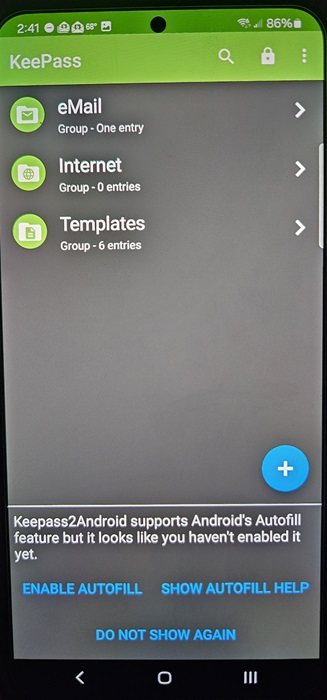
Finding Entries in Large Databases
While I used a temporary database with just a few entries for this tutorial, my regular Keepass2Android database has over two hundred entries – hence, the reason I need a password manager. Instead of having to remember where every entry is, I use the Advanced Search feature to find exactly what I need.
When prompted to select an entry while logging in to a site, tap the three-dot menu in Keepass2Android, and select Advanced Search. Use the filters to narrow your search and enter your search term. There’s even a Regular expression option.

Personally, I prefer using KeePass due to its strong encryption, open-source design, and ease of use, but I know the autofill service is not for everyone. Try one of these other password managers instead if you prefer something different. And, for us Windows users, learn how to lock down your files and folders with passwords.