
In Windows, File Explorer is one of the most-used programs. Though File Explorer looks simple, it is quite powerful and feature-filled. In fact, it has several hidden or hard-to-find options that can make your life a tad bit easier. Here are some of the useful File Explorer tips you should consider following.
1. Show File Extensions
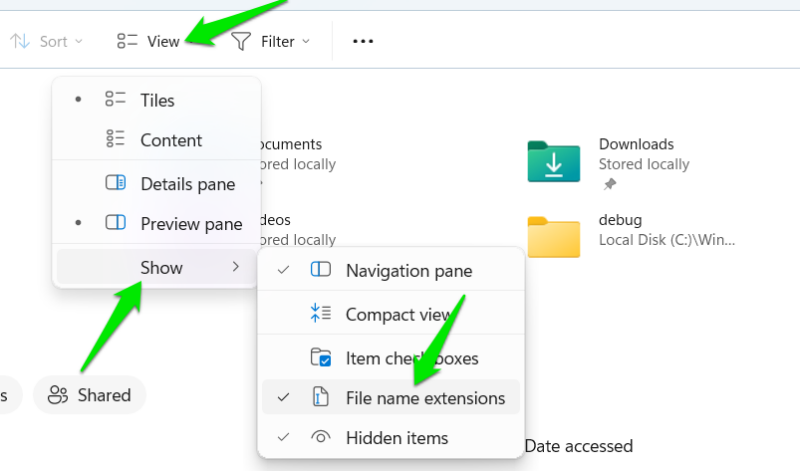
I really don’t know why Windows still doesn’t enable this option by default, but it is important that you configure the File Explorer to show file extensions for all files, not just unknown files. File extensions can easily be exploited in malware attacks, like the LNK files vulnerability.
The good thing is that it is quite easy to enable this option. Open the File Explorer, click on the View tab, and then select Show → File name extensions, and you are done.
2. Make “This PC” the Default Page
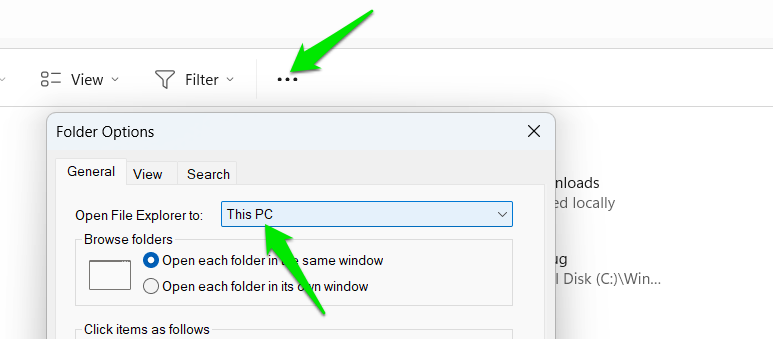
By default, when you open File Explorer, it will open directly to the Home page. In general, the Home page lists your frequently-used folders and recent files. However, if you are like me and like to have quick access to your different drives, then it is better to change the default File Explorer page to “This PC.”
To do that, click on the See more (three dots) menu at the top and then on the Options button. In the Folder Options window, select This PC from the drop-down menu next to Open File Explorer to and click on the OK button.
3. Enable Checkboxes
In Windows, you can select multiple files or folders by holding the Ctrl key and clicking on the file or folder with your mouse. Alternatively, you can enable the checkboxes feature, which lets you select multiple files without holding the Ctrl key. The checkboxes feature is quite useful when you don’t know what or how many files or folders you are going to select.
To enable the feature, open File Explorer, click on the View tab, and select Show → Item check boxes.
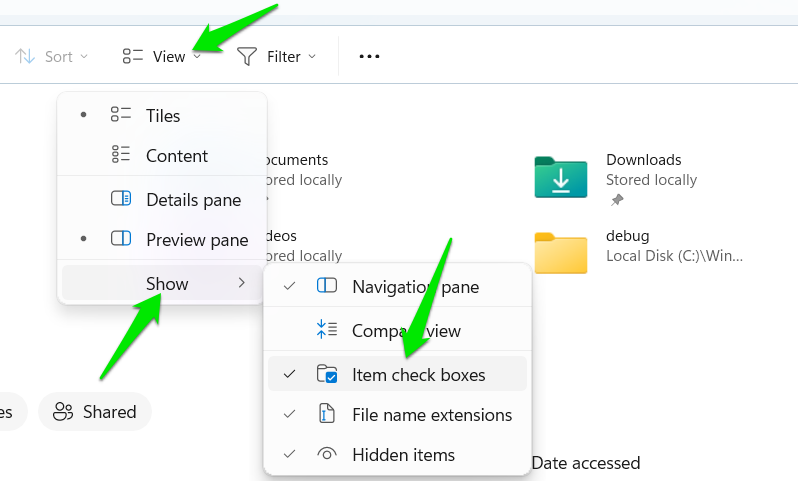
Once you enable the option, you will see a checkbox on the left side of the file or folder name when you hover over it. Tick the checkbox to select the file.
4. Show Full Path in the Title Bar
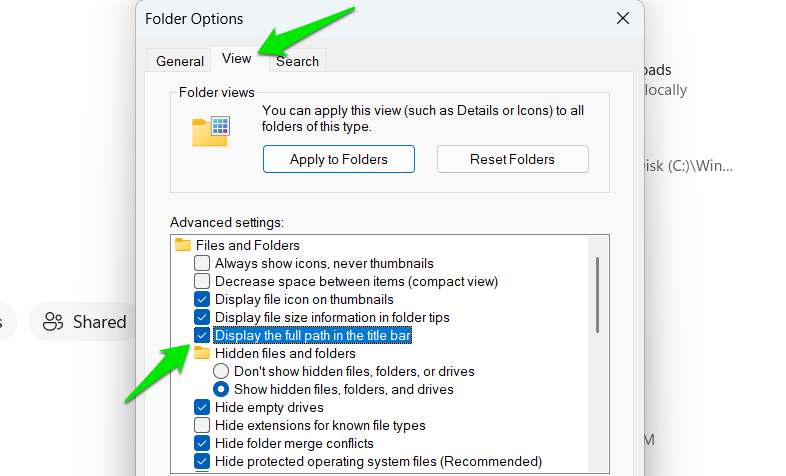
No matter where you are in File Explorer, it shows the folder path as breadcrumbs in the address bar. Until you click on the address, you will not see the actual full path. If you want to, you can make the file explorer show the full path. To do that, open Options again from the See more menu.
In the Folder Options window, go to the View tab, select Display the full path in the title bar checkbox, and click on the OK button.
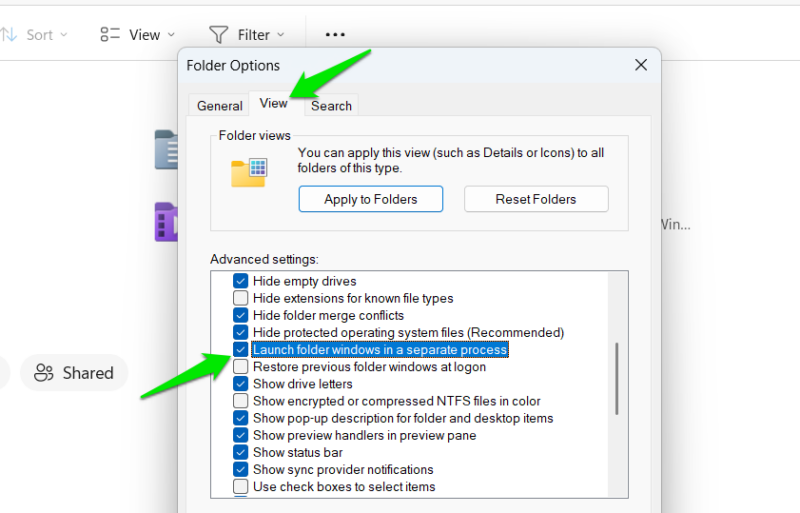
5. Launch Folders in Separate Process
If you have been using Windows for long enough, you might have seen File Explorer crashing under certain circumstances. When you launch multiple folders and one folder causes the crash, all folders will be collapsed along with the offending one. This is because File Explorer runs on a single process instance. By configuring File Explorer to launch folders in separate processes, you can avoid this hard crash.
To enable the separate process feature, open the Folder Options as we did above. Under the View tab, enable the Launch folder Windows in a separate process option and click on the OK button.
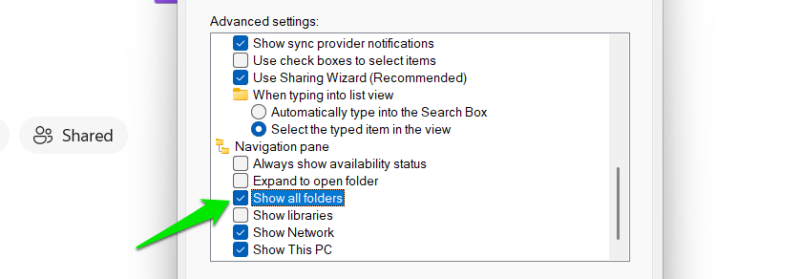
6. Expand the Folder in the Navigation Pane
When you browse through different folders in File Explorer, you can see that it will highlight the root drive of the folder. If you want to, you can expand the navigation manually. However, having the folder tree expand automatically is quite helpful for quick navigation.
To do so, open the Folder Options again and move to the View tab. Scroll to the bottom, enable the Show all folders option, and click on OK to confirm the change.
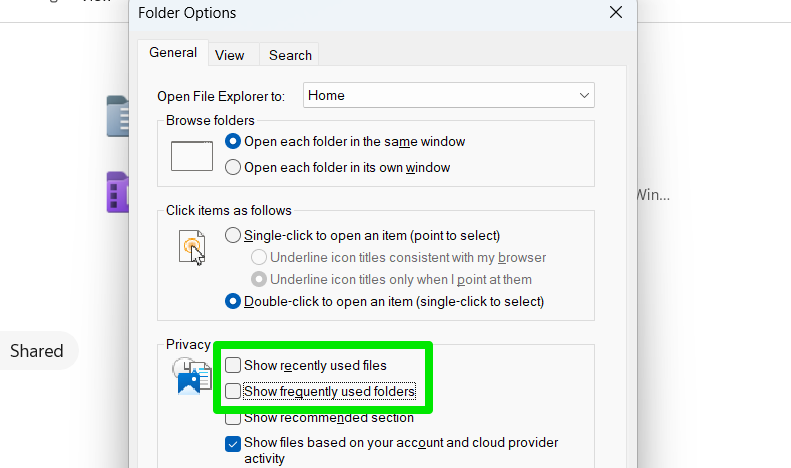
7. Hide Recent Activity in File Explorer
By default, File Explorer will list your recent activity right on the front page. Though this is helpful and gives you quick access to your recent files, if you don’t like this behavior, you can stop File Explorer from tracking and listing your activity.
To do that, open the Folder Options window and uncheck both the Show recently used files and Show frequently used folders checkboxes. Click on the OK button to save changes.
8. Make Use of the Search Bar
The built-in File Explorer search is quite powerful. For instance, you can use the search bar to find files based on specific words, dates, file size, extension, wildcards, etc. Check out our guide on how to use the File Explorer search bar to learn different ways to use the search bar effectively.

9. Use File Explorer Tabs
Similar to a browser, you can click the + button in the top bar to open a new File Explorer tab. These tabs are separate from each other and can navigate completely different locations from each other. Just like a browser, they also support shortcuts Ctrl + T and Ctrl + W to open and close tabs quickly.
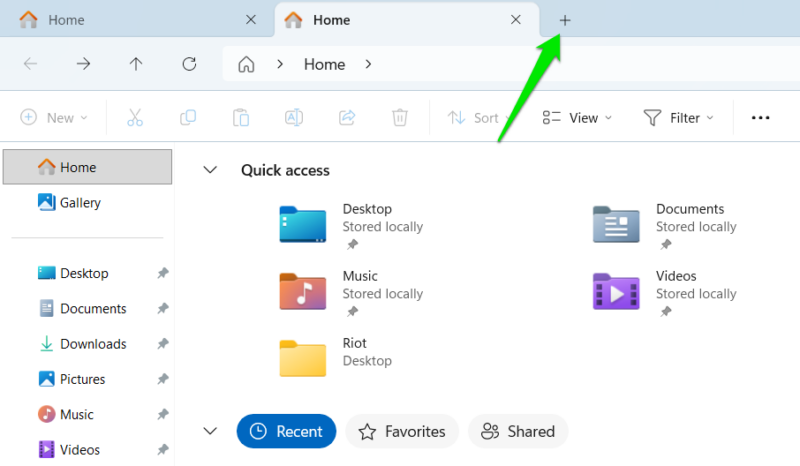
These tabs allow you to view all opened folders and easily switch between them. You can also quickly move data between them without needing to manage separate windows. For more File Explorer tabs tricks, check our guide on using File Explorer tabs in Windows 11.
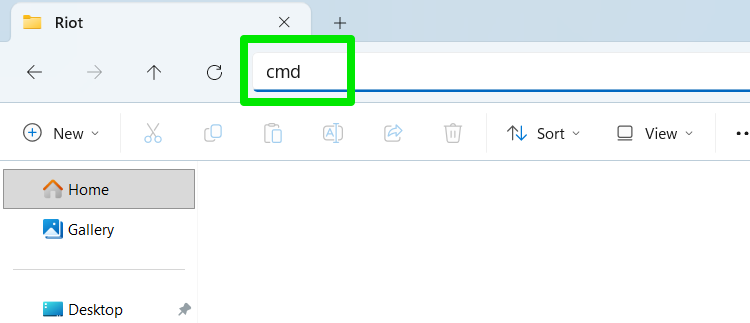
10. Quickly Open Command Line in the Current Folder
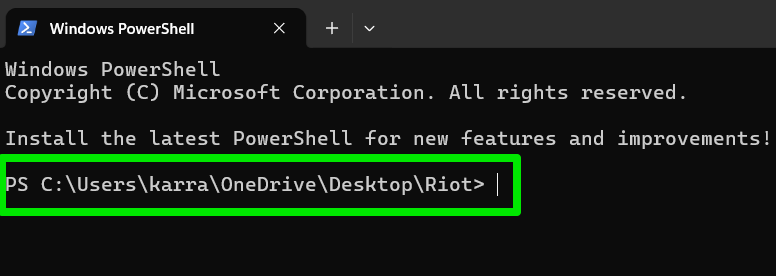
Many Command Prompt commands and PowerShell commands require you to be in the exact folder where your files are located. Manually navigating to that path can be time-consuming and error-prone, especially with long or complex directory names. Instead, try this File Explorer trick: open the folder you want, click the address bar, type cmd, and press Enter. Command Prompt will open automatically with that folder set as the current working directory.
You can also type powershell to open the same location in PowerShell. There’s no need to remove the folder path from the address bar – having the folder open is all that is required.
These tips will ensure you use Windows File Explorer easily and efficiently to get more things done faster. If you still feel like File Explorer isn’t enough, you can also try some File Explorer add-ons or even fully replace the File Explorer.


