
The “lsass.exe” process is critical to Windows’s proper functioning and should not be modified in any way. It is vulnerable to RAM overconsumption due to multiple user accounts, memory leaks, corrupted files, excessive background processes, or malware mimicking the process. With specific methods and precautions, you can prevent lsass.exe or its variants from overloading your RAM resources.
What Is lsass.exe and What Does It Do?
“lsass.exe” (Local Security Authority Subsystem Service) is a core Windows process used to enforce security policies, document password changes and login verifications. “lsass.exe” stores credentials in memory to enable a single sign-in, where the user does not have to reenter credentials for services inside the domain.
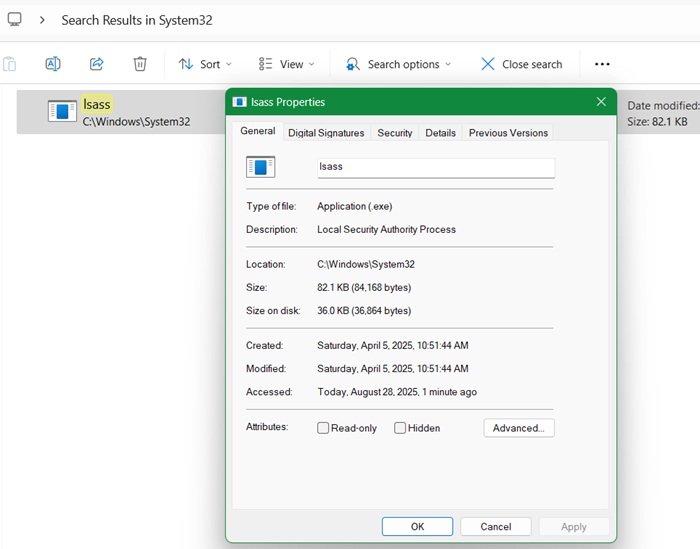
You can locate this in “C:\Windows\System32” folder, but you should not try making any changes. At less than 100 kb, its memory impact is insignificant.
“lsass.exe” is a safe file that plays a vital part in your PC’s day-to-day operations. It stores passwords and IDs through the Netplwiz front-end. For example, when you add or manage user accounts or change passwords, lsass.exe checks permissions, updates secure data, and enforces the policy changes.
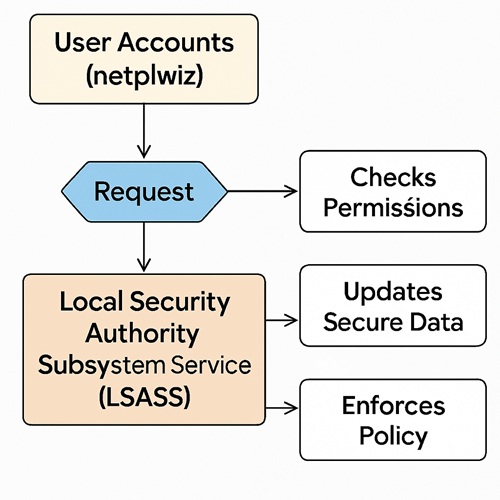
Accordingly, you can think of “lsass.exe” as a backend vault or key card that verifies your access to your Windows PC, working with netplwiz, the concierge managing user accounts. While it uses RAM and resources during authentication, its impact should typically be minimal.
lsass.exe and High RAM Usage
At a corporate network level, lsass.exe service is active on domain controller computers (servers responsible for managing networks). On server computers, lsass.exe is responsible for storing thousand of passwords and IDs and monitoring resource access. In these cases, they use more CPU, RAM, and IO resources.
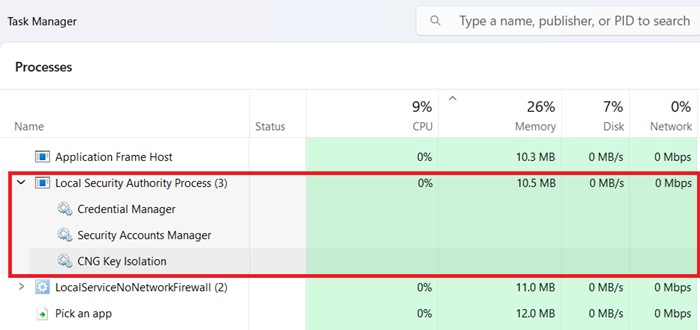
However, you wouldn’t observe as big an impact on a computer that isn’t a domain controller. You can check its memory usage on your PC under Processes in Task Manager. It should be a few megabytes at the most. Therefore, something is wrong if the process is using too much RAM, say in gigabytes.
The biggest causes of high RAM usage due to “lsass.exe” are:
- Similarly named malware: the most frequent scenario is that the supposedly lsass.exe process is not what it first seems to be. It’s likely to be a malware using a similar name as “lsass.exe.”
- Memory leaks: it’s usually pinned to a proprietary third-party program.
- Multiple user accounts: let’s just say you have a home PC without any active directory. As “lsass.exe” keeps frequently accessed data in memory to speed up authentication, if you have multiple user accounts with separate user profiles, it means multiple sets of cached data, and background services in each context. With OneDrive, email, and Wi-Fi tokens, the RAM consumption adds up.
- Corrupted user files: If your system files are damaged or your local security policies are misconfigured, they cause RAM issues due to “lsass.exe”.
Related: If you’re worried about viruses taking over your PC, check out this list of more genuine Windows processes that can look like malware.
Dealing With Malware Resembling lsass.exe
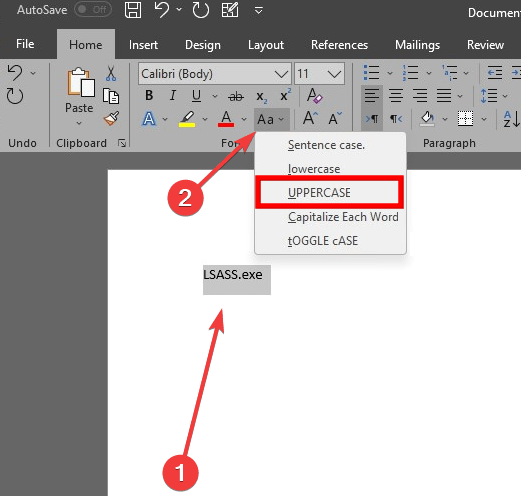
A malicious “lsass.exe” process might use an uppercase “i” (I), whereas the genuine process uses a lowercase “L” (l). Names may appear similar, depending on how your computer displays them, making it easy to confuse one for the other.
To verify, open Microsoft Word.
- Copy the file name, then paste it into the word processor.
- Click the Change case button from the menu at the top and select UPPERCASE.
There are many variations of the “lsass.exe” spelling. Also, it’s only found in one location: “C:\Windows\System32\” If it’s found elsewhere, it is most certainly malicious and should be deleted immediately.
A full antivirus scan is recommended if you run into any instances of these fake and bogus processes. You can use other methods such as the Command Prompt to remove any stubborn files.
Uninstall Proprietary or Third-Party Programs
Almost all branded laptops have many such proprietary programs which seemingly help you, but are a resource burden. In my case with a Dell laptop, a program called “Dell SupportAssist” is notorious for being a RAM hogger, often consuming 7 to 10 GB. In fact, the more RAM I acquired on my device, the more memory would this application consume.
Many users often go for a cloud reset in their Windows operating system to remove any previous bugs. After that, the proprietary RAM-intensive software show up again. Uninstalling Dell SupportAssist is a routine task for me with every cloud reset.
Use DISM and SFC Commands
A regular system internal check through DISM or SFC commands goes a long way in fixing broken or corrupted files in your system, which in some cases become a RAM hogger. “lsass.exe” often struggles to enforce any policies efficiently. Running sfc /scannow and DISM /Online /Cleanup-Image /RestoreHealth goes a long way in repairing the problems.
Use Autoruns by Sysinternals to Regulate lsass.exe RAM Consumption
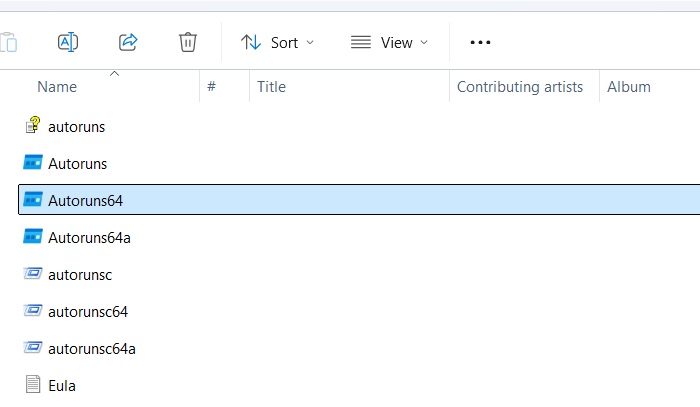
Here’s a quick, no-fluff way to help you track down any extra user accounts that cause bloating in the “lsass.exe” process. Download Microsoft’s official Autoruns application ZIP from the Sysinternals page. Extract it on your computer and run the Autoruns64 file.
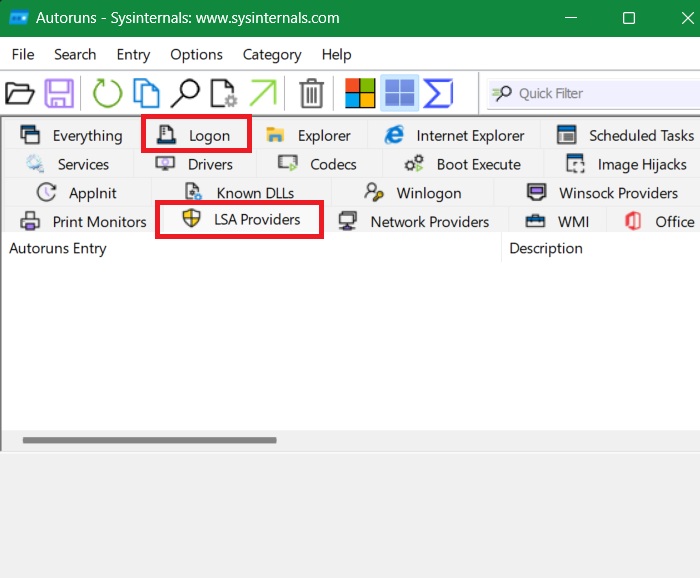
Check two tabs: Logon and LSA Providers. The Logon tab lists all active user accounts on your PC. Multiple user sessions may increase lsass.exe activity, not browser processes.
The LSA Providers tab shows authentication packages and third-party DLLs. These third-party entries can easily be minimized by uninstalling unnecessary applications and their user accounts., In my case, the list for LSA Providers is empty.
Another tool you can use is the Microsoft Process Explorer which does a good job at monitoring the size and bytes consumed by each process. So, you can get a fuller overview of RAM usage by processes like “lsass.exe.” The Windows Resource Monitor is a free built-in app which you can access by typing resmon in search menu. It gives more detailed RAM consumption usages compared to Task Manager.
System restore is a simple way to fix excessive RAM usage caused by internal processes. A faulty update or third-party program may be the culprit. Restoring your system to a previous, stable state can resolve the issue and reduce resource strain.


