
The Linux terminal isn’t just for server maintenance, system admins, or file management. It’s a powerful, versatile environment where you can be productive, creative, and even have some fun. Let’s explore seven cool and useful things you can do right now that reveal a whole new side of your terminal.
1. Generate Random Numbers in the Terminal
Sometimes you need a random number, such as for a password, a sample dataset, or maybe to make a quick decision. You could open a web browser and search for a random number generator, but if you are on Linux, then why leave it when you already have a built-in solution?
The Linux terminal has a few built-in ways to generate random numbers, and my personal favorite is using the $RANDOM variable. It’s an internal Bash function that gives a different integer between 0 and 32767 every time you call it. It’s incredibly simple, just type this and press Enter:
echo $RANDOM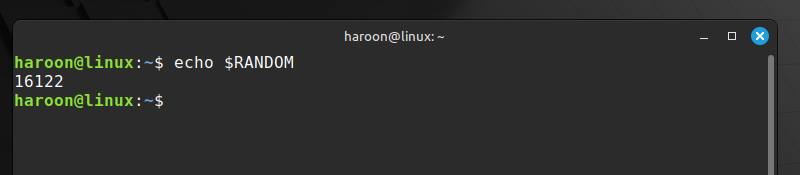
That’s it! A random number appears. Do it again, and you’ll get another. But what if you need a number within a specific range, say between 1 and 100? To achieve this, you can use a bit of math with the modulo operator (%) to constrain the output:
echo $((RANDOM % 100 + 1))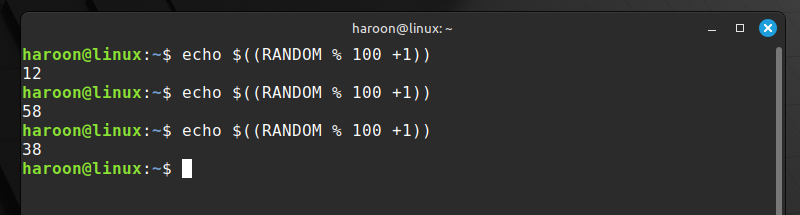
Here, the modulo operator (%) keeps things within your desired range, and adding 1 ensures you don’t get zero.
Alternatively, if you want more control and want to get multiple random numbers at once, you can use the shuf command:
shuf -i 1-1000 -n 5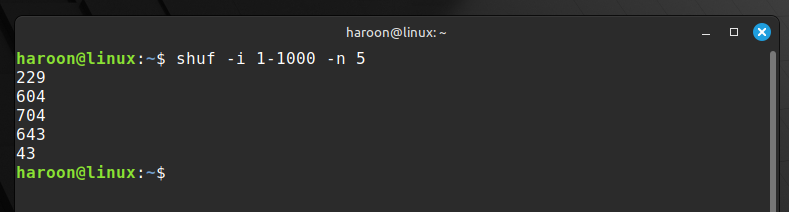
This gives you five random numbers between 1 and 1000.
What if you need something cryptographically secure? For those situations, turn to /dev/urandom. Here’s a command to generate a random string perfect for passwords:
cat /dev/urandom | tr -dc 'a-zA-Z0-9' | fold -w 16 | head -n 1
This pipeline filters random data to include only alphanumeric characters, takes the first 16 of them, and gives you one solid password candidate. You can also combine it with other commands to get exactly what you need.
2. Translate Any Text Instantly
If you need a quick translation, then instead of firing up Google Translate in your browser, you can bring the power of translation directly into your terminal. My go-to tool for this is Translate Shell, a command-line translator that uses engines like Google, Bing, and Yandex.
First, you’ll likely need to install it. On Debian/Ubuntu-based systems, you can get it with:
sudo apt install translate-shellFor other distros, check your package manager, it’s usually there as trans. Once it’s installed, the fun begins. For example, to translate Hello, world into Spanish, type:
trans :es "Hello, world"
If you’re not sure what language you’re dealing with, just leave out the source language code, Translate Shell is smart enough to figure it out. However, you can use the colon notation to specify source and target languages, such as:
trans en:es "How are you?"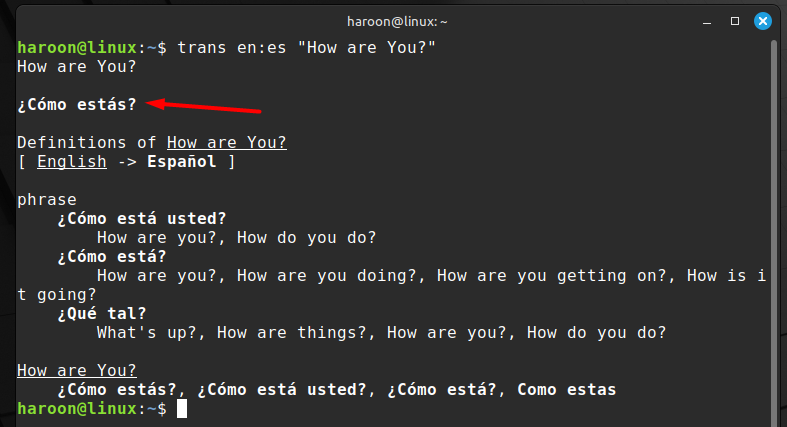
if you don’t want extra details other than translation, use the -b option in the previous command like this:
trans -b en:es "How are you?"
You can even translate entire files. For example, if you have any configuration file with comments written in German, instead of copying and pasting each line, just run this:
trans :en It translates the whole thing right there in your terminal.
Translate Shell also offers more than basic translations, such as interactive shell mode (trans -shell), where you can translate continuously and use it interactively:
trans -shellPlus, you can also use text-to-speech functionality and dictionary mode, which provide spoken translations and detailed definitions.
3. Generate QR Codes Directly in the Terminal
QR codes are a convenient way to share URLs, Wi-Fi credentials, or any bit of text. But did you know you can create your own QR code without ever leaving the Linux terminal? With a tool like qrencode, you can make QR codes in seconds.
First, install qrencode using your default distribution manager. On Debian or Ubuntu systems, run:
sudo apt install qrencodeLet’s create a QR code for the Google homepage that displays right in your temrinal:
qrencode -t ansiutf8 'https://www.google.com'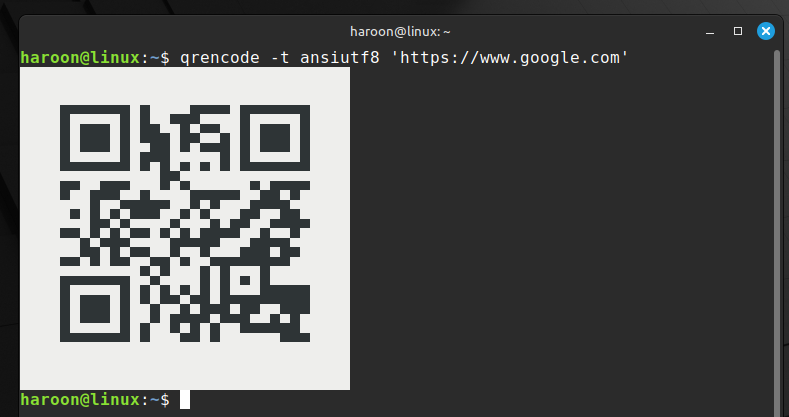
Instantly, a QR code made of text characters will appear in your terminal. If you need an actual image file, maybe for a website or a presentation, use the -o (output) flag:
qrencode -o mywebsite.png 'https://www.google.com'This will create a PNG file in your current directory.
In addition to links, you can also encode text, contacts, or even Bitcoin addresses. For example, you can encode Wi-Fi credentials with this:
qrencode -t ansiutf8 "WIFI:S:MyNetwork;T:WPA;P:MyPassword;;"qrencode also offers customization options, such as changing size with -s 10 for larger pixels, adjusting error correction level with -l for better resilience, and setting the margin around your code with -m.
4. Convert Files to Any Format From the Terminal
The terminal is an absolute powerhouse when it comes to file conversion, handling everything from images and documents to audio and video files. Linux tools like FFmpeg, ImageMagick, and Pandoc can handle almost anything you throw at them.
For example, Pandoc is the ultimate document converter. It can read dozens of formats and write to dozens more. You can install it using your default distro package manager, Like on Debian or Ubuntu, run:
sudo apt install pandocNow, let’s say you’ve written a beautiful document in Markdown and you need to submit it as a Word document. You can convert it with:
pandoc MyReport.md -o MyReport.docxFor images, ImageMagick’s convert command is your Swiss Army knife. You can install ImageMagick with your package manager and use it for converting, optimizing or resizing images.
For example, to convert JPG images into PNG with ImageMagick, use this:
convert input.jpg output.pngSimilarly, to resize an image, use:
convert input.png -resize 50% small.pngFinally, for multimedia files, FFmpeg reigns supreme. Converting video formats, extracting audio, or even creating GIFs, it’s all possible. For example, to extract audio from a video, use:
ffmpeg -i video.mp4 audio.mp3The tool is so powerful that most online converters actually use FFmpeg under the hood.
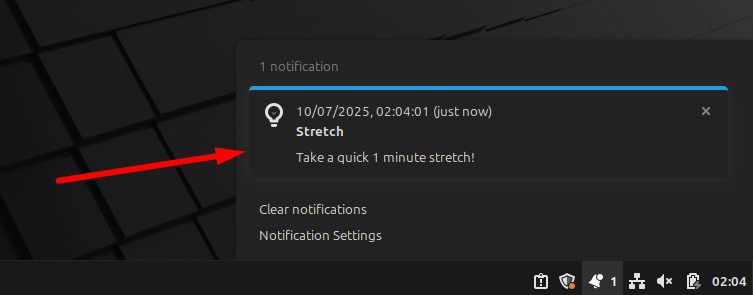
5. Schedule Reminders and Notifications
Your Linux terminal can act as your personal assistant by scheduling reminders and notifications right when you need them. For example, the at command lets you schedule one-time reminders for a specific time in the future. Before using it, you may need to install and enable it with the following commands:
sudo apt install at
sudo systemctl enable --now atd
Once that’s done, you can set a reminder like this:
echo 'notify-send "Stretch" "Take a quick 5-minute stretch!"' | at now + 5 minutes
In exactly five minutes, a desktop notification will pop up. Here, notify-send creates the notification while at schedules it. You can also set reminders for specific times, such as at 10:00 AM tomorrow or at noon July 4.
For recurring reminders, you can use cron instead. Open your crontab with crontab -e and add a line like this:
0 9 * * 1-5 notify-send "Daily standup in 15 minutes!"This will display a notification every weekday at 9:00 AM. The five fields in the cron syntax represent the minute, hour, day, month, and day of the week.
If you just need a quick one-time reminder without using at or cron, you can use a simple trick with the sleep command:
(sleep 3600 && notify-send "Break time" "Get up and walk for 5 minutes") &Note: Keep in mind that notify-send works through your desktop’s notification system, so if you’re not in a graphical session, you might need to set the DISPLAY variable or use other methods like email, SMS, or logging.
6. Preview Markdown Files in the Terminal
If you work with documentation, READMEs, or notes, you’ve probably encountered Markdown. You can preview how it looks right in the terminal using various Linux command-line tools without opening a browser or separate application.
Glow is a fantastic tool that renders Markdown files with proper formatting, including tables, code blocks, and even some styling.
You can usually grab the latest release from its GitHub page or install through the Snap package manager:
sudo snap install glowOnce installed, using it is simple. Just point it at a Markdown file:
glow README.mdInstead of a wall of plain text with asterisks and hash symbols, you get a beautifully formatted document.
7. Record and Share Terminal Sessions for Tutorials
Sometimes we need to record terminal sessions for various reasons, like demonstrating complex commands or procedures to friends or colleagues. In either case, Linux provides multiple tools to record your terminal sessions and share them easily.
Asciinema is arguably the best tool for recording terminal sessions. Unlike simple screen recording, it captures the actual text and timing data, resulting in crisp, high-quality replays that are easily embeddable on web pages.
Installation is simple on most distributions. On Debian/Ubuntu, use:
sudo apt install asciinemaOn Fedora/CentOS, use:
sudo dnf install asciinemaAfter installation, starting a recording is as easy as:
asciinema rec mysession.castWhen you’re finished, simply type exit or press Ctrl + D. You can then play back the recording locally:
asciinema play mysession.castYou can also upload your session to the Asciinema server directly from your terminal:
asciinema upload mysession.castThis gives you a URL you can share with anyone, who can then view your terminal session in their browser with perfect clarity. Further, if you want to turn your terminal into a shareable webpage, then try ttyd command line tool.
Final Thoughts
By bringing tasks like translation, file conversion, and even QR code generation into the command line, you start using the terminal to its full potential. Furthermore, if you want some GUI tools that can replace your terminal commands, check out this guide.


