Integrating Docker into Visual Studio Code makes development easier and more efficient. You can quickly create Docker files, explore containers and images in a visual panel, and switch to logs or terminals with a single click. In this article, we will explore how to set up Docker in VS Code with the Docker extension.
Installing the Docker Extension in VS Code
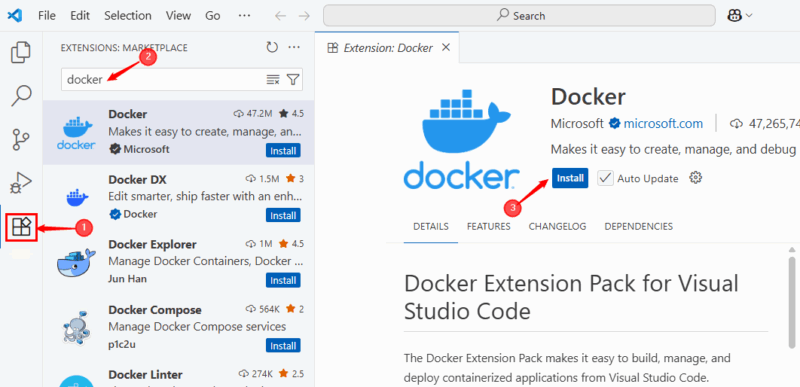
Before installing the Docker extension, ensure that Docker and Visual Studio Code are already set up on your system. Open the Extensions view in Visual Studio Code, search for Docker, and install the official Docker extension by Microsoft.
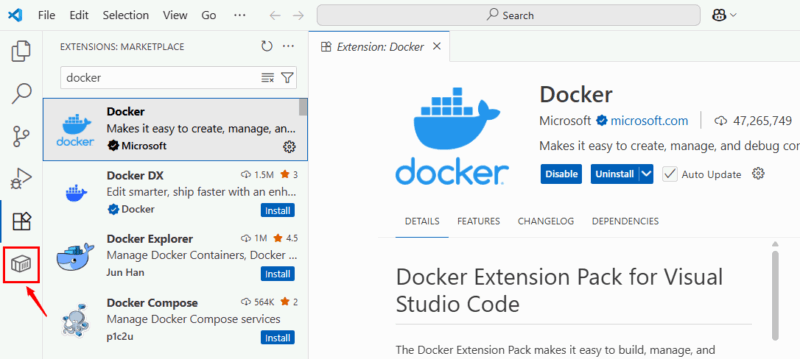
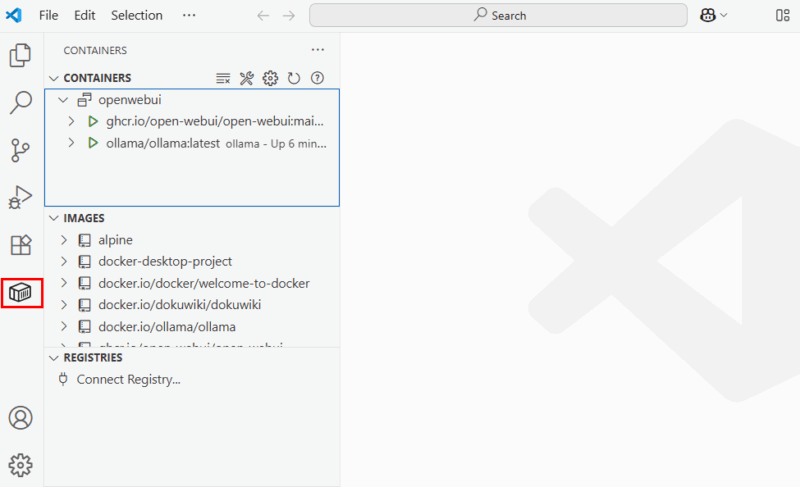
After the installation completes, you’ll see a Docker/Containers logo appear in the lower-left corner of the editor, which serves as the Docker Explorer.
Connecting Docker Desktop to VS Code
When Docker Desktop is running, VS Code automatically connects through the Docker extension. You don’t need extra setup unless Docker requires special configuration (like remote hosts or WSL integration).
To confirm the connection, click the Docker/Containers icon to open the Docker Explorer. From here, you can check your running and stopped containers, as well as view images, registries, volumes, and networks.
Managing Containers, Images, and Volumes from VS Code
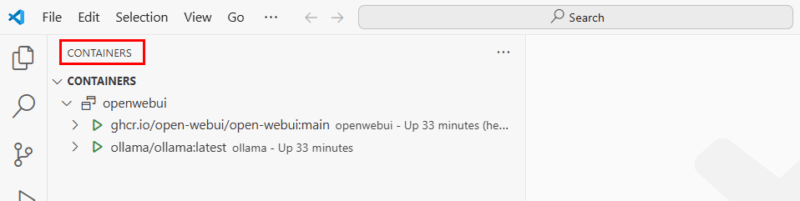
Once Docker is properly integrated, you can manage most container tasks directly from VS Code. For instance, you can view running and stopped containers in the CONTAINERS section.
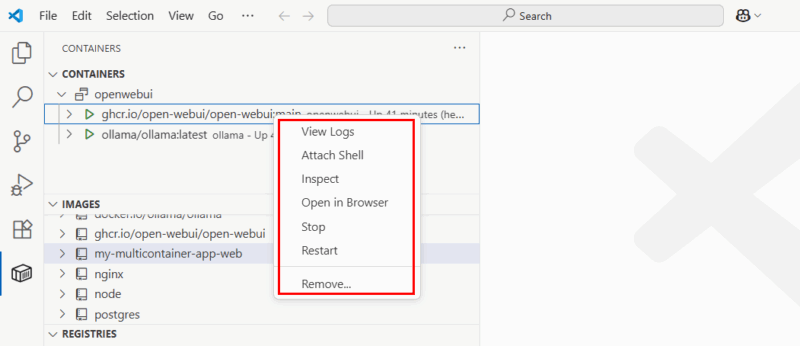
Moreover, you can right-click on a specific container to start, stop, restart, or remove it.
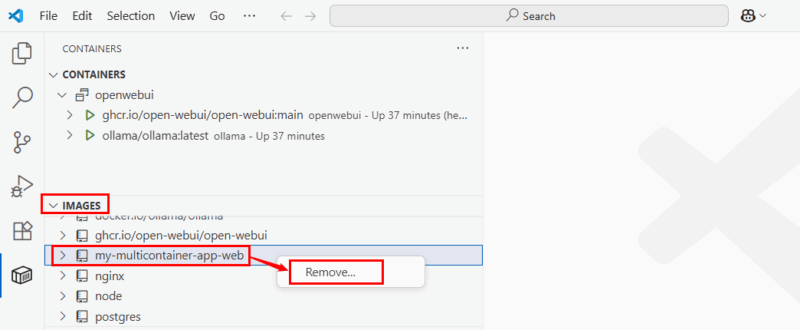
You can also pull images, build new ones, or clean up unused images. For example, to remove an unused image, I can simply right-click on it and select Remove to delete it immediately.
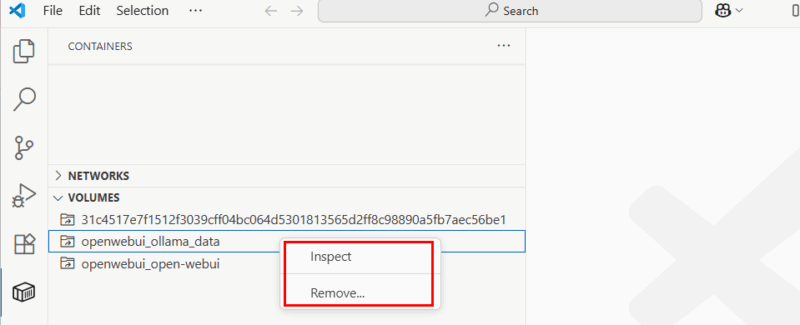
Apart from that, you can right-click on a specific volume linked to your containers to inspect or manage it.
You can also explore and manage container networks, registries, Docker contexts, and even access the help and feedback section to simplify your workflow.
Build and Run a Containerized App in VS Code
Let’s build a simple Node.js Express app to try out the extension. To do this, first, create a new folder in VS Code for your project, then a file named “index.js”, and add the following code in that file:
const express = require("express");
const server = express();
const PORT = 4000;

server.get("/", (req, res) => {
  res.send("Welcome to our Express app!");
});

server.listen(PORT, () => {
  console.log(`App running on port ${PORT}`);
});
This code creates a small Express app that runs on port 4000. When you open the root URL (/), it shows the message “Welcome to our Express app!“. It’s just a basic setup for Dockerfile testing.
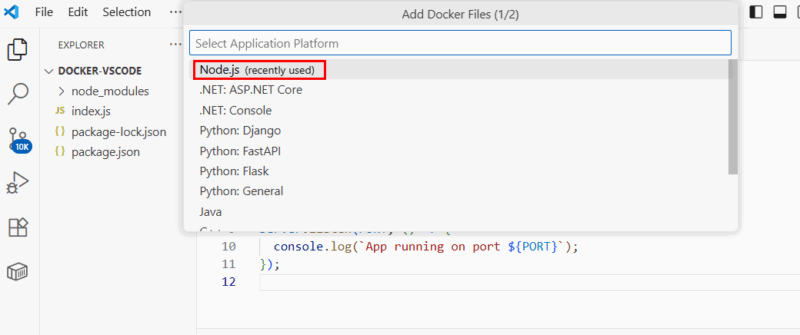
Next, you need to add a Docker file. Normally, adding Docker means creating a Dockerfile, writing the instructions, building an image from the terminal, and then running it manually. With the Docker extension, VS Code can generate these files for you. To do this, open the Command Palette (⇧⌘P on Mac or Ctrl + Shift + P on Windows) and type the command Add Docker files to Workspace.

Select Node.js as your application platform.
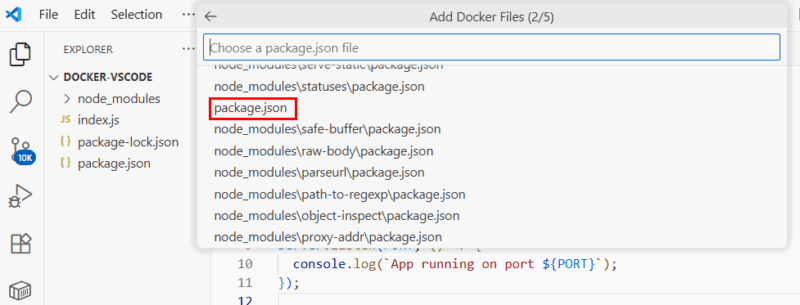
Select the “package.json” file located in your project root (the same folder as your index.js file). This is the main configuration file for your app, and the Docker extension will use it to generate the necessary Dockerfile and other related files.
Specify the port your app runs on for Docker to expose it.

Select Yes to include the Docker Compose file.

The Docker extension will generate a Dockerfile, a “.dockerignore” file, and optionally a “compose.yaml” file if you choose it.
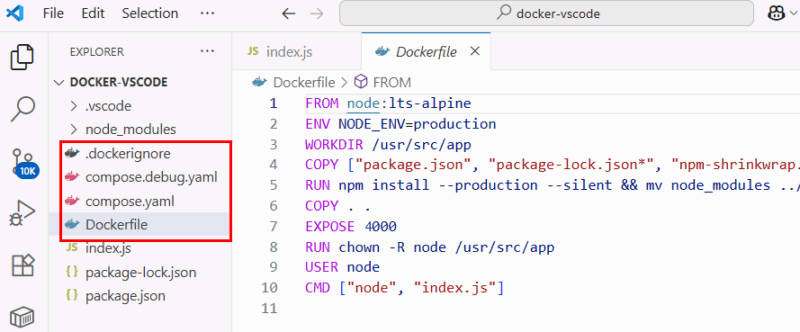
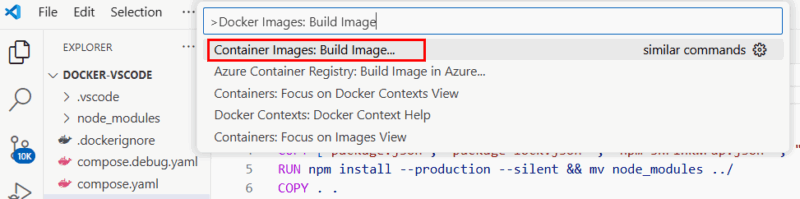
Finally, to build a Docker image, right-click the Dockerfile and select Build Image or run Docker Images: Build Image in the Command Palette.

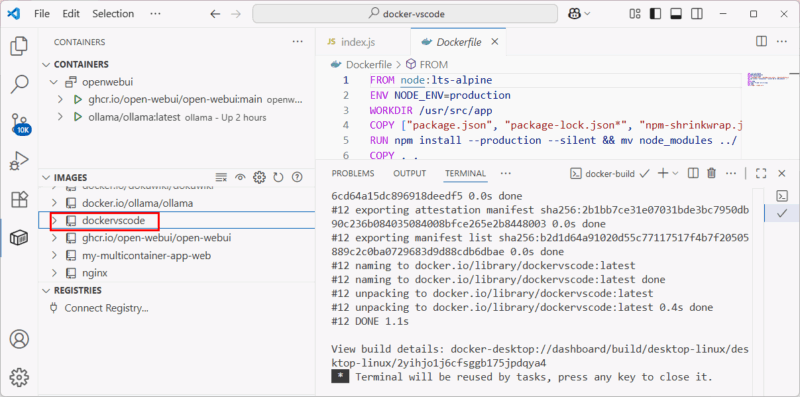
Next, go to the Images section in Docker Explorer to see your newly added project:
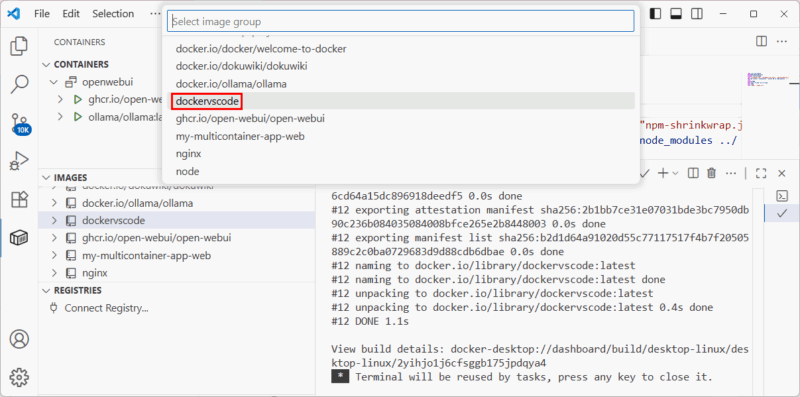
Now, open the Command Palette, execute the command container images: run or right-click on your image and select Run.

From the list of images, choose your latest image.
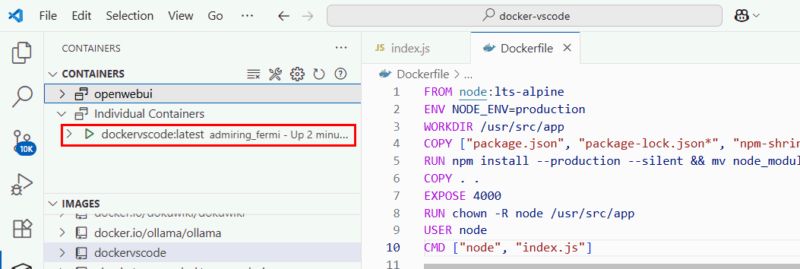
And finally, you can confirm it’s running by checking the Containers section in Docker Explorer.
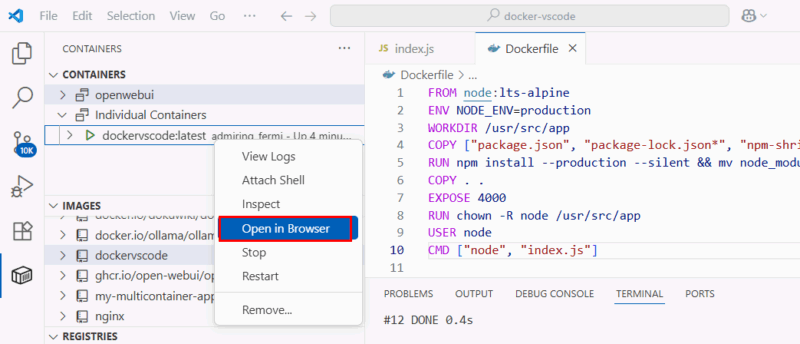
To see your app in action, right-click the running container in Docker Explorer and choose Open in Browser.
From the output, you can see that the container is running and our app is accessible through the specified port.

Wrapping Up
Integrating Docker into VS Code streamlines your development by enabling you to build, run, and manage containers directly within your editor. Once set up, you can easily create Docker files, explore containers and images, and access logs or terminals with a single click. It simplifies running and testing applications and keeps your workflow organized and efficient.