Sharing files across local devices should be simple, but in Windows 11, it often isn’t. By default, Microsoft enabled password-protected sharing, forcing you to enter login details every time you connect. Although secure, it’s inconvenient, especially at home. Here, we’ll guide you through how to turn off password-protected sharing in Windows 11 and discuss whether it’s worth doing so.
What Password-Protected Sharing Means
Password-protected sharing is Windows 11’s default security guard. It requires anyone accessing your shared files, folders, or printers to enter a username and password.
It’s a smart default if you’re on public, office, or shared networks, but on a home network, it feels like overkill.
I’ve seen plenty of users, including myself, disable it just to make quick transfers easier. However, that convenience makes you lose a layer of protection. Once disabled, anyone connected to the same network can get into your shared files.
If you’re interested in shutting down access in other ways, you can password-protect folders or even set up disk-level protection through the UEFI BIOS.
Turning Off Password-Protected Sharing
Windows 11 doesn’t make this setting obvious, since it would rather you use OneDrive or cloud-based sharing. In fact, it still hides behind the legacy Control Panel and Registry Editor rather than the Settings app. So, here’s how to do it.
Using the Control Panel
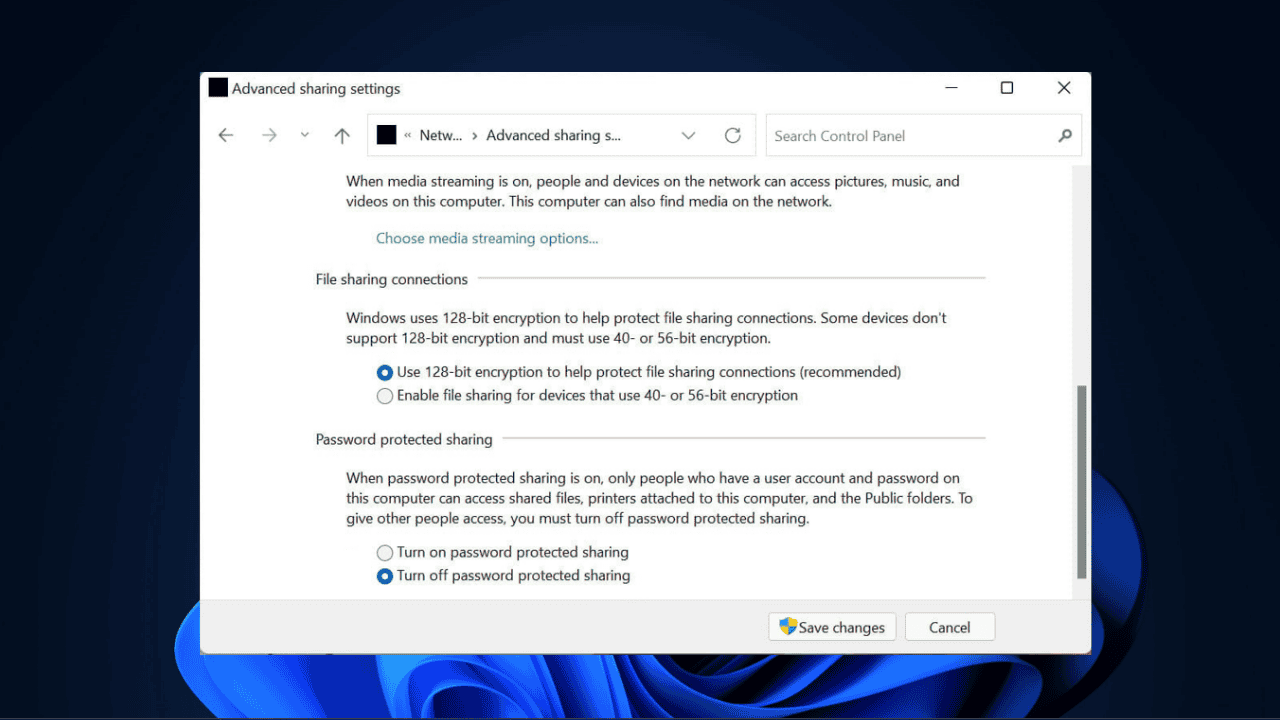
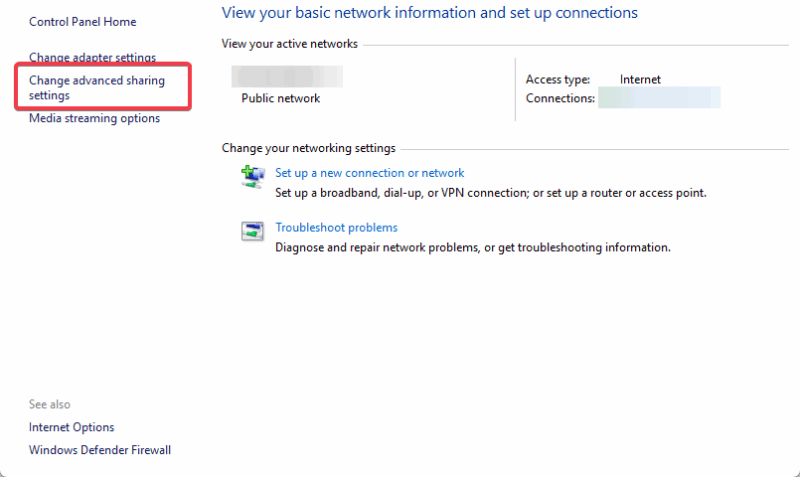
Open the Control Panel by searching for it in the Start menu. Then head to Network and Internet -> Network and Sharing Center -> Change advanced sharing settings.
Scroll to the All Networks section, find Password-protected sharing, and select Turn off password-protected sharing. Hit Save changes.
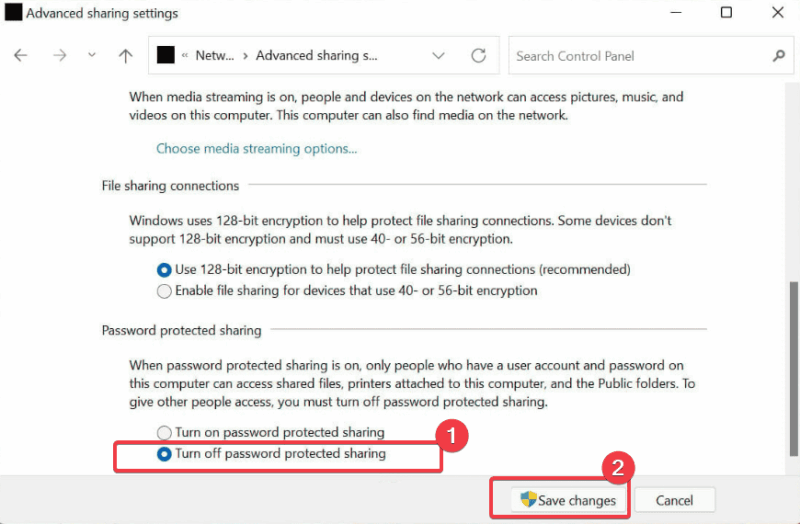
Note: You’ll need admin rights, so make sure you’re logged in as one.
I’ve used this method on my PC, and it’s a breeze, though Windows 11’s Control Panel feels like a relic compared to the Settings app.
Using the Registry Editor
If your settings keep reverting or you just want to permanently turn off password-protected sharing, you can use the following registry tweak.
Note: Ensure that you back up your Registry before tweaking it.
Press Windows + R, type regedit, and hit Enter.
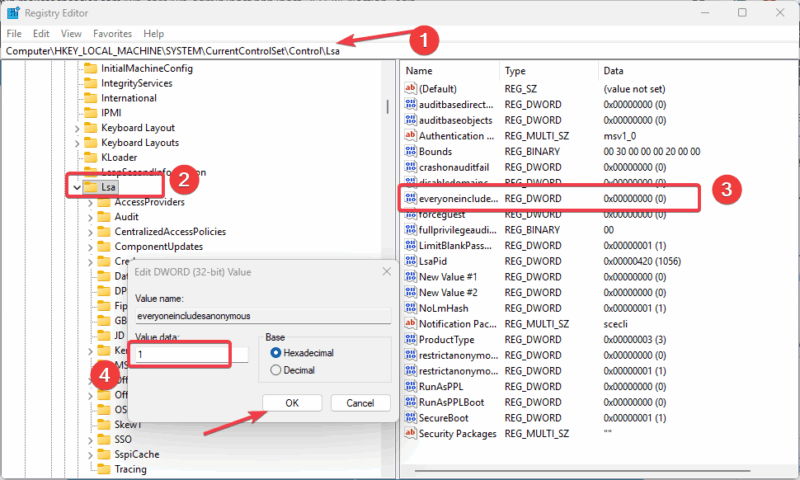
Navigate to
HKEY_LOCAL_MACHINE\SYSTEM\CurrentControlSet\Control\Lsaand set the value data of everyoneincludeanonymous to 1.
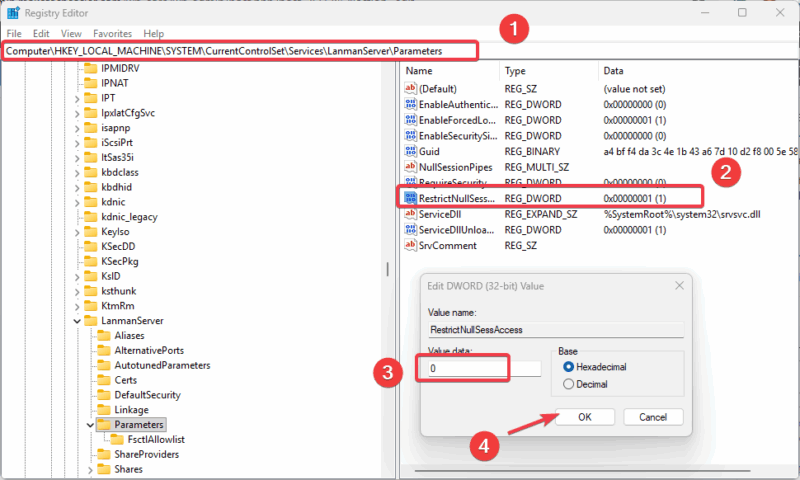
Next, go to
HKEY_LOCAL_MACHINE\SYSTEM\CurrentControlSet\Services\LanmanServer\Parameters and set restrictnullsessaccess to 0.
Risks of Turning It Off
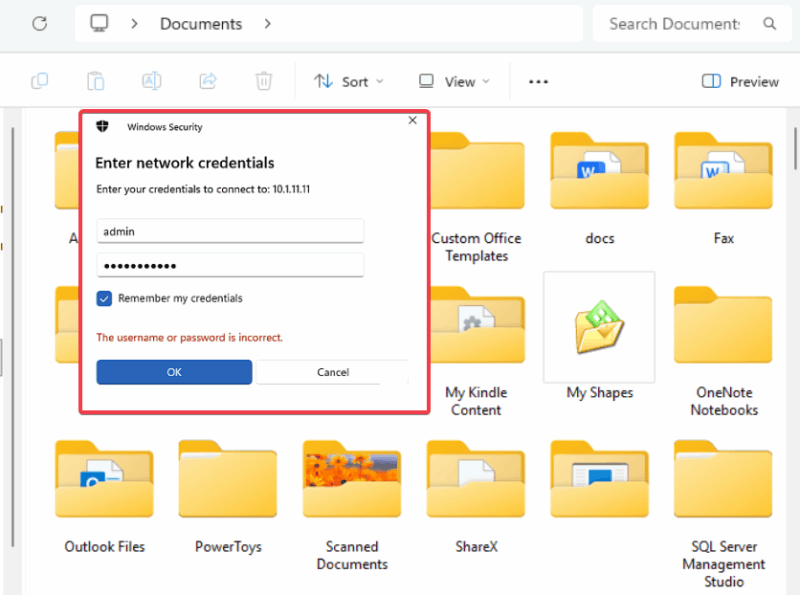
Turning off password-protected sharing in Windows 11 is convenient but risky. Once disabled, malware in the network could exploit open shares. Without credentials, anyone on your Wi-Fi can also access your shared folders.
I’ve seen friends cheer this tweak, only to find their neighbor’s laptop browsing their shared music folder because their Wi-Fi wasn’t locked down.
On a trusted home network, that might not bother you. But if your Wi-Fi is set to public, you’re basically leaving the door unlocked for data leaks. Microsoft set this on for a reason.
For stronger protection without relying on this feature, check out other hidden Windows security features.
Smarter Alternatives for Sharing Files
Before you switch off password protection, consider safer ways to share:
- You can create a guest account with limited permissions for shared access.
- Another alternative is to use OneDrive or Google Drive for quick file transfers. They are integrated into Windows 11 and are more secure.
- For cross-platform sharing, like with a Mac, you can set up folder-level protection. See how to password-protect folders on a Mac here.
The reality is that local network sharing hasn’t aged well. Microsoft hasn’t modernized it because the company assumes most users will use the cloud options instead.
Turning off password-protected sharing in Windows 11 does make things easier on a private home network. But it’s not without risks. Personally, I only disable it when I need quick file transfers, and re-enable it afterward. If you’ve tried these tweaks, share your thoughts in the comments below.


