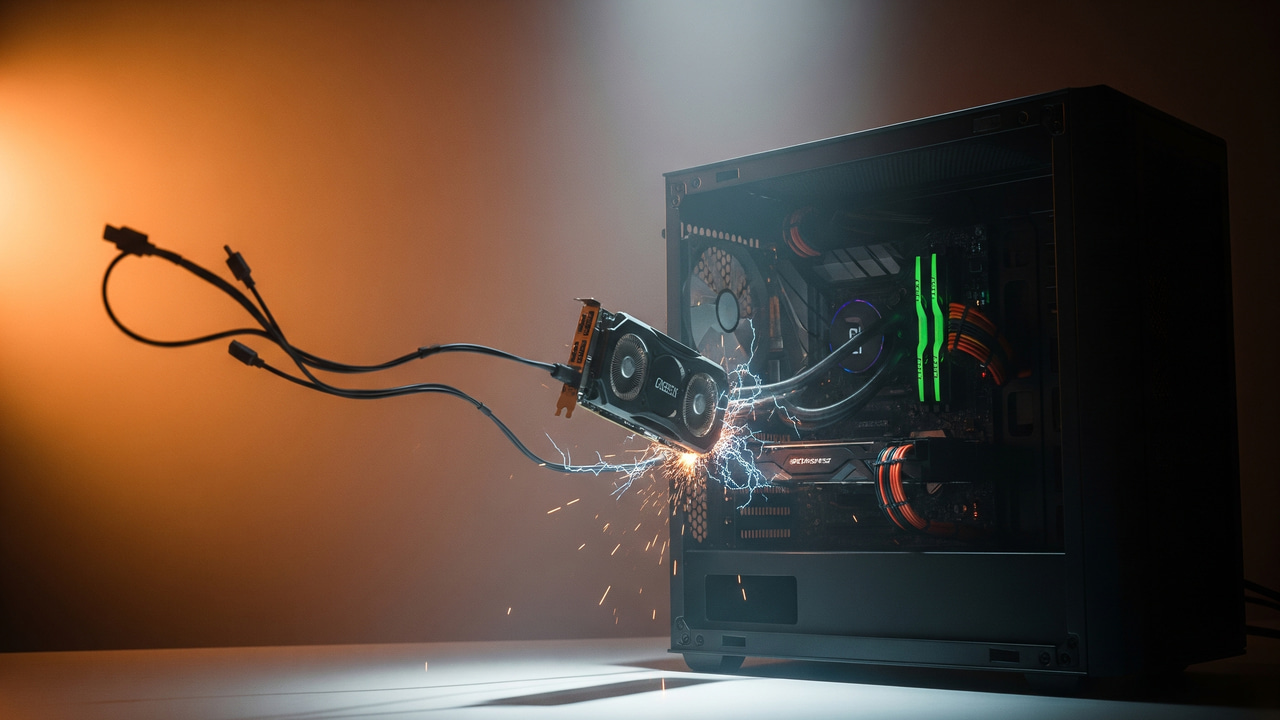
Unlike the USB disk, the graphic card doesn’t have to be removed from the PC, that is why it can be confusing when Windows shows a message to eject your GPU. Imagining your graphics card ejecting out of its slot like a pilot ejecting from a jet is quite unsettling. In this guide, we’ll explain why Windows lists your GPU as a removable device and show you how to prevent it from doing so.
What is the “Eject GPU” Option in Windows
This option appears when Windows mistakenly treats the PC GPU as a removable device. It’s actually a real option for external GPU enclosures or for hot plug enabled slots. The problem occurs when Windows starts treating your normal PCIe lane or soldered GPU as removable.
This bug often appears in dual-GPU laptops and prebuilt PCs with eGPU support or PCs with a BIOS that has a hot plug option. Since Windows device manager relies on information from the device’s ACPI firmware, it can mistake a hot-swappable device for a removable device, similar to a USB.
This option isn’t a glitch; it actually works, and you shouldn’t click it. If you click on it, one of the following scenarios will happen depending on your PC configuration:
- Display will turn off, and you’ll hear the device disconnection sound. After a delay, it will turn back on.
- Your dedicated GPU will turn off, and the PC will work on the integrated GPU. A restart will be required if you need to run heavier programs.
- Your screen will go black and won’t recover until you restart the PC.
If you don’t want to risk accidentally ejecting your GPU, it is best to disable this option.
Disable PCIe Hot Plug in BIOS
Most PCs showing this option will also have a hot plug or hot swap option in BIOS that you can disable to get rid of this option completely. If you don’t use an external device like an eGPU or other external PCIe peripherals, then you can safely disable this option in the BIOS.
Enter BIOS/UEFI, and look for the Advanced options. Here, you need to look for PCIe configuration, which should be under the Onboard Devices or Chipset section. You’ll find entries for PCIe Slot Hot Plug (or Hot Swap), either to manage slots individually or apply changes to all slots. If the slots are individually listed, then disable the option for the GPU; otherwise, disable the Hot Plug option completely.
In the future, if you ever use a hot-swappable device with your PC, you’ll have to restart the PC to detect it.
Use a Registry Hack
You can also use a Windows Registry hack to prevent Windows from treating your GPU as a removable device. Since Windows uses the PCI removal policy status to show the eject GPU option, you can set the GPU as a permanent hardware device to prevent showing this option.
Note: back up the Registry before making any changes, as incorrect changes can cause system corruption, data loss, and other malfunctions.
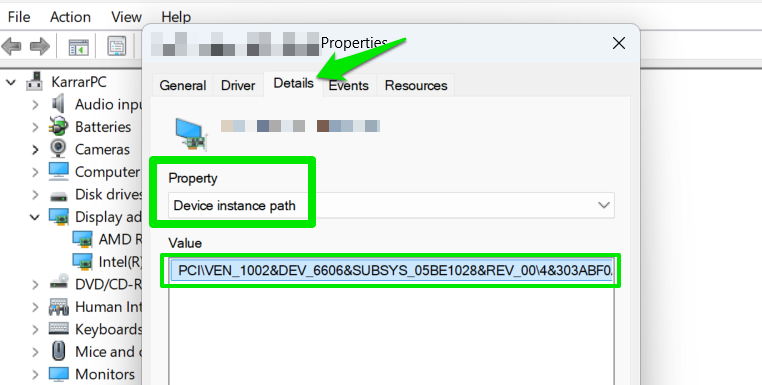
First, you need to get your GPU device instance ID. Search “device manager” in Windows Search and open the Device Manager. Here, right-click on your GPU and select Properties. Move to the Details tab, select Device instance path under Property, and take a note of the value.
Afterward, open Windows Registry using the Search bar and move to the following location.
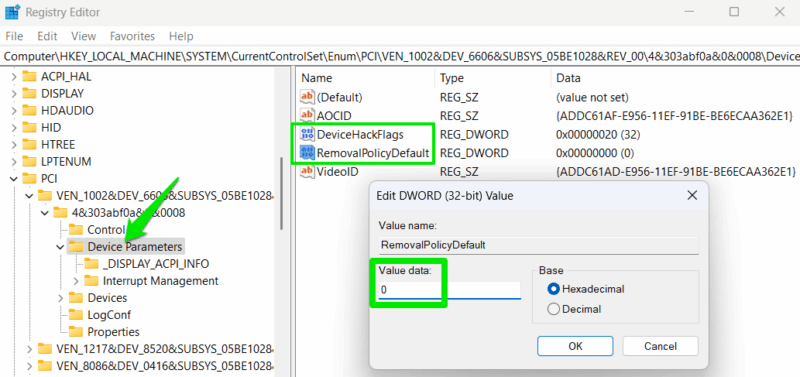
HKEY_LOCAL_MACHINE\SYSTEM\CurrentControlSet\Enum\PCIUnder the PCI key, open your GPU’s device instance ID we noted above and select Device Parameters under it.
Now in the right panel, right-click and select New → DWORD (32-bit) Value. Name this value RemovalPolicyDefault, double-click on it, and set its value to 0. Repeat the same steps to create another DWORD value, name it DeviceHackFlags, and set its value to 20.
Restart the PC for changes to take effect. This will prevent hot-swaps on that specific PCIe port.
Users with an Nvidia GPU can also modify an alternative Registry key for the same results. Go to the following location in the Registry:
HKEY_LOCAL_MACHINE\SYSTEM\CurrentControlSet\Services\nvlddmkmHere in the right panel, set the value of SurpriseRemovalSupport to 0. If it’s not there, you can create a new DWORD value and name it SurpriseRemovalSupport.
While Windows has many annoyances, this particular issue is mainly a bug caused by how specialized setups handle hot plugs and provide the information to Windows. Due to it affecting users with specific devices and it’s not entirely Windows’ fault, it’s unlikely that any new Windows updates will bring a fix for it.


