We’ve explored using Task Scheduler to launch programs or scripts, but did you know you can delay their execution? This feature is super useful for postponing non-essential tasks, ensuring network connectivity before a task starts, running tasks in a specific order, scheduling updates, or performing hardware maintenance. Let’s find out how you can delay scheduled tasks in Task Scheduler.
Start Scheduled Tasks with Delay Using Task Scheduler
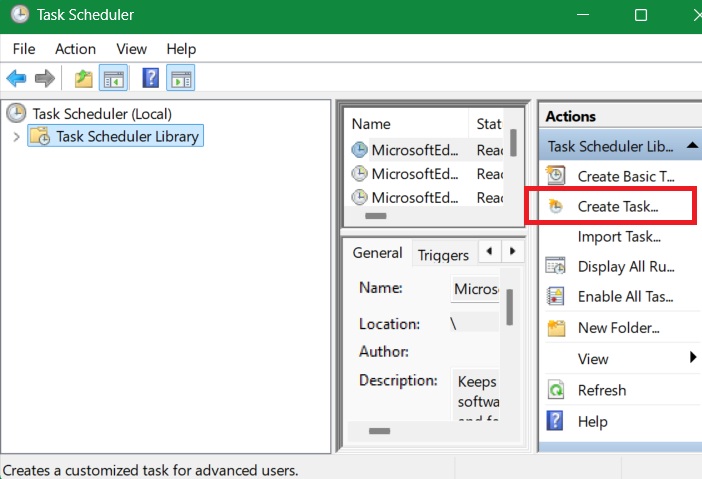
Open Task Scheduler using any of these methods. To delay any startup program or other system processes, do the following:
Select Task Scheduler Library on the left panel, and click on the Create Task option appearing on the right panel.
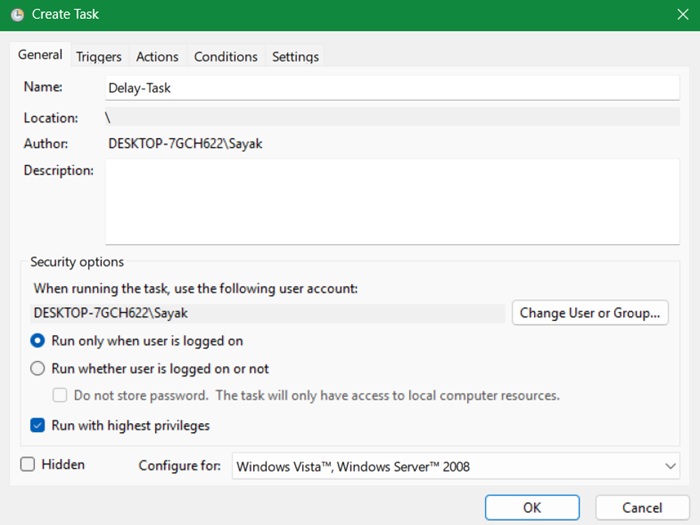
In the General tab, enter a proper Name and Description. If the task needs administrative privileges, select the checkbox Run with highest privileges.
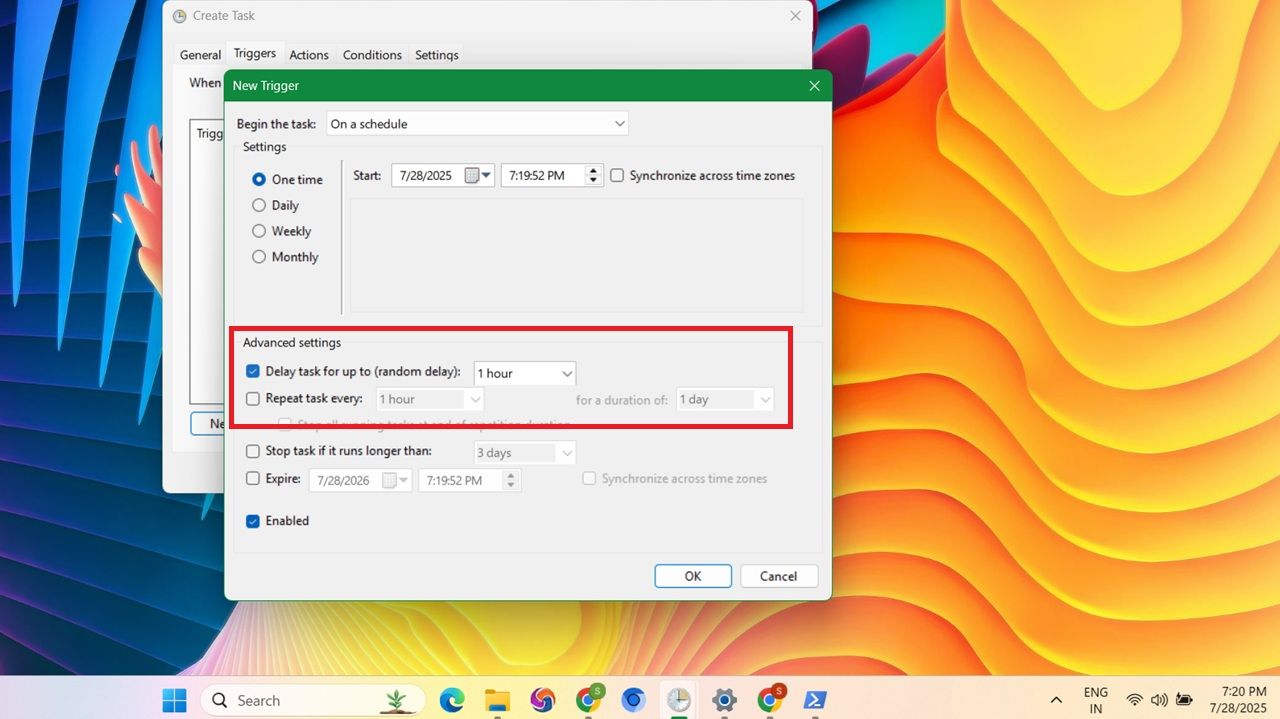
Don’t click OK right away. Instead, go to the Triggers tab and click New.
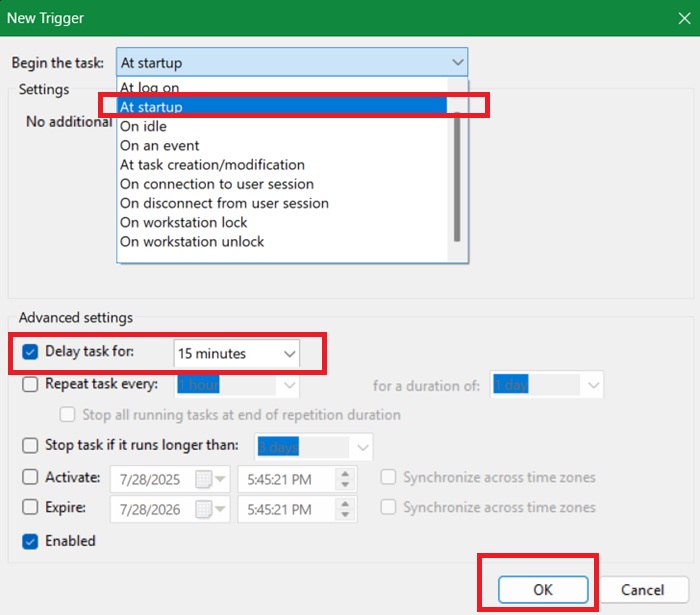
Select a trigger from the dropdown menu. Since I want to start a program with delayed startup, I’m selecting the At Startup option. You can select any other trigger you want. The delay functionality is available for all triggers except on idle.
After selecting the trigger, select the checkbox Delay task for, and select the number of minutes from the dropdown menu. In my case, I’m delaying the program launch for 15 minutes after starting the system. Click OK to continue.
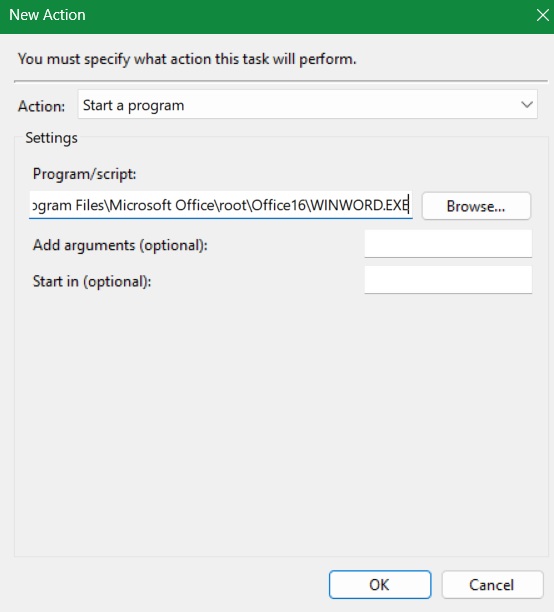
Go to the Actions tab. Click New to open a New Action window. Select an action. In my case, that is Start a Program. Select a program by clicking on the Browse button.
In this example, I have chosen to open the Word application. For this, I had to locate its source file, right-click to view its Properties, and copy-paste the entire path into the Program/script area. But you can also manually browse for any programs in your PC folders.
If the program needs any additional arguments, you can enter them in the Add Arguments field. Click OK to continue.
Note: if there are no arguments, another pop-up window will make you confirm that you want to have it that way.
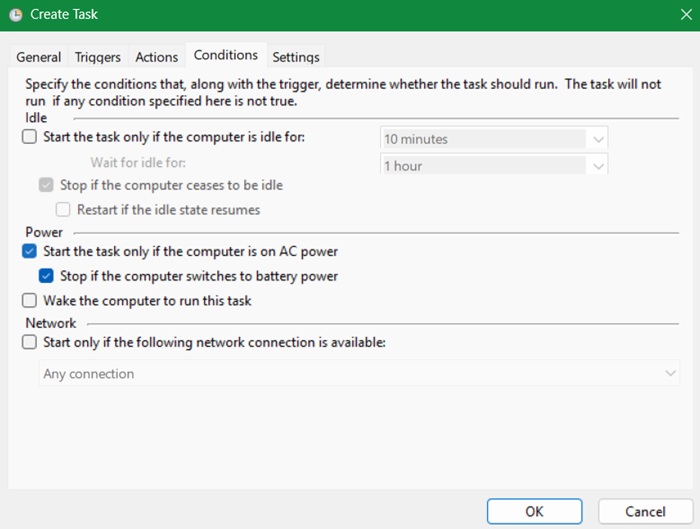
(Optional) If you are on a laptop, you might want to make the task start only when using AC power. If that’s the case, go to the Conditions tab and select the checkbox Start the task only if the computer is on AC power.
You can leave the Settings tab as is. Click the OK button to complete the task creation process.
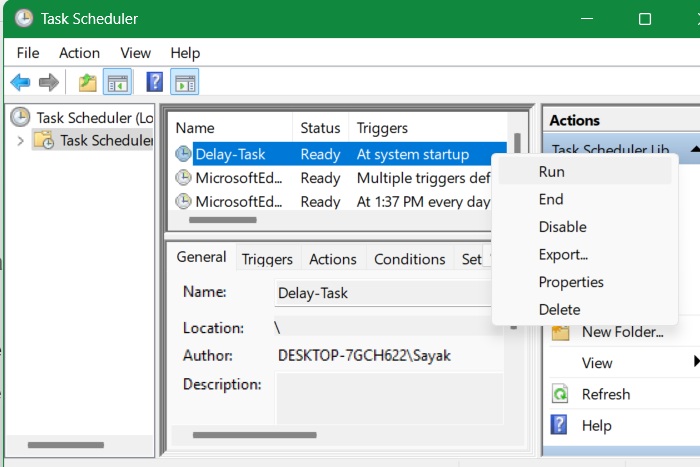
Finally, to verify if the task runs properly, right-click on it in the main window and select the option Run. If there are no errors, the task should run instantly. You can edit the task’s triggers and actions anytime using Properties.
From this point on, the task you just set will run with a delay according to your settings. Since I chose to delay the task at startup, it will run fifteen minutes after starting up the system.
Related: is your Task Scheduler not working in Windows? We have the fixes.
Use Group Policy to Delay the Start of Scheduled Tasks (Multiple Machines)
This is a useful method for network administrators who wish to push out common startup applications (with delay) to all the PCs under their control.
Using Group Policy to start scheduled tasks with a delay on Windows is an effective method for managing tasks across multiple PCs. Of course, it requires a Windows Pro/Enterprise access.
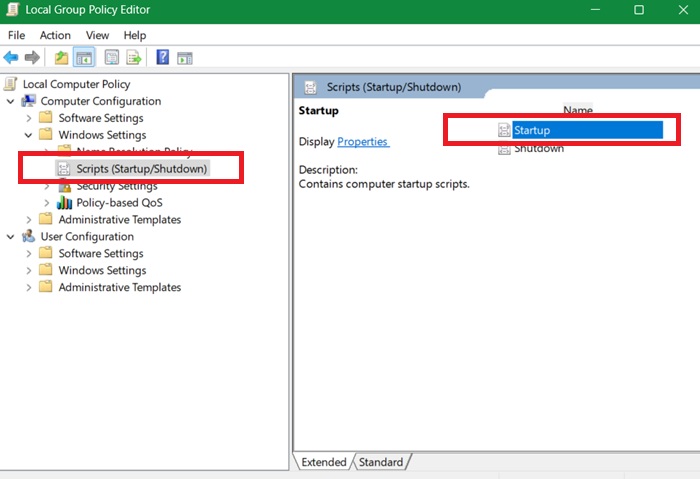
Open the Local Group Policy Manager using gpedit.msc in Run command, Win + R. Go to Computer Configuration -> Windows Settings -> Scripts (Startup/Shutdown).
Double-click the Startup script to your right. It will open a new window.
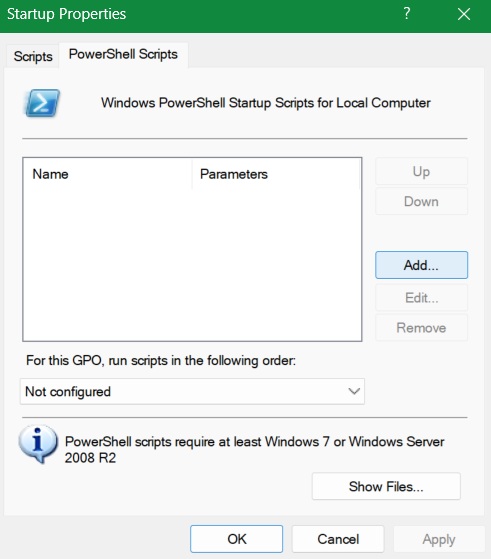
In the Startup Properties window, go to PowerShell Scripts tab. Here, click Add to have a new dialog box where you can add a preconfigured script.
We will show a simple example of how such a PowerShell script can be run. Open Notepad in administrator mode, and type the following to open the Notepad application after 5 minutes (300 seconds) of a PC startup. This is just one example. You can use a similar script to open any installed program on PC.
Start-Sleep -Seconds 300; Start-Process "notepad.exe"To work with these scripts, you have to save PowerShell scripts in PS1 format. Click File -> Save as, and give a name followed by the .PS1 extension.
You can test the script on PowerShell window immediately. If you don’t want to run it rightaway, pause the script using Ctrl + C, as shown below. This ensures the script you create doesn’t interfere with your current on-screen activities.

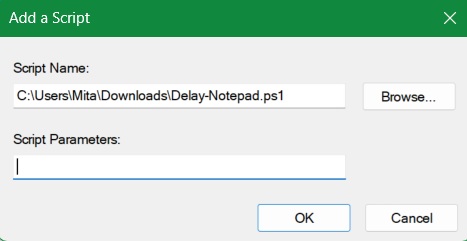
Return to the Local Group Policy Editor. At the next stage, in the Add a Script window, browse for the saved script. In this example, we are reusing the PowerShell script saved above as a “Delay-Notepad” file. Click OK to confirm.
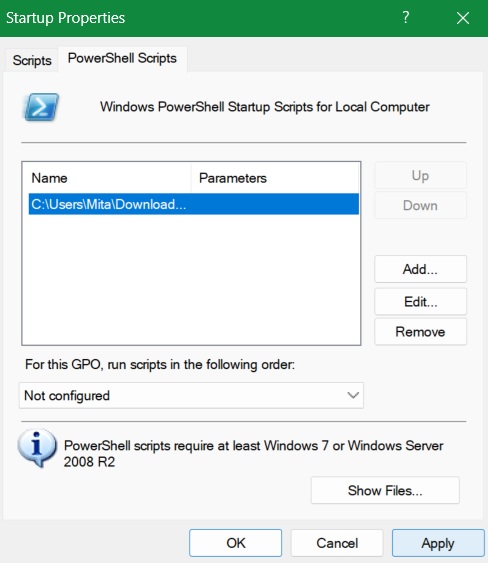
Finally, go back to the original window. Here, the delay startup script has been added. You can Edit or Remove it anytime by clicking the buttons. Click Apply -> OK. If you have multiple PCs under your policy configuration, the delayed startup will be pushed to all of those individual computers.
The ability to delay task execution in Task Scheduler is very useful. I can disable some startup items to improve the startup time. However, I want these programs to start automatically. That’s where having a scheduled delay saves a lot of time.
Now that you’ve learned how to delay scheduled tasks in Windows, you can use it in many admin scenarios, such as scheduling PC maintenance in Device Manager.


