I often play games or run heavy work apps on my laptop away from AC power, so I can’t let battery saver throttle my experience. Because high-performance modes can nearly halve battery life, I use a few tweaks that cut power draw without costing performance. Use the tips below to keep your laptop fast while extending its runtime.
Switch the Default Windows Power Plan When on Battery
By default, Windows uses power efficiency mode on battery, which heavily throttles performance. Before we move to battery-saving tweaks, it’s important to switch to a performance power plan in Windows. In Windows Settings, go to System → Power & battery. Here, under Power Mode, select Balanced or Best Performance next to On battery.
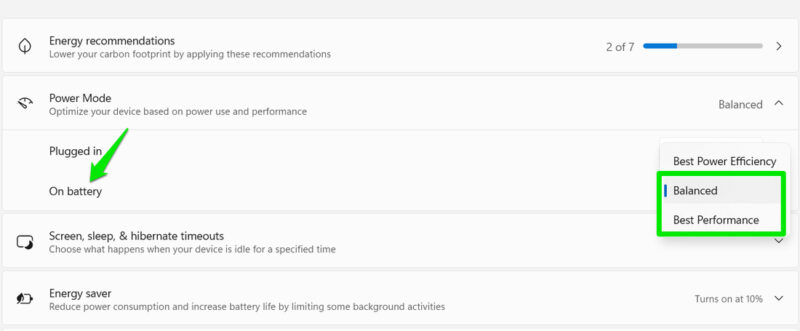
I prefer using the Balanced power plan as it lets my laptop reach higher clock speeds when needed, while still clocking down when idle. If you want better performance, you can choose Best Performance. If your laptop comes with OEM performance apps like Lenovo Vantage or ASUS Armoury Crate, then check its settings as well for performance settings when on battery.
Decrease Screen Brightness
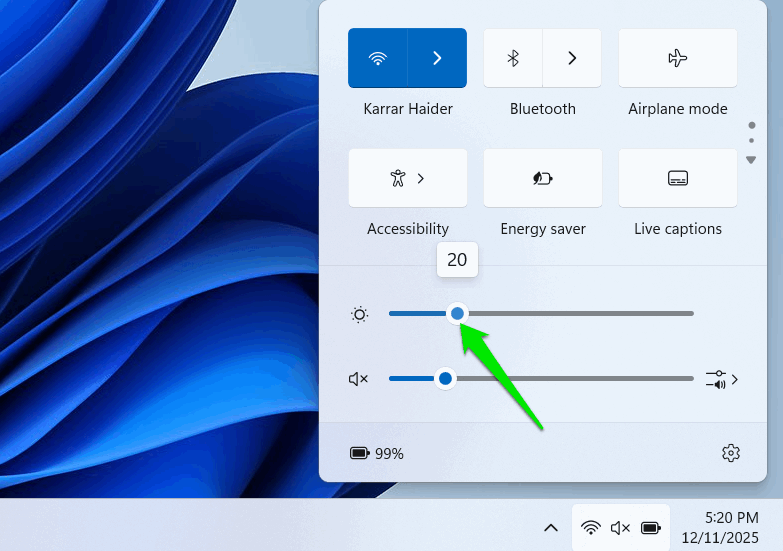
Display is one of the biggest battery-draining components, and its brightness is the main contributor to the power draw. Windows will usually drop brightness to 40% when on battery, to ensure good visibility for an average user. However, you can go even lower for huge battery saving without sacrificing performance.
In most cases, I can drop brightness to 20-30% without noticing any big drawbacks (unless I am in sunlight). In dark environments, even setting it to the lowest is acceptable. You can manually set the brightness lower either by using the Fn key shortcut on the keyboard or inside the quick settings panel on the Windows taskbar.
Force Integrated GPU Wherever Possible
On dual-GPU laptops, the dedicated GPU eats up lots of power even when it’s heavily throttled by limited battery power. You need to make sure it stays idle unless absolutely needed. Windows automatically decides which GPU to use for a specific app; it can prioritize the dedicated GPU for games or heavier tasks, even if it won’t lead to a big improvement in performance.
If a game or heavy app can work fine on an integrated GPU, you should definitely force it to use it, as the iGPU uses far less power than a dedicated GPU. To do so, go to System → Display → Graphics in Windows Settings. Here, use the Add desktop app button to add your app/game. Afterward, select your integrated GPU in the GPU preferences under the app you added.
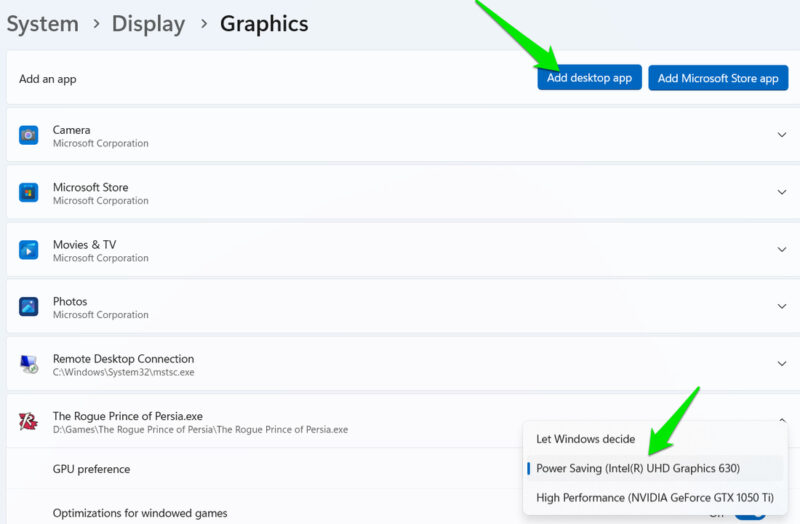
I prefer to experiment by switching to battery power and seeing how both iGPU and dGPU will perform (tracking FPS) for a specific app. If the performance is close or the iGPU offers acceptable FPS, then I switch to the iGPU for that app/game.
Lower Screen Refresh Rate
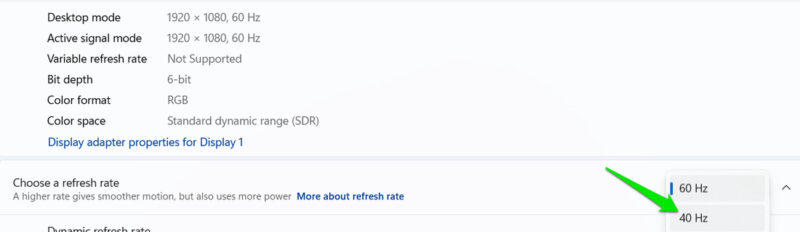
Lowering the Refresh rate is another display-related optimization that greatly affects battery consumption. Refresh rate is the total number of times the screen refreshes per second to display content; the higher the refresh rate, the more power the display needs to work.
On most gaming laptops with high refresh rates – like over 144Hz – you can easily switch to the standard 60Hz refresh rate for huge gains. Even most 60Hz laptop displays allow decreasing the refresh rate to 48Hz or 40Hz. To lower the refresh rate, go to System → Display → Advanced display and change the refresh rate next to Choose a refresh rate option.
This tweak is even useful for laptops with G-Sync or FreeSync support, as it lowers the maximum refresh rate under normal browsing and navigation.
Set Secondary Apps to Power Efficiency Mode
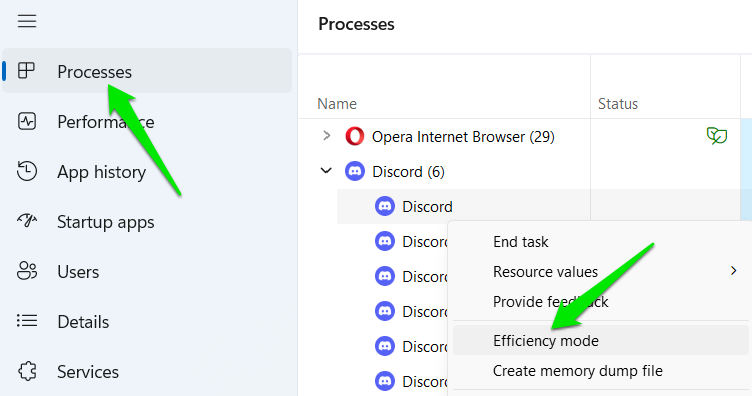
If you have other apps running apart from the main app – like communication or optimization apps – you can set them to Efficiency Mode to save power. In Efficiency Mode, fewer CPU resources are dedicated to the process, which can save battery power. Of course, this also affects app performance, but that’s less of an issue for secondary apps.
Open Task Manager, in Processes, right-click on an app’s process and select Efficiency mode. This needs to be done for every process, and it resets when that process closes.
Undervolt CPU and GPU
Undervolting is one of the best ways to save power without losing performance. While it’s great for demanding tasks, it’s also beneficial when the system is running on battery power. The undervolt limits power based on a curve. This means your laptop will use less power for the same performance, even when running at a lower clock speed due to limited battery power.
I recommend undervolting both the CPU and GPU, but if you don’t want to do both, then the CPU should be your priority. The GPU is heavily limited by battery power anyway, so its impact would be less. Here are the guides to undervolt CPU using Throttlestop and undervolt GPU using MSI Afterburner.
With these tweaks, I can easily squeeze out nearly 20-30 minutes extra while gaming with FPS capped. The gains are even higher when the dedicated GPU stays idle. If your laptop battery can’t meet your demands even after the tweaks, then try these advanced tips to improve battery life.


