What we like
- Light and super portable
- Extremely easy to set up and use
- Offers 15x zoom super
- Responsive and easy-to-use companion mobile app
- Delivers clear images
What we don’t like
- Compatible solely with Android
- Some issues viewing reports
- A bit tricky to hold sometimes
Thermal imaging used to require bulky, expensive gear and was mostly seen in industrial and tactical settings. Today, the technology has trickled down into compact, consumer-friendly devices. The Thermal Master P2 is a perfect example, as it plugs into your smartphone and transforms it into a powerful thermal camera. We put it to the test to see how far portable thermal imaging has come. Here’s what we found.
Design
The Thermal Master P2 is tiny. So tiny, in fact, it fits easily in the palm of your hand. Touted as the second smallest thermal camera available (per the manufacturer), it weighs a mere 0.35 oz. (10g) and measures 1.06” x 0.71” x 0.39” (27mm x 18mm x 9.8mm). It’s light enough to forget you’re even carrying it.

The camera arrives in a tough, little hard case with a handy lanyard loop, perfect for clipping it to your backpack or toolbox. Don’t feel like attaching it? That’s fine too: the case is solid enough to toss in a bag without a second thought. The only downside is that, due to its small size, the camera can be easy to misplace in your backpack or other container.
Features
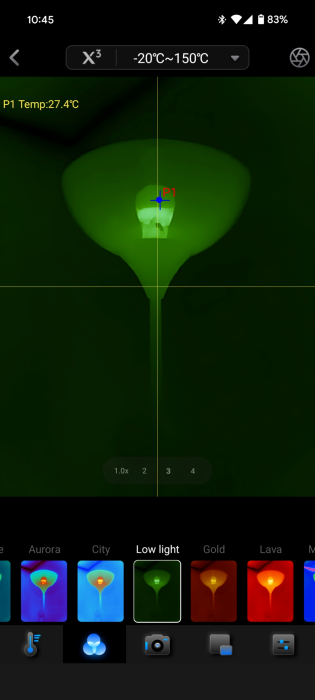
The Thermal Master P2 camera works by plugging into your smartphone though the USB Type-C port. From there, it taps into your device’s power and processing. Users can access up to 15x zoom for thermal imaging, with temperatures ranging from -4ºF to 304ºF with a PCB accuracy of ±34.7F (from -20°C to 150°C with a PCB accuracy of ±1.5°C).
While the Thermal Master P2 doesn’t deliver ultra-high resolution images, its 256 x 192 IR resolution (enhanced to 512 x 384 with Thermal Master’s proprietary Razor X algorithm) proved more than capable in our tests, producing solid and reliable results most of the time.
One excellent feature of the P2 is that it does more than just display heat signatures in the environment you’re scanning – it allows you to highlight a specific area for targeted temperature tracking, from the camera’s mobile companion app (which you need to install independently). This is especially useful in scenarios where, for example, you’re working with heated components, helping you track when they cool to a safe level. You can even set a high temperature alarm for added safety. With four shape options – point, line, box, and circle – you can zero in on temperature readings exactly where you need them.
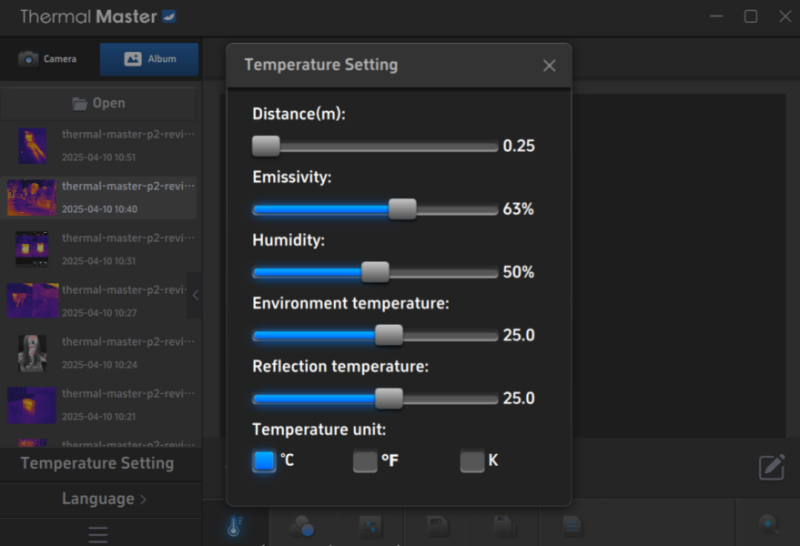
Some professional-grade settings are also included in the app, such as adjusting Emissivity to ensure temperature readings across different environments and surfaces.
Finally, I should note that Thermal Master warns that the camera is highly sensitive to impact, moisture, and magnetic fields, and users should not aim it at extreme heat sources, such as the sun or open flames, to avoid sensor damage.
Getting Started
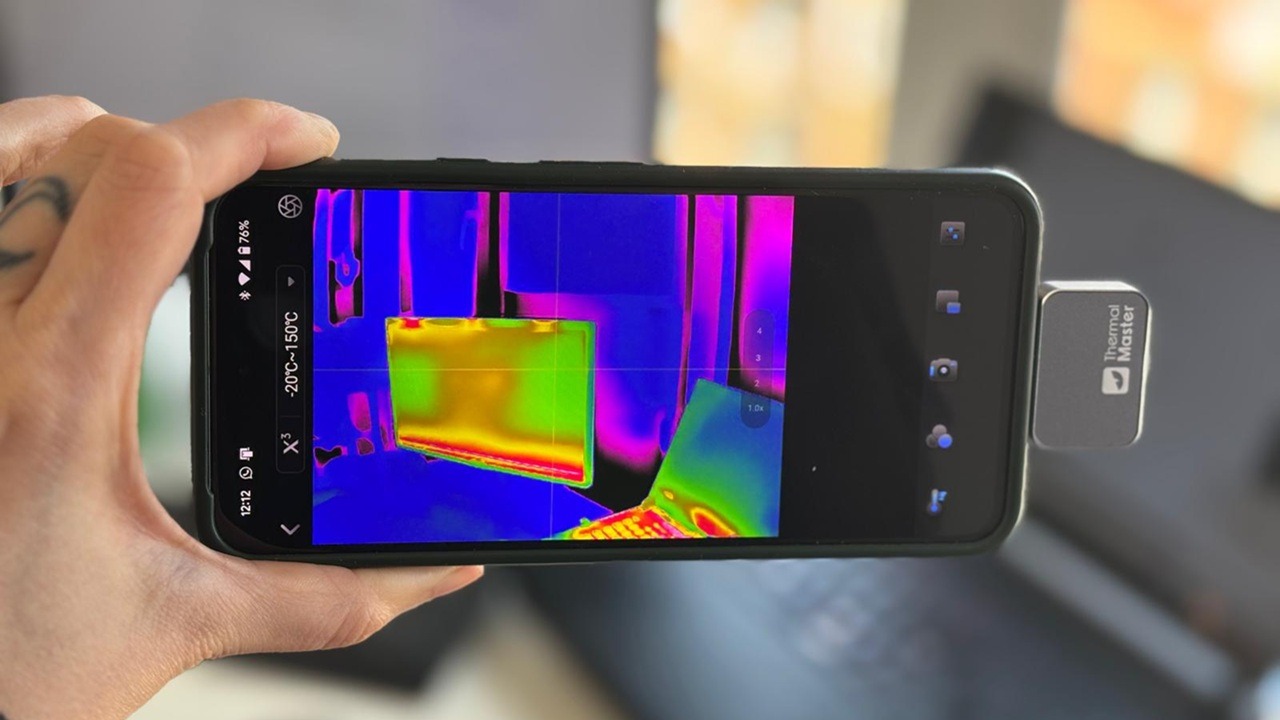
The camera requires the Temp Master app to work. After the installation, you’ll need to connect the camera by plugging it into your Android smartphone via USB Type-C. Attach It front-facing or rear-facing. It fits easily – even with a phone case on.
Note: if you’re using an iPhone, you’ll need the P2 Pro camera version, as the one tested for this review only works with Android.
Setup is nearly instant. Once you plug in the camera, your phone’s display will light up with a live thermal image of whatever the lens is pointed at.
The camera can snap images and record videos. It’s a bit counterintuitive to find the shutter at first, as the option is hidden unnecessarily under the Camera menu at the bottom. However, once you get the gist of it, it works smoothly from there. The results save to the app’s gallery, as well as your phone.
Despite the ease of getting started, I did encounter some difficulties while shooting. My usual way of holding the phone often covered the camera, requiring me to find a new way to grip the phone that left the viewfinder clear. This wasn’t often comfortable to do, but after a few tries I settled for a position that produced satisfactory results.
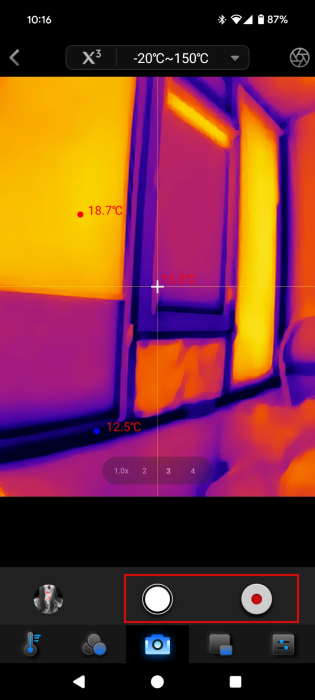
The P2 offers access to 12 color palettes, giving you flexibility to tailor the thermal display to your preferences. Options range from the classic thermal imaging palette Iron Red to alternatives like Aurora, Low Light, and Medical.
Using the Thermal Master P2
So what did I use the Thermal Master P2 for? First off, I scanned my immediate surroundings, meaning my apartment. I conducted a quick test to assess the thermal output of my laptop, revealing several hot spots with elevated temperatures. Interestingly, the modem also exhibited significant heat buildup, but it’s always plugged in.
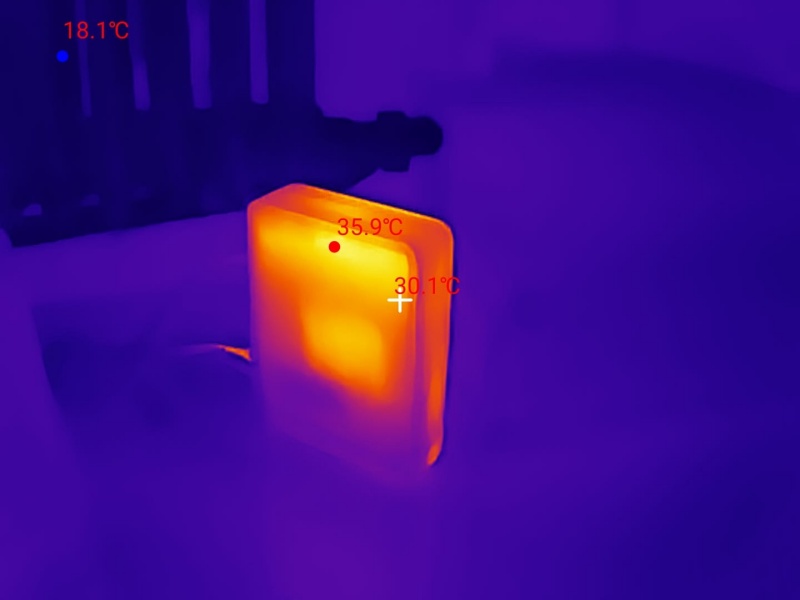
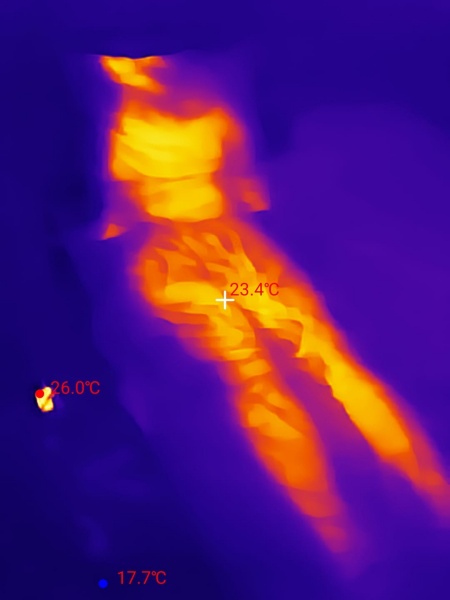
I was also struck by how vividly the heat pipes stood out in the dark during scanning. Moreover, the camera is sensitive enough to capture the residual heat signature of my body after lying in bed.
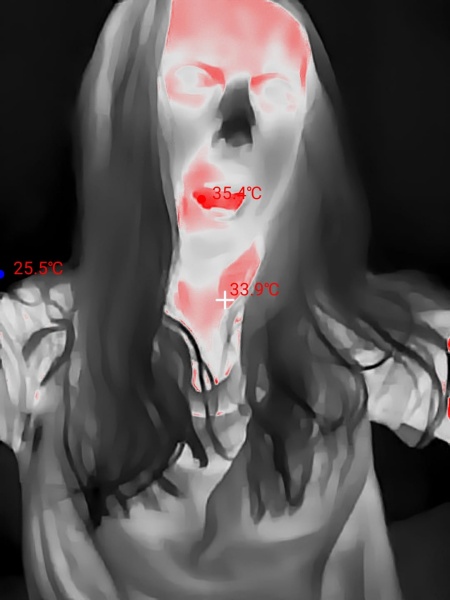
Of course, I had to try a few thermal selfies, as well. They looked delightfully weird, but it made for a fun and quirky experiment.
Scanning outdoors
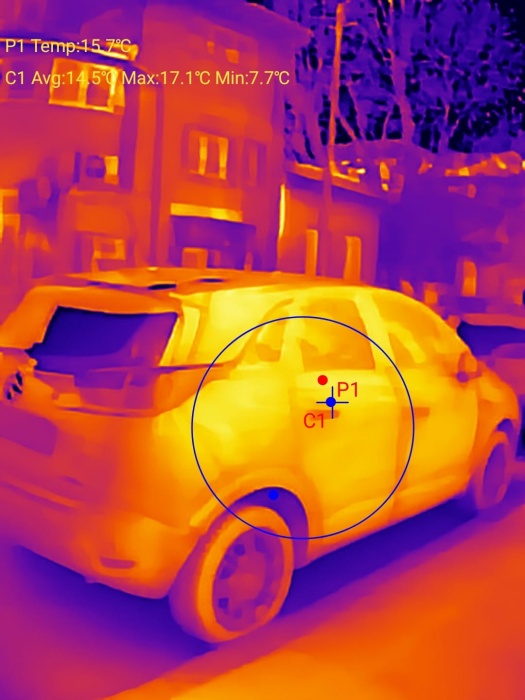
Next up, I took the camera outside to see what it could do. I thought it was pretty cool that it could pick up the heat signatures of all the stray cats living near my apartment building. The zoom feature is handy, but trying to lock onto faster moving targets wasn’t easy. Nevertheless, I think the Thermal Master P2 would make the Thermal Master P2 a great asset for wildlife photographers trying to spot animals hidden in their natural habitats.
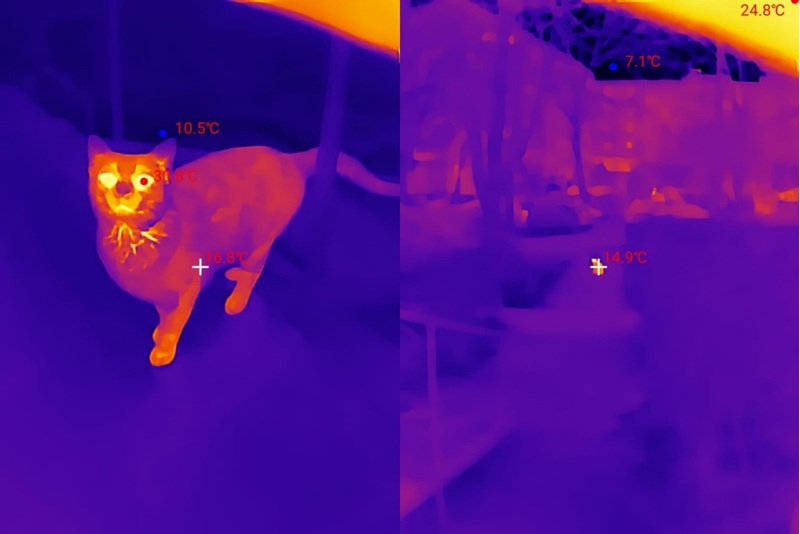
While the camera does pick up heat signatures at a distance quite easily, temperature reads aren’t accurate. You can try zooming in, but in my experience it didn’t help much. You need to get close to your target for an accurate reading.
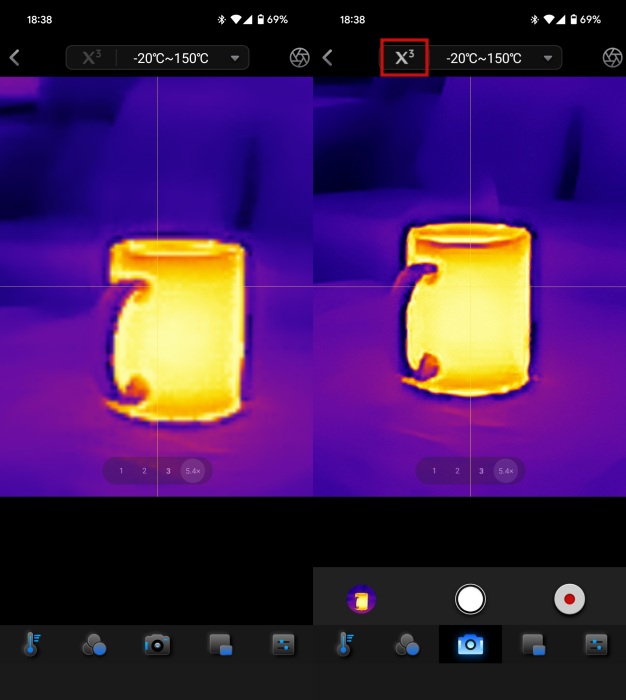
Speaking of zoom, make sure you enable Thermal’s Master Razor X algorithm for improved quality of zoom shots. Without it, close up images are a lot more blurry, as you can see below.
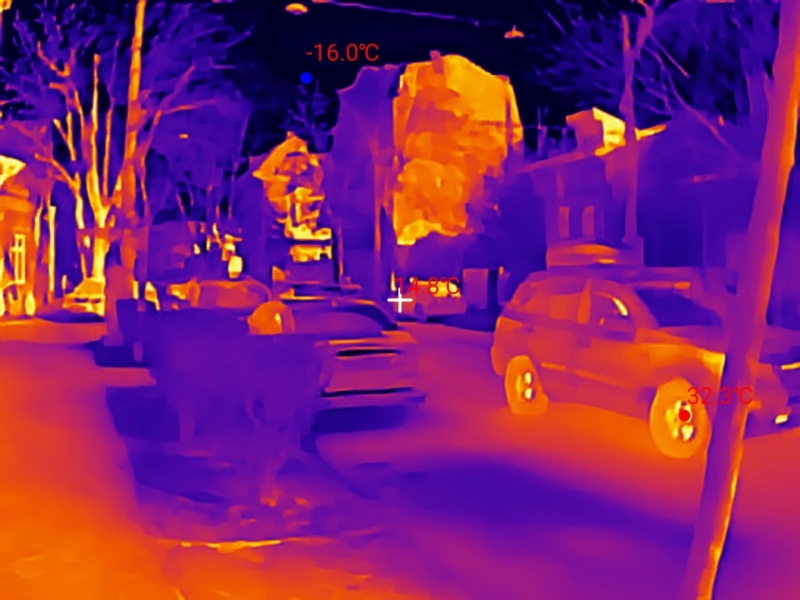
I also tried scanning people and cars on the road as they approached, with readings showing up steadily as the vehicles emerged into view.
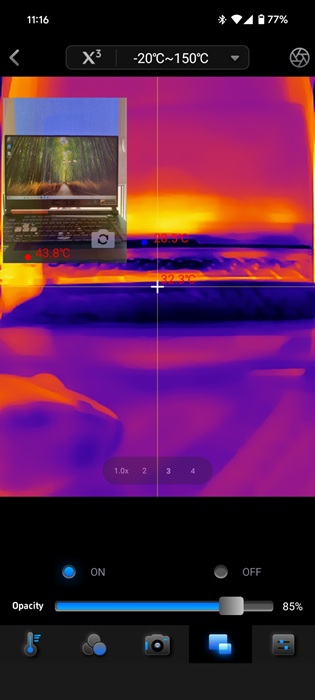
The device also packs a picture-in-picture feature, offering a standard optical view alongside the thermal image – it’s ideal for contextual analysis and comparison.
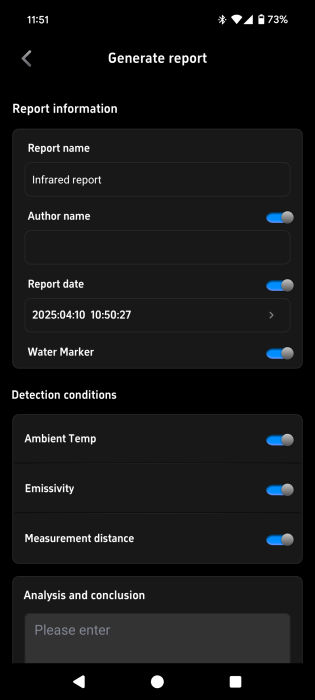
All in all, the Thermal Master P2 can function as a versatile tool for practical applications, like inspecting pipes, assessing insulation, or diagnosing temperature irregularities in engine components. The companion app can generate reports from gallery images that could be very helpful in these scenarios, but I couldn’t open these reports and received an error instead.
The Thermal Master P2 doesn’t come with any battery. It attaches to your smartphone and draw power from the device. The good thing is, it draws minimal power (0.3W) from the smartphone, so you’ll barely notice any impact on your Android’s battery life. On the other hand, since it uses up your USB port to function, you won’t be able to connect and use your Type-C headphones while shooting with it.
To top it off, you can use the included USB extension cable to connect the camera to your laptop. The Thermal Master Windows app provides access to most options.
Final Thoughts
The Thermal Master P2 Camera is hard to beat. It’s compact, lightweight, delivers fantastic image clarity, and is just $249. The user experience is mostly smooth and intuitive. As an amateur, I’ve found it surprisingly useful, and I’ll be bringing it along on my next camping trip to investigate any strange sounds. For more technical users, its capabilities offer even greater value.
Subscribe to our newsletter!
Our latest tutorials delivered straight to your inbox