Apple’s new Mail app redesign brings brighter colors, enhanced interactivity, and a modern feel. But not all users are thrilled. For those who favor the old, more minimal design, the interface feels like a step too far. The good news is that you can bring back the old look.
Good to know: learn how to use autofill on your iPhone like a pro.
1. Remove Contacts Icons
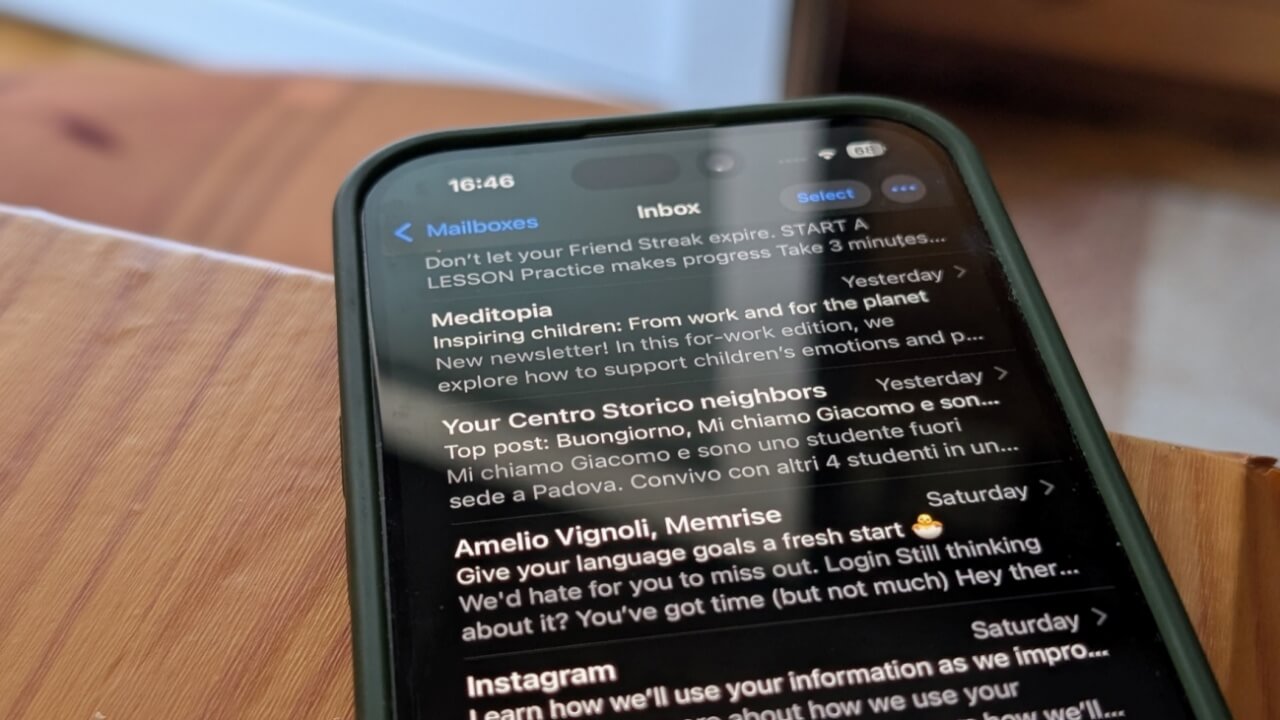
One of the most evident changes in Apple’s Mail app is the presence of colorful circular or rectangular contact photos that appear next to emails in your inbox.
Whether sourced from contacts, email metadata, or basic category icons, these visual identifiers are meant to help you instantly recognize who an email is from. Their purpose is to help users quickly recognize emails at a glance – whether it’s a familiar company logo or a personal photo linked to a contact.
If you find the new visuals make your inbox feel too colorful or cluttered, there’s an option to disable them.
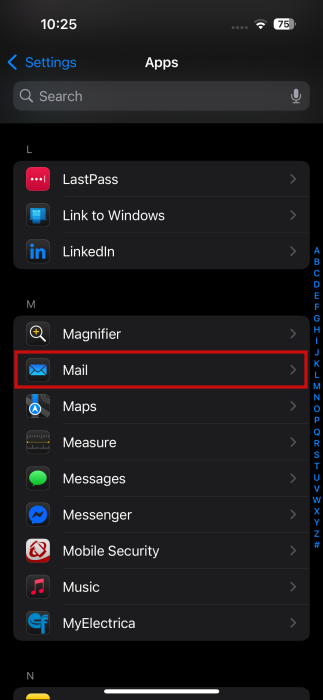
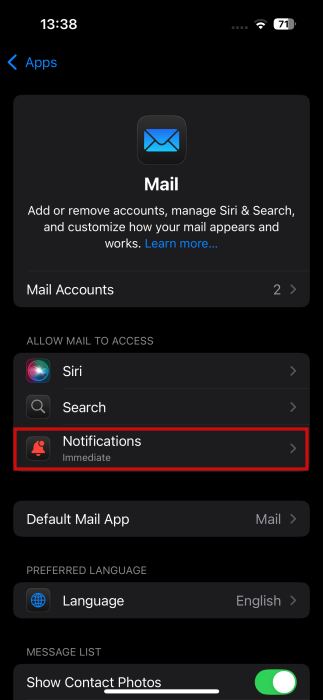
To do that, open the Settings app on your iPhone or iPad and navigate to Apps. Select Mail from the app list.
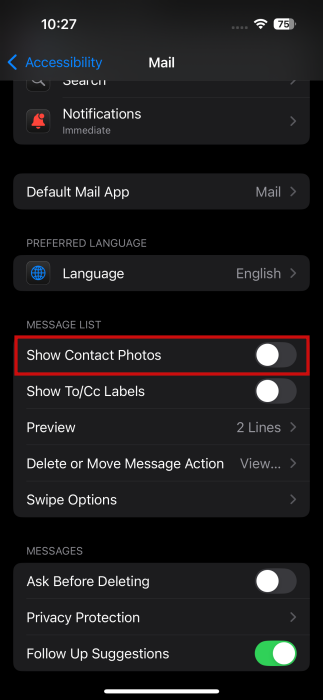
On the next screen, in the Message List section, turn off the toggle next to Show Contact Photos.
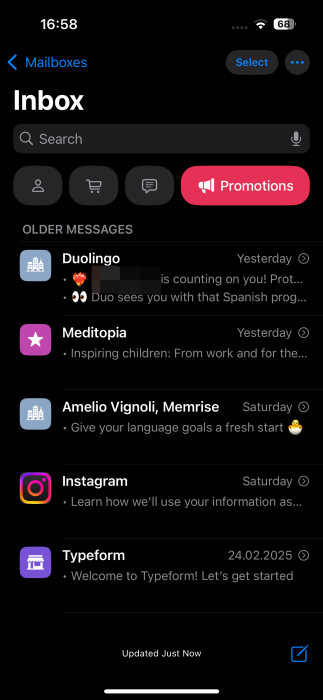
Now you can return to your email app. Notice how the colorful pictograms are no longer visible now.
Note: if you’re running iOS 18.5/iPadOS 18.5/macOS 15.5 there’s an easier way to do this. In the Mail app, tap on the three dots in the upper right corner and deselect the Show Contacts Photo option.
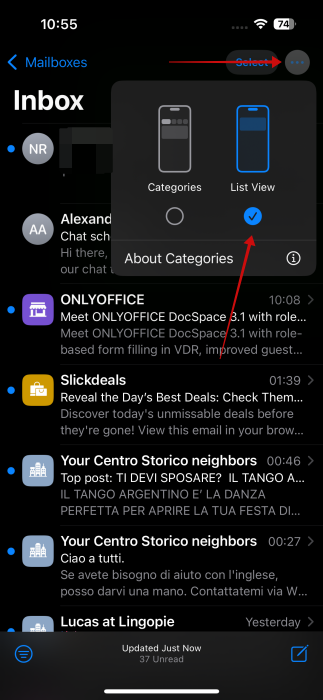
2. Turn Off Categories
Categories are another feature that was introduced as part of Apple’s Mail app overhaul. These appear at the top and are meant to help users with email categorization. For instance, the emails that matter most (such as messages from your friends or family members ) are sorted in Primary while Updates houses emails from services you’ve subscribed to or other social apps.
However, if you don’t want to see these at the top of your inbox and instead long for a clear view of your messages, you just have to tap on the List View option. That’s it. The categories will now disappear from view.
Tip: here’s how to convert an alias into your primary email in iCloud mail.
3. Ungroup Emails from the Same Sender
When categories are enabled, the Mail app groups all emails from the same sender together. This can reduce inbox clutter, but it may also make it harder to locate a specific email within that group.
If you’d rather see individual emails as they arrive in your inbox, navigate to a category that contains threads with multiple emails. Tap on the three dots in the upper right corner and uncheck the Group by Sender option.

4. Turn Off Priority Emails
Apple’s Mail app now uses AI to surface emails it identifies as high priority, analyzing keywords, urgency cues, sender information, and other factors. However, AI isn’t foolproof – and its judgement isn’t always perfect.
If you’d like to stop AI from pushing forth certain emails, open the Mail app and press the three dots in the upper right.
Deselect the Show Priority option from there.

FYI: here’s how to silence notifications on iPhone for texts and more.
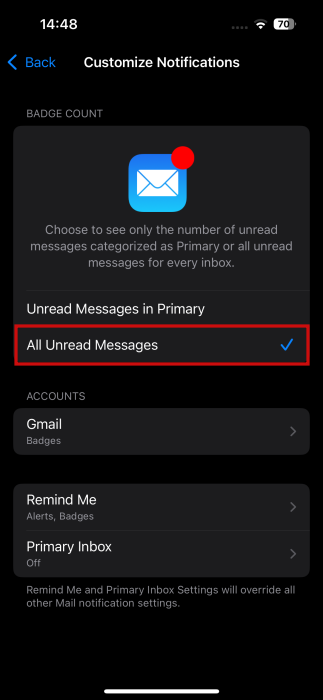
5. Change the Mail App’s Badge Notification Count
Before the iOS 18.2 update, the mail app badge notification used to show the number of total unread emails. This has changed to the number of new emails in the Primary category.
If you’d like to change this back the way it was, open Settings and go to Apps -> Mail -> Notifications.
Select Customize Notifications at the bottom.
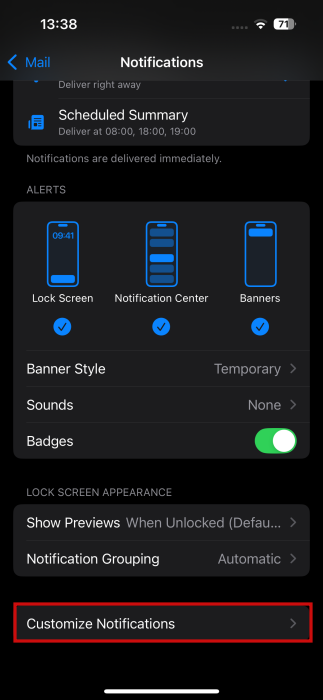
Switch to All Unread Messages.
If you’d like to learn about some of the standout features it brings, such as the Ambient Music one, check our detailed post on the matter. Alternatively, you might also want to learn about how to block tracking pixels in Apple Mail.