
Did you notice a yellow triangle warning sign on a Windows drive, particularly the C drive? It may cause alarm, but Microsoft uses a symbol associated with hard disk failure for a trivial issue. This misplaced indicator usually means that BitLocker encryption is disabled, an update requires a reboot, or a firmware upgrade is pending. We will show you how to remove this sign.
Is There an Error on My Disk Drive?
A yellow triangle can indicate a disk drive issue, but on a healthy PC, it’s actually pretty rare to encounter this. If your disk is failing, you’ll notice other symptoms first like system crashes, blue screen errors, or missing files.
In any case, follow the simple error checking method below to rule out the possibility of a hard disk failure.
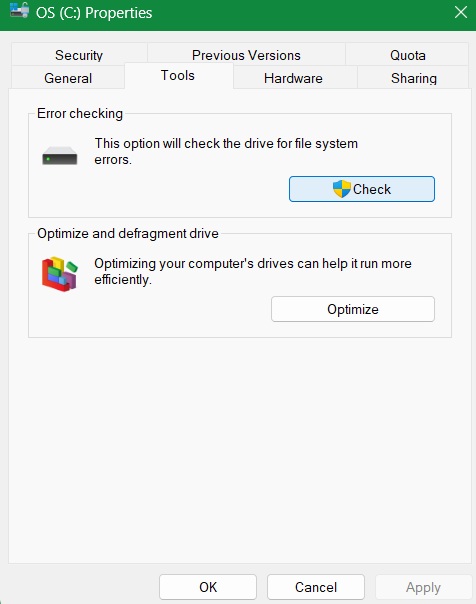
Right-click on C drive, open Properties and go to the Tools tab. Click Check under Error checking.
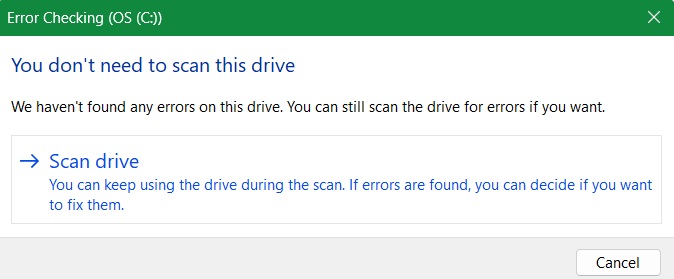
If you see a pop-up status that says You don’t need to scan this drive as no errors were found, it means the drive is healthy. For complete verification, click Scan drive and finish the disk repair which will take a few minutes.
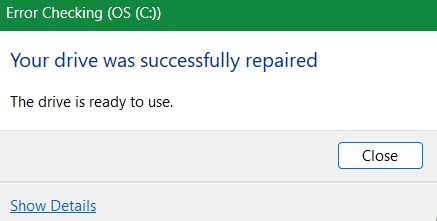
In the end, the C drive error checking leads to a Your drive was successfully repaired status. The fact that you can use the drive rules out any errors, but the yellow triangle warning is still there. There is a small chance the error shows when your PC is running low on disk space, but it’s so unlikely that we can rule it out.
Related: if Windows detects a hard disk problem, you can troubleshoot it using one of these methods. You can also perform DISM, Chkdsk, and SFC scans.
Real Reasons Why the Windows C Drive Shows a Yellow Triangle
The biggest reason a Windows drive, especially the C drive, shows a yellow triangle warning is when the BitLocker encryption has been disabled, usually after an update. The padlock icon on the C drive indicates its status.
- Padlock locked: the BitLocker volume is inaccessible
- Padlock unlocked: BitLocker is working, with an encrypted drive (see below)
- Unlocked padlock with yellow triangle: BitLocker is suspended
Another common cause of this error, which isn’t a reason to panic, is Windows using the yellow triangle to signal a pending reboot, mainly to finish an update. In rare cases, it could indicate a firmware upgrade. Just restart your PC, and the yellow triangle should disappear. If it doesn’t, follow the next few methods.
Related: are you on a Windows 11/10 Home PC encountering automatic BitLocker encryption? You can prevent it easily.
Turn on Automatic BitLocker encryption Through Control Panel
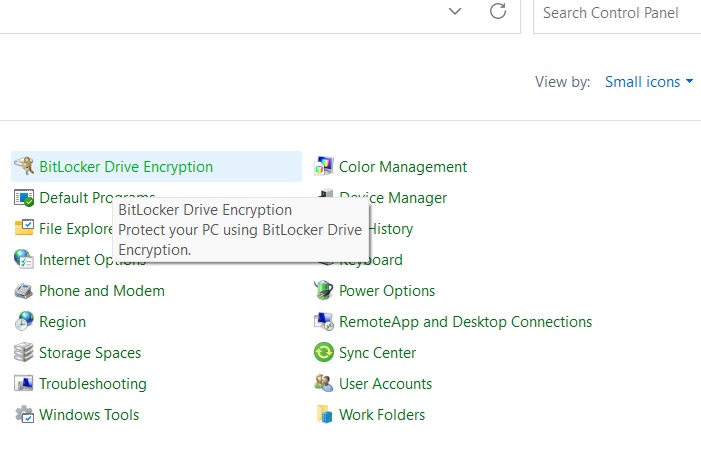
On a Windows 11/10 Pro or Enterprise PC, go to Control Panel. Click View by on top right, and choose Small icons.
If the drive is decrypting, wait for the process to finish, as it can take some time.
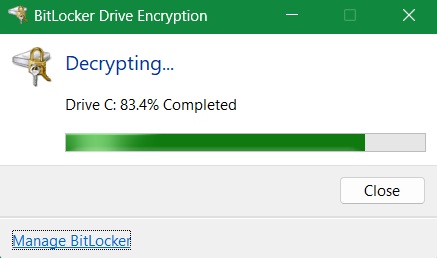
Finally, click Turn on BitLocker to enable BitLocker encryption for the C drive if it was turned off. Enter your password or PIN, follow the on-screen instructions, and restart your system to activate BitLocker protection.
Use This Command to Remove the Yellow Triangle Warning
Apart from the Control Panel, you can also use the Command Prompt to remove the yellow triangle warning.
Open Command Prompt in administrator mode, and type the following, which will disable encryption temporarily. The decryption can take a while. You can later turn it back on through Control Panel.
manage-bde -off C:
Related: have you run into Windows update problems? We have the fixes for most issues. Also, learn how to remove the compatibility hold for stuck update versions.
Fix Any Windows Update or Firmware Upgrade Problems
While BitLocker decryption is a major cause of the yellow triangle warning on a disk drive, minor issues often come from an unfinished update or a delayed firmware upgrade. If an update won’t complete or a firmware upgrade is taking too long, do the following things.
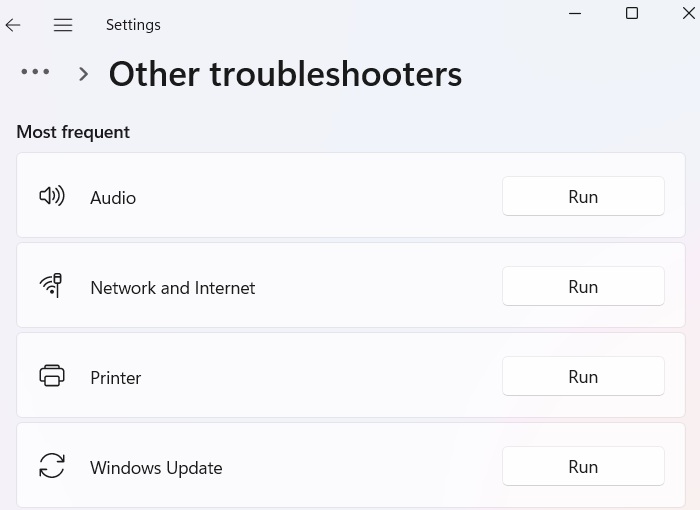
For an unfinished update, go to System -> Troubleshoot -> Other troubleshooters. Click Run next to Windows Update. Click Contact support inside the menu. Quick Assist through free Microsoft support is one of the best ways to finish stalled updates.
For firmware upgrades, the best approach is to wait, as they can take longer than expected. If you’re facing issues, the final solution below will resolve any pending problems.
Restore and Reset Your Device
From the search menu, select Create a restore point. Go to System Protection, and select System Restore. Turn your PC’s image back to a point when it was not showing an error. This has been covered in detail in this guide.
Another method I use is resetting the device. It’s best to do it as a cloud download rather than a local reinstall. Resetting does not erase PC data or core applications. I have often relied on the cloud download method to fix the most stubborn Windows errors.


