Windows’ Snipping Tool is already a great app to take screenshots and screen record. Now, the app lets you turn those screen recordings into GIFs without needing any extra tools, since GIFs are perfect for capturing quick tutorials or sharing fun moments online. This guide will show you how to record your screen as a GIF in Windows 11, even if you’re not on an Insider build.
Recording a GIF with the Snipping Tool
To record your screen as a GIF in Windows 11, you need to be in the Windows Insider Program. Here’s how to capture your screen:
Update your Snipping Tool app on the Microsoft Store to version 11.2408.8.0 or later.
Open the Snipping Tool by pressing Win + Shift + S, and click the video camera icon to switch to screen recording mode.
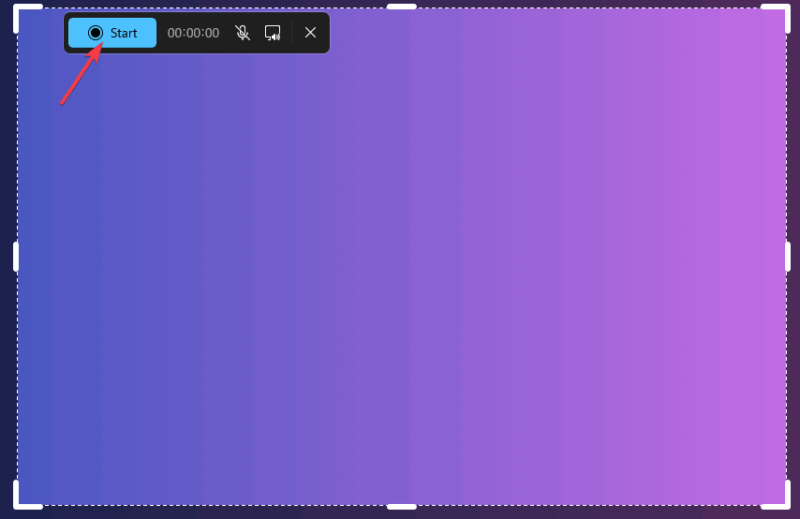
Drag your cursor to select the part of the screen to record, click Start, and click the red button to stop when done.
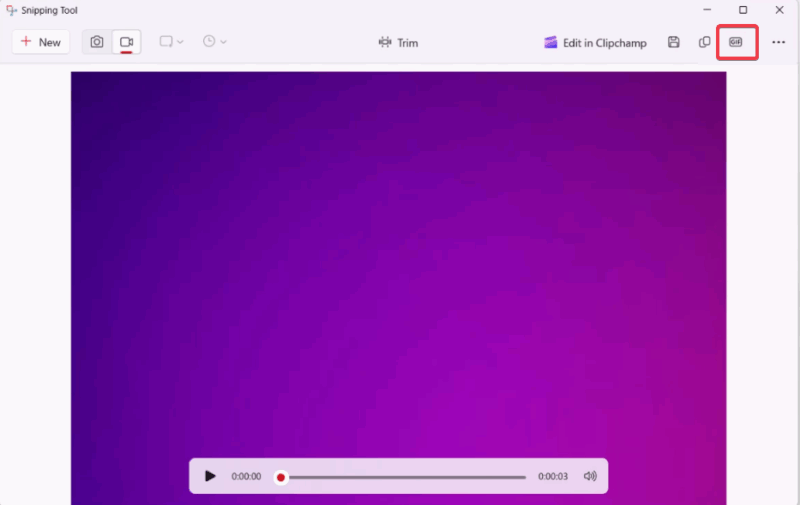
The Snipping Tool editor opens, and click the GIF button in the upper-right corner.
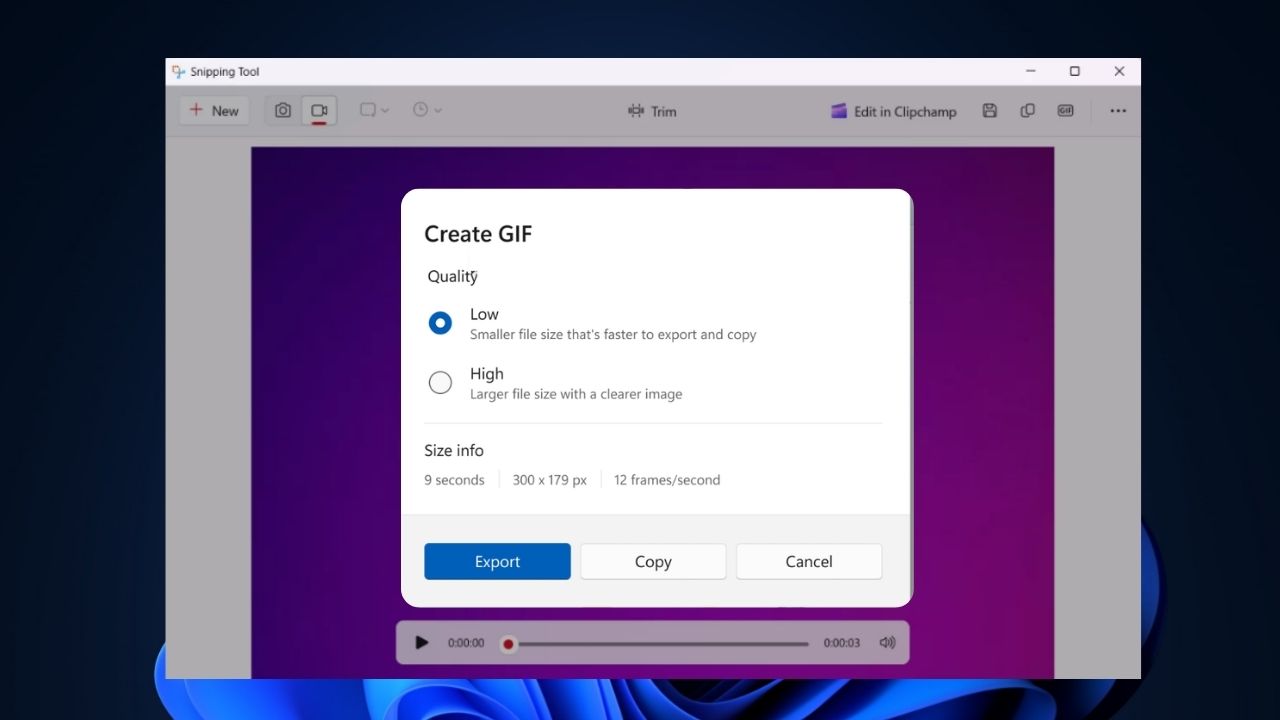
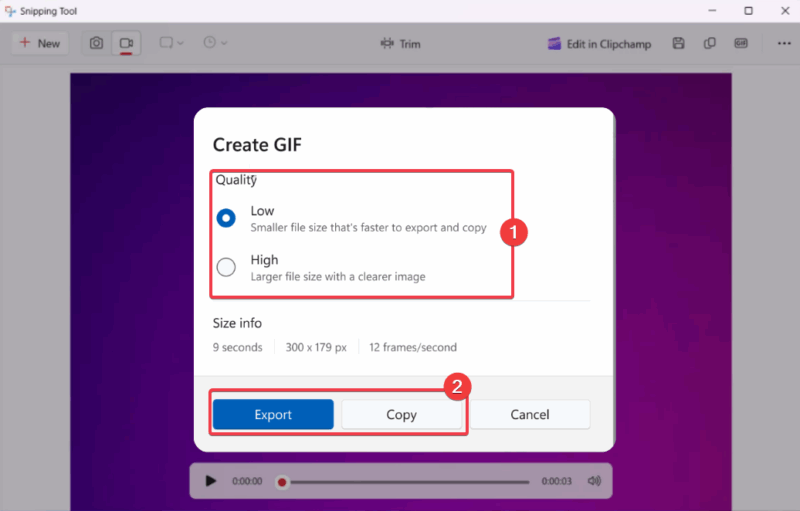
Select a quality (low or high), and click Export to save as a file or copy to the clipboard for quick sharing.
There’s a 30-second limit for how long your recordings can be. If you need longer recordings, learn how to screen record in Windows.
Extra: An alternative to GIF is capturing scrolling screenshots in Windows. You can check that out as well.
Enabling GIF Recording for Stable Windows 11 Users
If you’re not on a Windows Insider build and still want to record your screen as a GIF on Windows 11, try this workaround to enable GIF support:
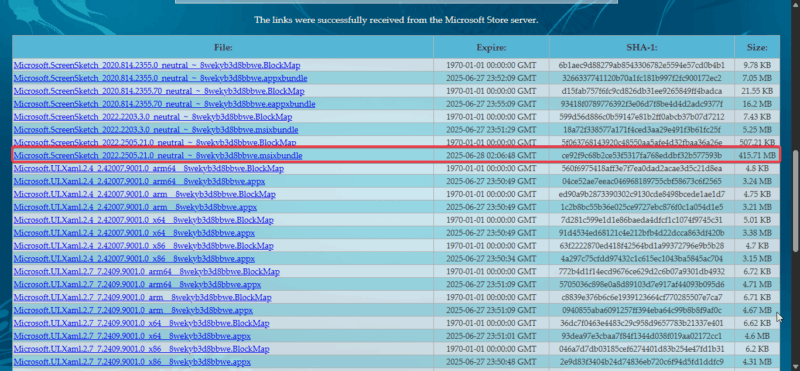
Head to store.rg-adguard.net, select ProductID in the first drop-down menu, enter 9MZ95KL8MR0L, select Fast, and press the checkmark button.

Locate and download Microsoft.ScreenSketch_2022.2505.21.0_neutral_~_8wekyb3d8bbwe.msixbundle in the list. While the version number could be newer, ensure it’s a msixbundle file.
Click to open the file and select Update.
- Now, download ViveTool from GitHub and unpack the files into an easy-to-locate folder. Copy the unpacked files’ location path.
- Launch Command Prompt as Administrator and type
cdplus the location path and press Enter:cd C:\Vive - Type
ViveTool /enable /id:47081492to enable the GIF export feature and press Enter.
This workaround is strictly for stable Windows 11 users. Should you run into any issues with ViveTool, check our detailed guide on how to use ViveTool to enable hidden Windows 11 features.
Quick Tips for Optimizing GIFs
If you’re bothered about GIFs eating up your PC storage, try these tips to optimize that:
- Keep it short by sticking to the 30-second or less limit for recording the screen as a GIF.
- Choose a smaller screen area or select low quality in the Snipping Tool editor.
- Test run screen size recordings and quality options to balance GIFs’ clarity and file size.
Recording your screen as a GIF in Windows 11 is a breeze with the Snipping Tool if you’re a Windows Insider. If you’re not, just follow the workaround for stable users to create quick and shareable GIFs. For more tips, check out our guide on using Windows Snipping Tool for screenshots.


