
If you care about mouse precision for gaming or design, you have probably been told to disable Windows Enhanced pointer precision. However, you do not need to remove acceleration completely just because Windows implements it poorly. Switch to the free Raw Accel app and regain full control over mouse acceleration.
Enhanced Pointer Precision Vs. Raw Accel
It doesn’t make sense why a precision feature of Windows is recommended to be disabled to gain precision. The problem is not the feature, it’s the implementation. Windows uses non-linear mouse acceleration; the acceleration speed changes based on different hidden factors, like timing difference, recent movement history, pointer speed, etc.
The problem with non-linear mouse acceleration is that the human brain is unable to create muscle memory when each movement can produce different results. It also doesn’t help that Windows’ mouse acceleration lacks a practical maximum cap, so acceleration often gets out of control.
Raw Accel fixes this problem by giving you complete control over mouse acceleration speed. You can set the exact acceleration speed when it kicks in, and cap the maximum acceleration. This allows you to use constant acceleration that your brain can actually track and get used to.
Apart from making acceleration linear, Raw Accel is also great for controlling acceleration behavior according to your needs. For example, you can disable it for small movements, apply separate acceleration vertically and horizontally, and apply decaying acceleration.
How to Use Raw Accel to Control Mouse Acceleration
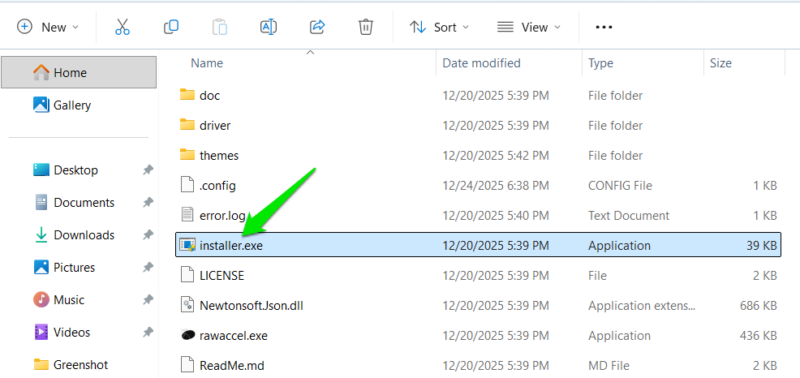
Raw Accel installs a kernel-level driver (signed) to process the raw input stream. So you’ll have to install it first before proceeding. After extracting the compressed file, open the installer.exe file to install the driver. Restart the PC afterward, and you’ll be ready to use the app.
There’s no single default configuration in Raw Accel that works for everyone. You’ll have to adjust its settings according to your needs and see what works best for you. It has a sensitivity tracker on the right side to help you experiment and find the perfect acceleration.
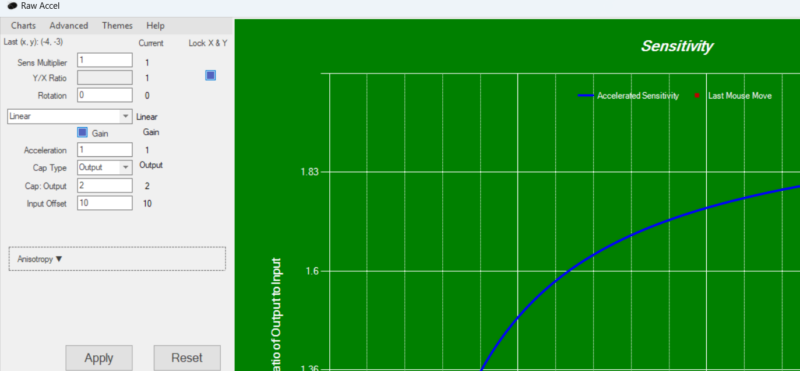
To adjust settings, you’ll need to know what each setting does:
- Sens Multiplier: this is your mouse cursor speed. If it’s at 1, Raw Accel won’t make any changes to the cursor speed, and it will run at your mouse’s native DPI. The value here is a decimal multiplier, so 0.5 here will lead to 50% decrease in speed, and 1.5 will increase speed by 50%.
- Y/X Ratio: you can adjust the vertical (Y) speed in relation to horizontal (X) speed here. While not useful for most users, many gamers who play FPS games decrease vertical speed to better control recoil, while horizontal movement stays fast for aiming. Any value changes here will impact vertical movement.
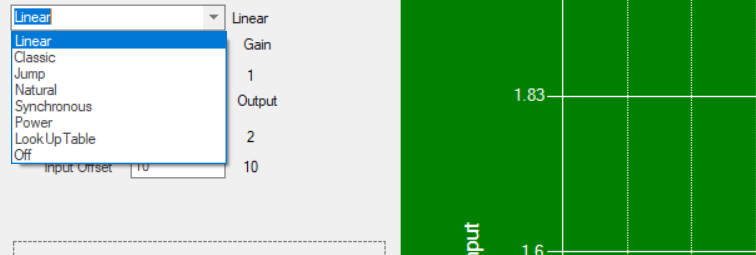
- Acceleration Styles: the drop-down menu you see here lists the way acceleration is applied, like Linear for a fixed increase or Power for burst acceleration. I’ll use Linear here for demonstration, as consistent acceleration is our goal, but you can experiment with others as well.
- Acceleration: this is where you configure the intensity of the acceleration. For most users, the 0.05 value works fine for a 1600 DPI mouse, but you can increase/decrease it to your liking.
- Cap Type: here you can select how you want to cap the maximum acceleration so it doesn’t get out of control. The Output Cap will let you cap acceleration by the maximum cursor speed. The Input Cap uses physical mouse speed (counts/ms) to cap acceleration, so it will stop accelerating at the specified physical movement speed.
- Input Offset: this option lets you control when exactly acceleration kicks in. The value is based on physical mouse movement speed, so you can set it to keep acceleration disabled on slow mouse movement for precision.
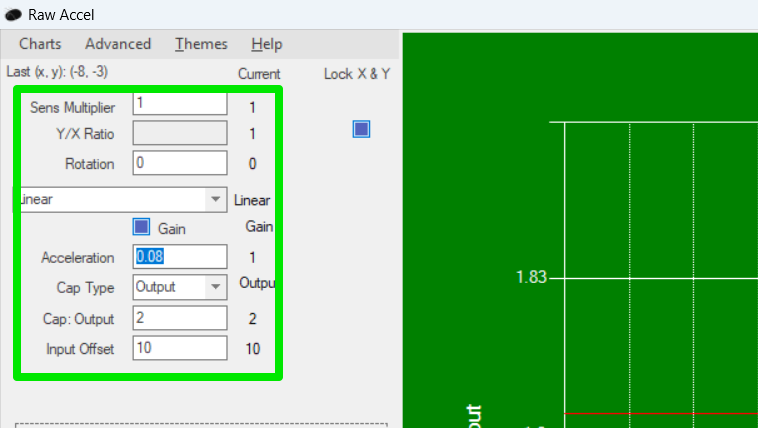
Now that you know what each option does, you can set values that best suit your needs. To give you an idea, I am sharing my current setup below that works great for both normal use and gaming:
- Sens Multiplier: 1
- Y/X Ratio: Locked
- Acceleration Style: Linear
- Acceleration: 0.08
- Cap Type: Output
- Cap Output: 2
- Input Offset: 10
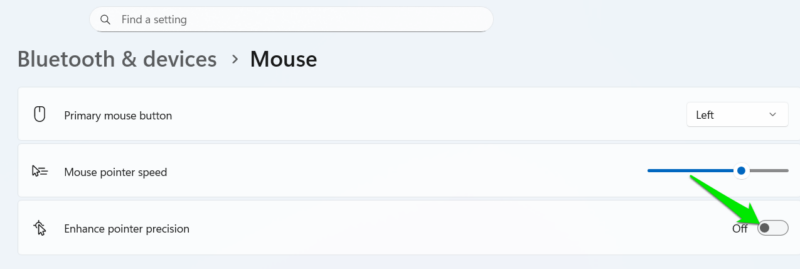
Make sure you disable Enhanced pointer precision in Windows by going to Bluetooth & devices → Mouse in Windows Settings. Otherwise, it will conflict with the Raw Accel configuration.
Raw Accel Trick to Decrease Input Lag
Apart from managing acceleration, Raw Accel also lets you decrease input lag if you have a high-DPI gaming mouse. Higher DPI mice – like 1600 or 3200 DPI – register first movement count faster, so they generally have slightly lower input lag (3-5ms). However, using a mouse at a DPI like 3200 isn’t feasible for most users due to extreme speed.
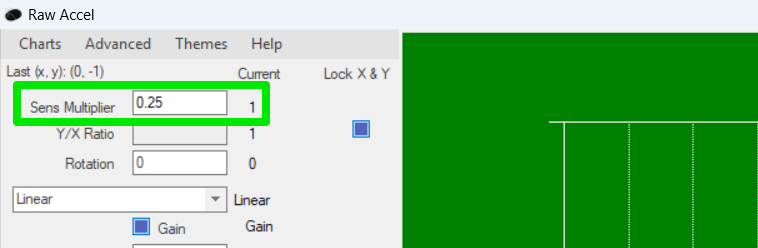
Raw Accel solves this by letting the mouse run at high DPI (lower input lag), but configuring Sens Multiplier at a lower value to have less practical DPI. For example, with a 3200 DPI mouse, you can set Sens Multiplier to 0.25, which will make the actual DPI 800. So you get a lower input lag of 3200 DPI and still use the mouse at 800 DPI.
Once you have set up Raw Accel properly, it will automatically apply your acceleration settings on Windows startup (unless you disable this). There is no need to keep the app running once settings are applied. If you are configuring your mouse for gaming, make sure you apply these optimal mouse settings for gaming.


