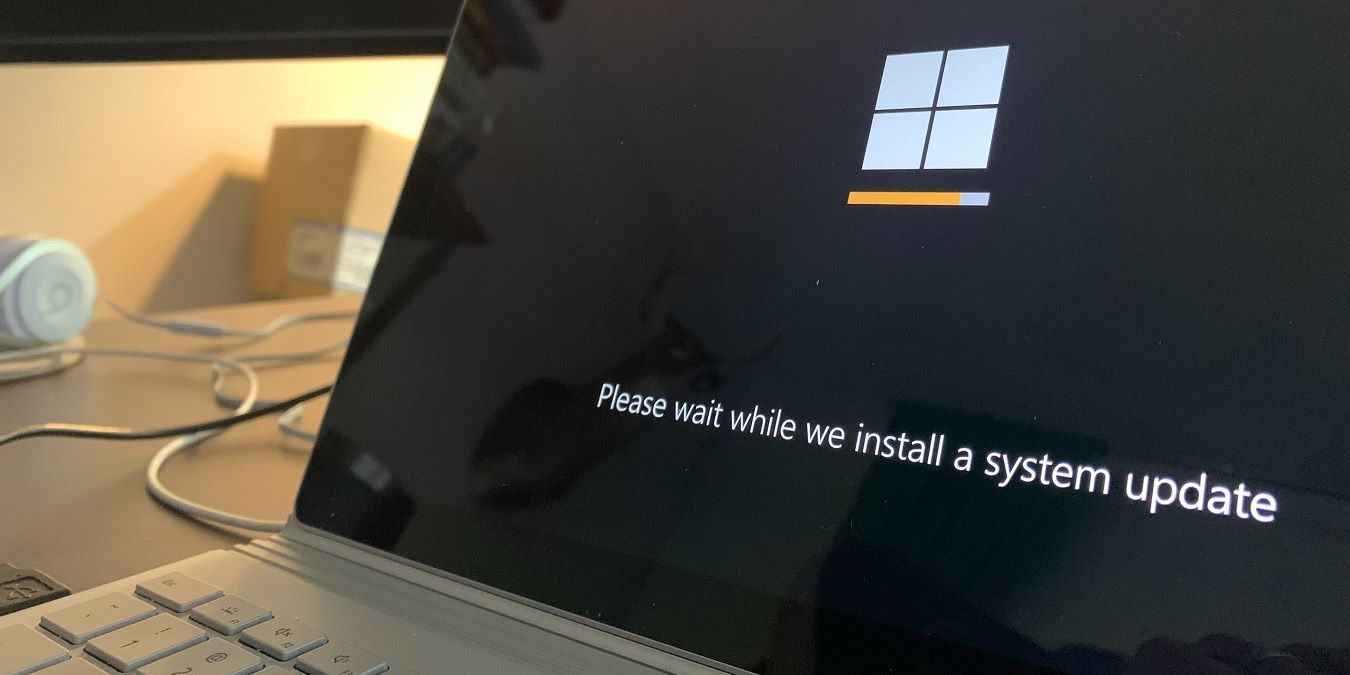
Microsoft forces you to restart your Windows computer every time it performs an update. At first glance, it would seem unusual, as Linux systems don’t have such requirements. Updates are supposed to happen in the background and not disturb your current workflow. This guide shows a few workarounds to stop automatic restart in Windows after you finish an update.
1. Using the Services Menu
This is the easiest way to prevent automatic restarts after a Windows update. Open the Services menu, either by entering services in Win + R or using Windows menu search. Scroll all the way down to Windows Update in the list of items. Right-click and select Properties, then go to the General tab. Change the Startup Type to Disabled. Click Apply, then OK.
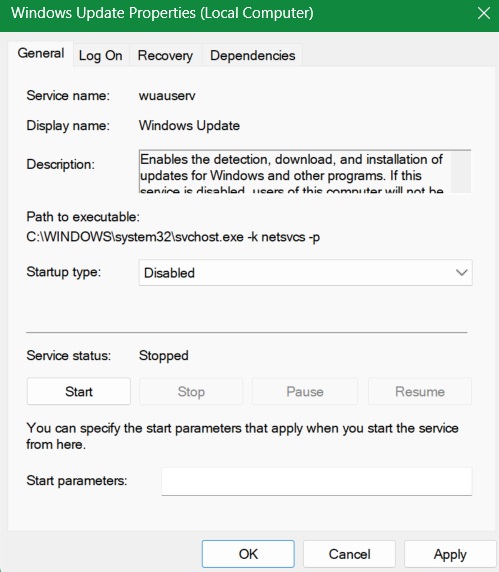
There are a few problems with this method, even though you can turn it off at will. A blanket ban on update-related activities can impact Windows app updates and security patches, which are essential in today’s threat environment. This means no downloads and no update reminders. There are better methods below that offer a more granular approach.
2. Using the Local Group Policy Editor
On a Windows Pro/Enterprise device, open the Run command, Win + R, and type gpedit.msc then hit Enter.
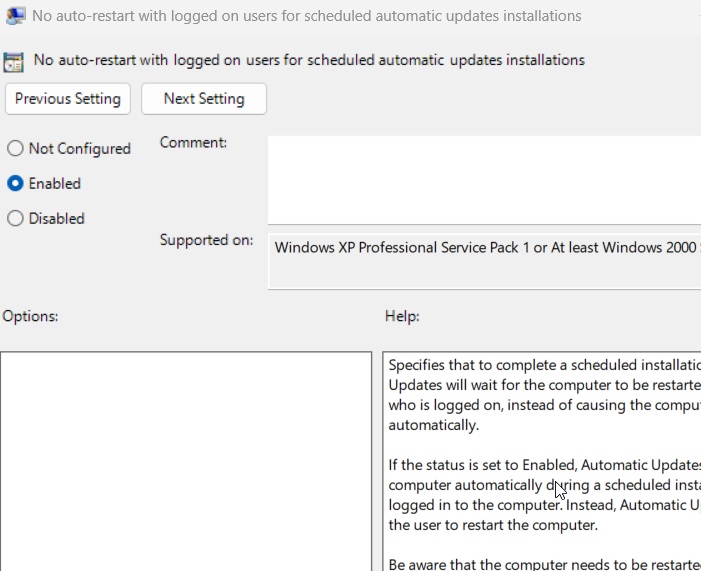
Once the Local Group Policy Editor window opens, navigate to Local Computer Policy -> Computer Configuration -> Administrative Templates -> Windows Components -> Windows Update. On the right pane, double-click on the entry: No auto-restart with logged on users for scheduled automated updates installation.
Select the Enabled box, and click Apply -> OK to disable the auto-restart function completely for any future updates. This method still allows Windows update downloads, but there is no forced restart.
FYI: if you’re experiencing problems after a recent Windows update, learn how to move forward.
3. Using PowerShell
PowerShell has a registry setting called NoAutoRebootWithLoggedOnUsers which allows users to prevent forced restarts after a Windows update. The method should work easily in Windows 10, but requires a few tweaks in Windows 11 as the exact registry path may not exist, leading to a “path not found” error.
First, open PowerShell in administrator mode. If you’re a Windows 11 user, run the following PowerShell script to place the above registry setting.
$registryPath = "HKLM:\SOFTWARE\Policies\Microsoft\Windows\WindowsUpdate\AU"

# Check if the registry path exists
if (-not (Test-Path $registryPath)) {
    # Create the registry path
    New-Item -Path $registryPath -Force | Out-Null
}

# Set NoAutoRebootWithLoggedOnUsers to 1
Set-ItemProperty -Path $registryPath -Name "NoAutoRebootWithLoggedOnUsers" -Value 1 -Type DWord

# Set Configure Automatic Updates (required for NoAutoRebootWithLoggedOnUsers to work)
Set-ItemProperty -Path $registryPath -Name "AUOptions" -Value 4 -Type DWord
Following this, enter below command. If you’re a Windows 10 user, you can enter it directly as you shouldn’t encounter the “path not found” error.
Set-ItemProperty -Path "HKLM:\SOFTWARE\Policies\Microsoft\Windows\WindowsUpdate\AU" -Name "NoAutoRebootWithLoggedOnUsers" -Value 1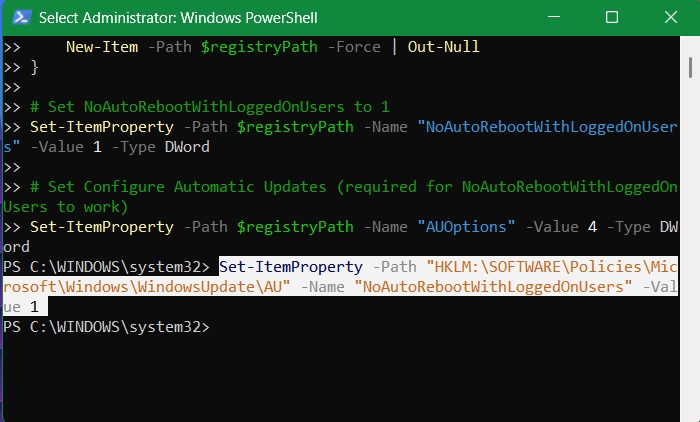
If later you change your mind, you can again bring in automatic restarts by setting the above registry value to “0.”
Set-ItemProperty -Path "HKLM:\SOFTWARE\Policies\Microsoft\Windows\WindowsUpdate\AU" -Name "NoAutoRebootWithLoggedOnUsers" -Value 0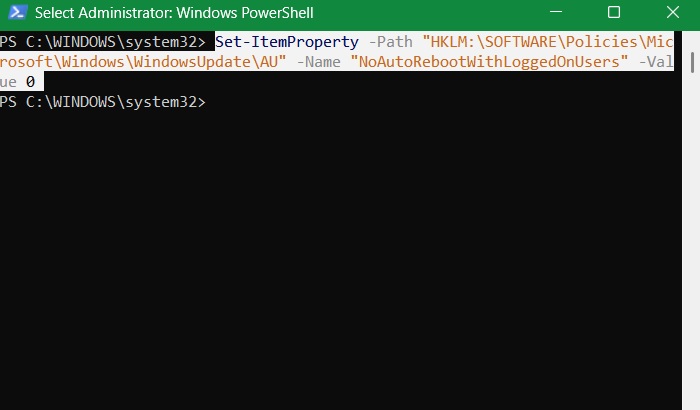
Related: you can also hide updates using PowerShell.
4. Using Registry Editor
The above method to force-stop Windows Update restarts, which you accomplished using PowerShell, can also be done using Registry Editor. This method should work automatically in Windows 10 but requires a specific tweak in Windows 11.
Open the Run command, Win + R, and type regedit in the box to open the Registry Editor on your device. Insert the following path into the Registry Editor window:
Computer\HKEY_LOCAL_MACHINE\SOFTWARE\Policies\Microsoft\Windows\WindowsUpdateLook Under WindowsUpdate -> AU (Automatic) key for a D-WORD (32-bit) value called “NoAutoRebootWithLoggedOnUsers.” It is set at 0 by default, but you need to set it as 1.
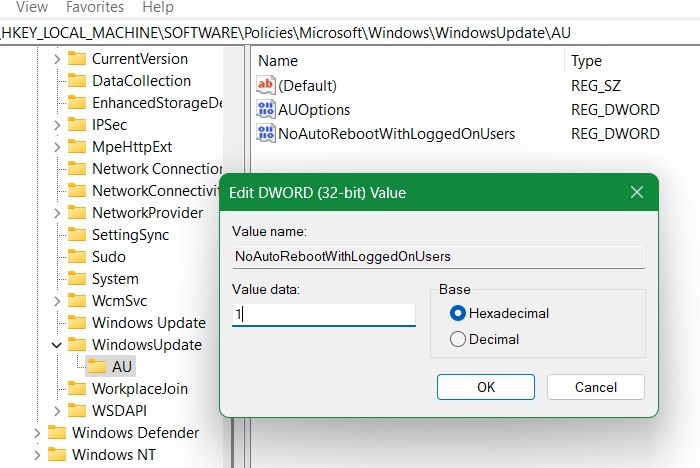
You don’t have to create a registry entry in this manner if you already executed the PowerShell script above.
Caution: it’s always a good idea to back up your registry before performing any tweaks.
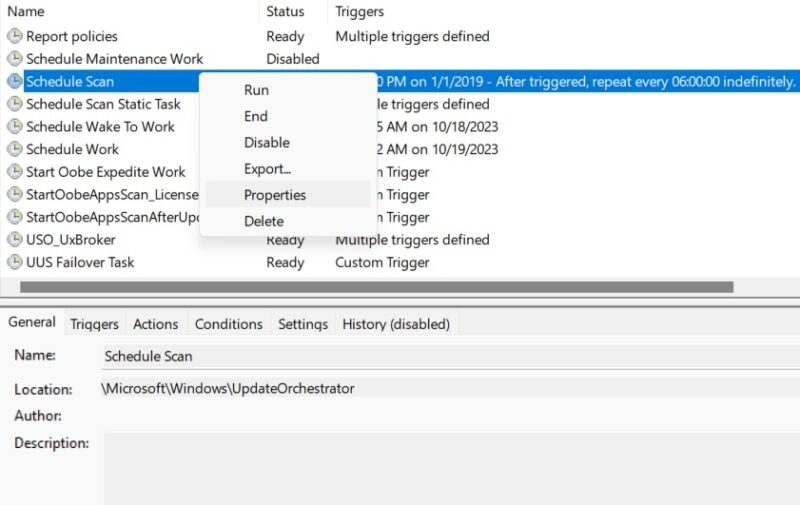
5. Using Task Scheduler
Open the Task Scheduler from the Windows Search box. Navigate to Task Scheduler -> Task Scheduler Library -> Microsoft -> Windows -> UpdateOrchestrator. The UpdateOrchestrator Service operates in the background to scan, download, and install Windows updates.
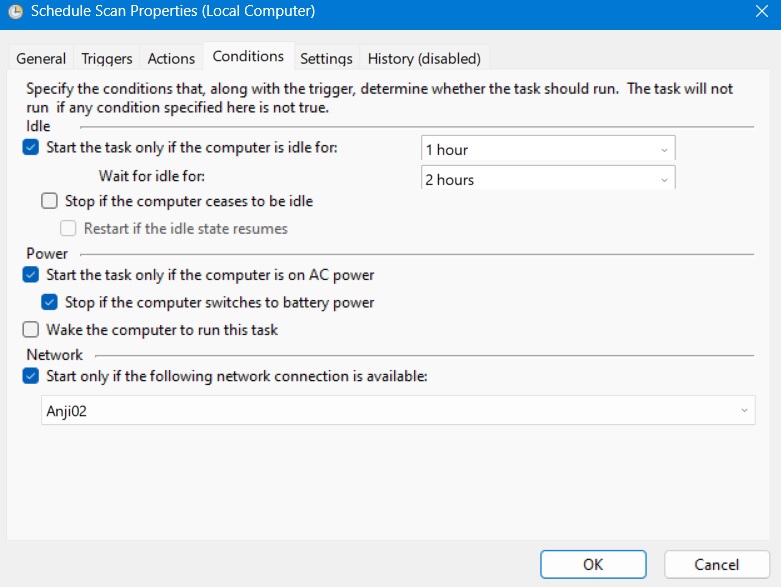
If you see a Reboot option in the panel on the right side of UpdateOrchestrator, right-click to Disable it. If you don’t see a Reboot option, it means the Reboot task was not created. The workaround is to change the basic restart parameters for the Schedule Scan option. Select its Properties with a right-click.
Change the restart parameters from the Conditions tab.
FYI: Task Scheduler not working for you? Learn how to fix it by checking our guide.
6. Changing Active Hours
Windows has a feature called Active Hours, which, as the name suggests, allows users to specify a period of time during which the operating system should not automatically install updates or perform system reboots.
In Windows 11, navigate to Settings -> Windows Update -> Advanced Options -> Active Hours. For Windows 10, choose Settings -> Update & Security -> Windows Update. Then, select Change Active Hours.
If the Adjust Active Hours button is set to Automatically, change it to Manually. Allocate a time duration of the day when your system should not prompt you for a restart. Easily adjust these settings to not get any restart notifications for at least 23 hours a day.
7. Using Metered Connections
Using metered connections is a great way to stop automatic restarts, while still allowing critical updates to install. This is good for those who don’t want to tinker with their group policies or registry editor.
Go to Settings -> Network & internet -> Wi-Fi. Select your desired Wi-Fi networks, and turn the Metered connection switch on.
As shown here, you can stop automatic restart in Windows after an update is downloaded. Likewise, you can turn off automatic driver updates in Windows. If you find your Windows Update Service missing, there are ways to bring it back to your computer.


