If you host a media server, maintain a home lab, run a cloud VM, or even built a small internal dashboard, you know how important remote access is. There’s little point in running services on your own infrastructure if you can’t reach those systems from outside your local network. But the moment you open your local services to the web, you invite a ton of risks, including the possibility of someone hijacking everything you’ve built. NetBird helps you find a middle ground by creating a secure private network between your devices. It allows them to communicate with each other as if they were on the same local network, even when they are in completely different locations.
NetBird is an open-source zero-trust networking platform that allows you to connect devices together over a secure private network. Once connected, your devices behave as if they are on the same local network, which makes it easy to access servers, dashboards, and other self-hosted services from anywhere.
For example, if you run a media server like Plex or Jellyfin, NetBird lets you access it from anywhere without opening ports on your router. If you are someone who manages servers in the cloud, you can SSH into them securely without exposing SSH to the internet. If you self-host tools like Joplin or build internal dashboards, you can share them with collaborators over your private network.
Without a connector like NetBird, you will have to expose your server to the public to be able to access them remotely. While you can always run your own VPN, you’ll likely end up spending more time managing firewall rules, opening ports, and maintaining certificates than actually using the service itself.
NetBird works by connecting your devices into a private network. Every device connected to this network are able to connect directly to each other (instead of sending all traffic through a central server). This makes the connection faster and more reliable. You can also turn one device into a routing peer, which acts as a gateway to an entire local network. For example, if your home server is configured as a routing peer, you can access other devices on your home network through it without installing NetBird on each one.
Setting Up and Using NetBird
NetBird is available as a hosted service (just like tailscale), but one of its biggest advantages is that you can self-host the entire stack. Self-hosting NetBird takes some time, but it’s an easy process.
Before starting, decide where you’ll host Netbird. You have a few options, including a cloud VM, a NAS, or even a laptop. You will also need a domain name pointing to your server’s public IP address.
NetBird uses Docker to run its services, so you should first make sure Docker and the Docker Compose plugin are installed on your server. You will also need two small utilities – curl and jq. The curl tool downloads the NetBird installation script, while jq is used by the setup process to handle configuration data.
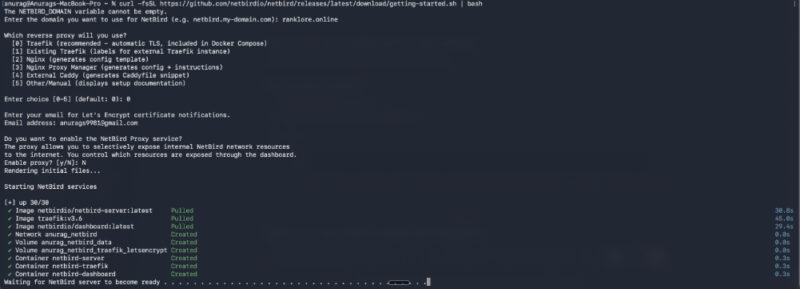
sudo apt install jq curlNetBird provides a setup script that automatically installs and configures all required components. Run the following command:
curl -fsSL https://github.com/netbirdio/netbird/releases/latest/download/getting-started.sh | bashDuring installation, the script will ask a few configuration questions. First, you need to enter the domain that will be used to access the NetBird dashboard. This domain will later be used to access the NetBird dashboard in your browser.
Next, the script asks which reverse proxy you want to use. For most setups, selecting 0 (Traefik) is the easiest option. Traefik automatically handles HTTPS certificates using Let’s Encrypt and configures secure access to the dashboard without additional setup.

After that, the script asks for an email address. You will then see another prompt asking whether you want to enable the NetBird Proxy service. The proxy feature allows you to expose services from your NetBird network to the public internet through controlled routes. Since our goal is to access devices remotely through the NetBird private network, select N here.
Once these steps are complete, the setup script waits for the NetBird server to finish initializing.
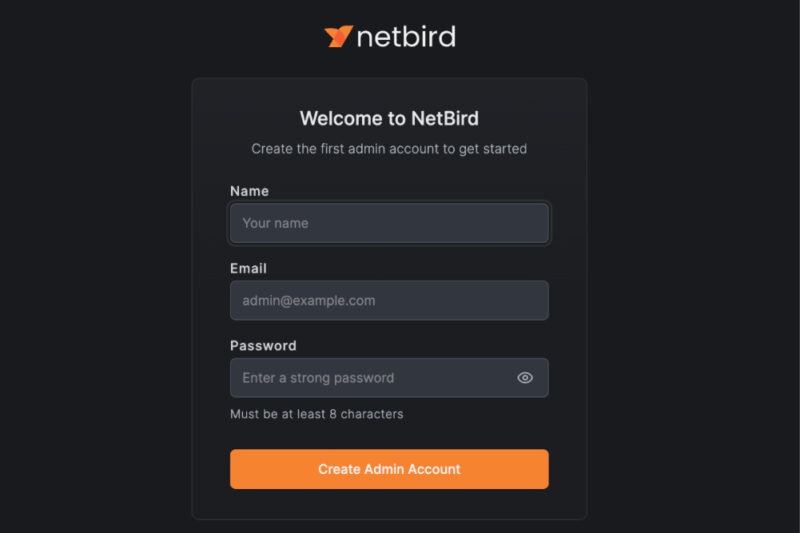
Once it becomes ready, you will be able to access the NetBird dashboard from your browser using the domain you configured earlier.
When you open this address, you will be redirected to the NetBird setup page, where you can create your first admin account and start adding devices to your network.
Adding A Device to NetBird
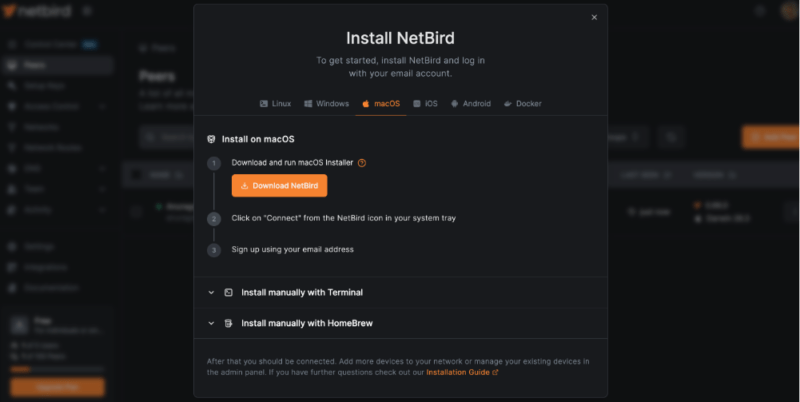
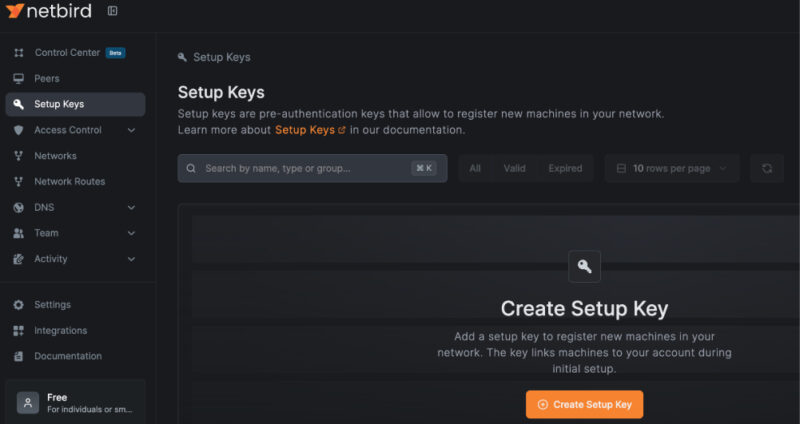
To remotely access a service through one of your devices, you’ll first have to add that device to NetBird. Go to the Peers section from the side panel and click the Add Peer button.
You will then see options to download the NetBird client. The tool usually suggests the correct client automatically depending on the device you are accessing it from. Download the client for the device you want to connect and install it.
Once installed, open the client and sign in using the same credentials you created for the NetBird dashboard. After authentication, the device will appear in the Peers list and will automatically receive a private IP address within your NetBird network.
To access another device, go to the Peers page and note the NetBird IP address of the device running the application. Open a browser on your laptop or phone and enter that IP address along with the port used by the application.
For example, if your home server is running a media server (such as Jellyfin), and NetBird assigns the address 100.70.15.8 to the server, you can access the media server by entering the following address in your browser:
http://100.70.15.8:8096As long as both your laptop and home server are connected to NetBird, the media server will load exactly as if you were connected to the same local network, even if you are accessing it from outside your home network.
Using NetBird Is Easy
Once your devices are connected, most of your interaction with NetBird happens through the web dashboard. The dashboard is where you can see all the devices in your network and control how they communicate with each other.
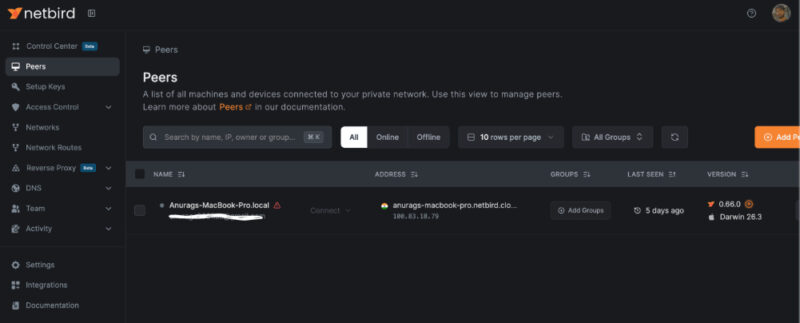
Start by opening the Peers section in the dashboard. This page lists every device currently connected to your NetBird network. Each entry shows the device name, its connection status, and the internal IP address assigned to it. For example, you might see your laptop, phone, and a server listed here. This page also allows you to rename devices, remove peers, or generate setup keys if you want to add more machines to the network.
Next, go to the Groups section. Groups allow you to organize devices so you can manage access more easily. For instance, you might create groups such as Personal Devices, Servers, or Development Machines. After creating a group, you can assign specific peers to it directly from the dashboard.
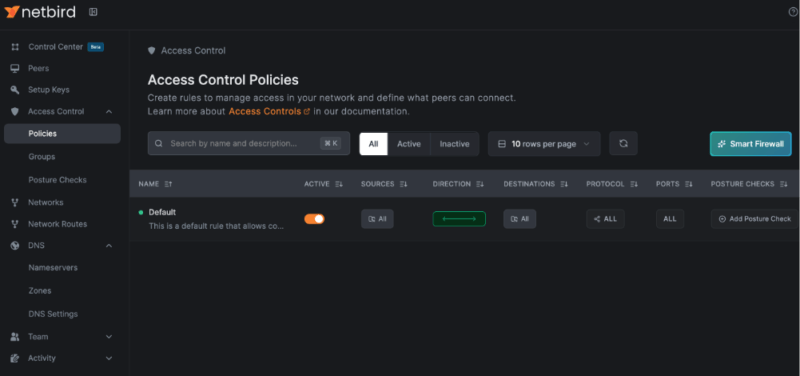
Once devices are organized into groups, open the Access Control section. Here, you can define how devices in your network are allowed to communicate. You can decide which groups or devices can connect to others and what type of traffic is allowed. For example, you might allow your laptop to connect to a server while preventing other devices from accessing it.
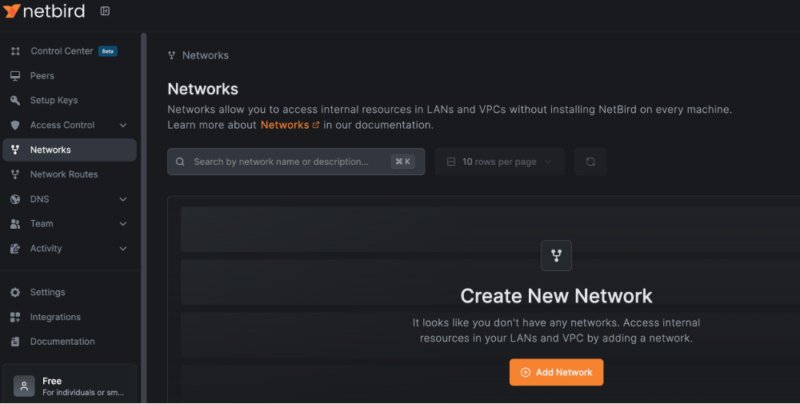
Another section you will use occasionally is Networks. This area is used when you want to expose an entire local network through one device acting as a routing peer. When you define a network resource and assign a routing peer, you can allow other devices in the NetBird network to reach machines that are not running the NetBird client themselves.
NetBird makes it easy to remotely access the apps you self-host, and it does that securely while keeping the spirit of self-hosting alive. Speaking of which, you might also want to explore some self-hosted apps you can install on your system to make the most of that remote access.