By default, Docker stores everything inside “/var/lib/docker”, which is located on the root (/) partition. As your containers grow, this folder can fill up quickly. If you notice that your server is running slow, fail to save data, or crash randomly, it is probably because the root partition has run out of space. In this guide, we’ll walk you through the methods to move your Docker volume (or data) to another partition and free up space in the root partition.
Why Do You Need to Move Docker Volumes to Another Partition
Docker containers often generate large amounts of persistent data. Over time, this data can consume the storage space of your root partition. Moving Docker volumes to another partition helps you to:
- free space on the root filesystem
- prevent system crashes due to disk exhaustion
- store large application data on dedicated storage
- improve overall storage management
For example, database containers such as MySQL or PostgreSQL may store gigabytes of data within volumes. Moving those volumes to a larger dedicated partition can help to maintain system stability.
Locate the Docker Volume Directory
Before moving a Docker volume, we first need to locate where Docker stores it on the system. Run the following command to list all available Docker volumes:
docker volume ls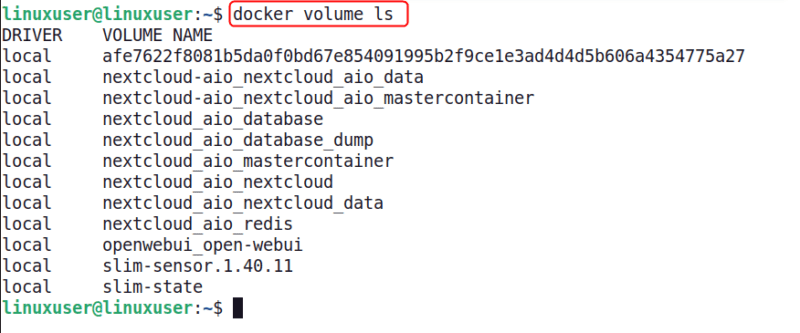
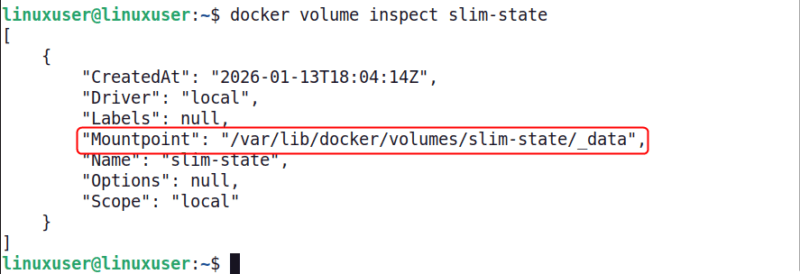
After identifying the volume name, run the command below to inspect that specific volume:
docker volume inspect volume_nameThis command displays detailed information about the volume. In the output, look for the Mountpoint field. It shows the exact directory where Docker stores the volume data.
Move the Entire Docker Data Root
One way to move Docker data to a different partition is by relocating the entire Docker storage directory, which includes volumes, images, containers, and logs. It’s the cleanest and safest method if “/var/lib/docker” is filling up.
For this purpose, first, you need to stop the Docker service to ensure no files change during the migration:
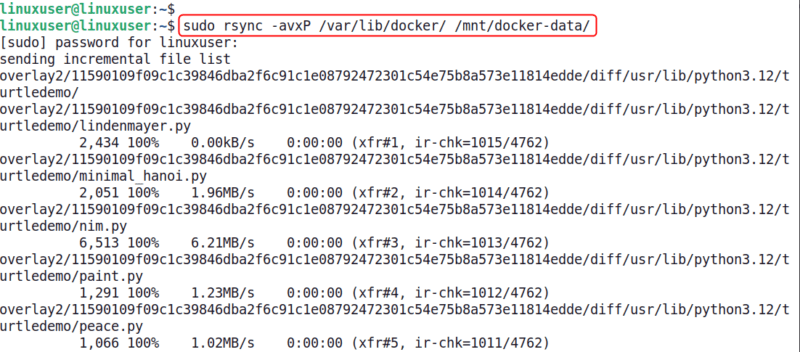
sudo systemctl stop dockerNext, you can copy the Docker data using the rsync command:
sudo rsync -avxP /var/lib/docker/ /path/to/new/partition/docker-data/Note: Change the “/path/to/new/partition/” to the path of the new partition where you want to migrate the folder to.
This command copies the Docker directory while preserving permissions and showing progress during the transfer.
Alternatively, you can use the following command, which preserves additional Docker attributes such as hard links, ACLs, and extended attributes:
sudo rsync -aHAX --info=progress2 /var/lib/docker/ /mnt/docker-data/This version is recommended when migrating Docker data because it preserves more filesystem metadata and provides a clearer overall progress indicator.
After this, rename the old data directory to back it up before deleting it.
sudo mv /var/lib/docker /var/lib/docker.oldNow, update Docker’s configuration by opening the daemon file with this command:
sudo nano /etc/docker/daemon.jsonAdd the following content to this file:
{
"data-root": "/path/to/new/partition/docker-data"
}
Finally, restart Docker with sudo systemctl start docker. After this, you can confirm the new Docker data directory with the following command:
docker info | grep "Docker Root Dir"
If everything is fine, remove the old backup:
sudo rm -rf /var/lib/docker.oldMove All Docker Data Using Docker Desktop (GUI Method)
Docker Desktop allows you to move all Docker data to another partition by changing the Disk Image Location. This option transfers everything stored by Docker, including images, containers, volumes, and the build cache, to a new location on your system.
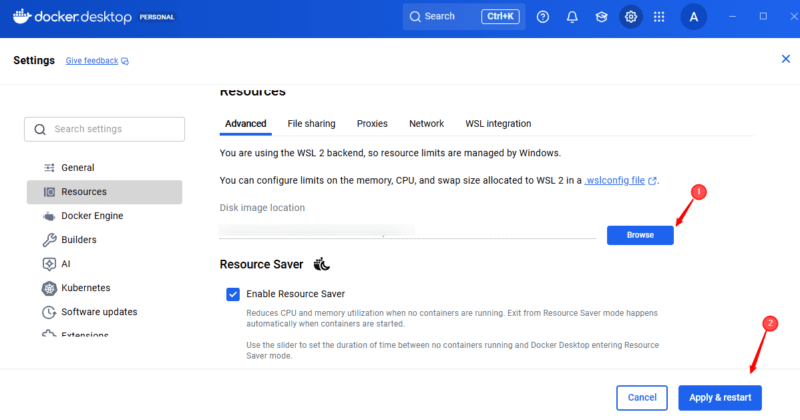
To do this, open Docker Desktop and navigate to Settings, go to Resources → Advanced, and then find the Disk Image Location option.
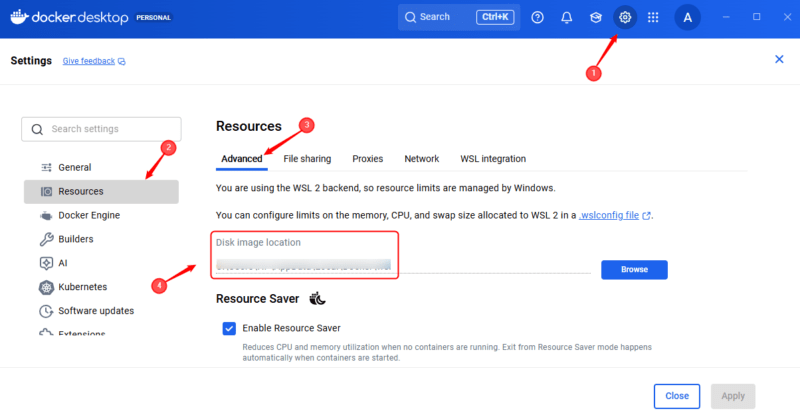
Click Browse and choose a folder on the new partition or drive where you want Docker to store its data, such as “/mnt/newdisk/docker-data”. After selecting the new location, click Apply & Restart. Docker Desktop will then restart and move all existing Docker data to the selected partition.
Note: This moves all Docker data. There is currently no GUI option to move individual volumes.
Relocate Only Specific Volume Data
You can move a specific Docker volume to another partition and use it with your container via a host bind mount. This approach is simple, safe, and easy to back up. Before moving the volume, stop the container that uses it:
docker stop container_nameAfter this, use rsync to move all data safely to your new directory:
sudo rsync -a /var/lib/docker/volumes/my_volume/_data/ /data/docker/my_volume/This will copy everything from the old volume to “/data/docker/my_volume”.
Edit your “docker-compose.yml” file to use a bind mount instead of a Docker-managed volume:
services:
  my_service:
    volumes:
      - /data/docker/my_volume:/container/path
Replace /container/path with the path inside the container where the volume was originally mounted. Then redeploy the container with the following command:
docker-compose up -dWrapping Up
Moving Docker volumes or the entire Docker data directory to a larger partition frees up space on your root filesystem and keeps your server stable. Containers continue running smoothly without any risk of data loss, and future storage management becomes much easier.
If relocating the entire Docker directory isn’t possible, you can still reclaim space using other methods. These include pruning unused containers, images, networks, and caches with docker system prune or individual prune commands, and using Linux bind mounts to move large directories without affecting Docker’s runtime.