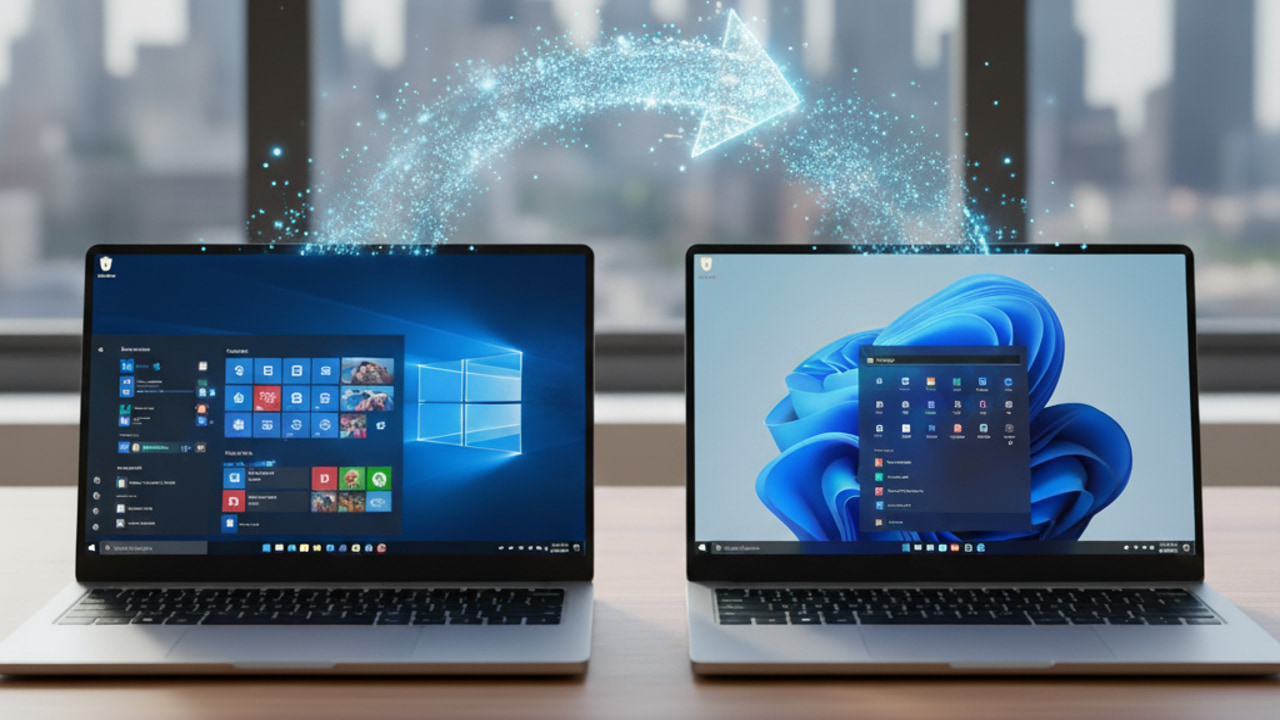
The Windows 11 Media Creation Tool has stopped working on Windows 10 22H2 devices. If you try to launch the tool, it will simply close after showing the Windows logo without any error. Microsoft has acknowledged the issue and will be fixed in the new MCT update. Until then, you can use the following methods to upgrade to Windows 11.
Do an In-Place Upgrade with Windows 11 ISO
While creating a Windows 11 USB is a common way to upgrade or clean install Windows, it isn’t necessary. The Windows 11 ISO is sufficient to do an in-place upgrade. Although the ISO will only be able to upgrade an existing Windows environment, it shouldn’t be a problem for you since you are already on Windows 10.
The ISO can also be moved to other Windows PCs to upgrade them (like on a USB) if you have more than one device to upgrade. The main drawback is that you can’t customize the installer easily, and it won’t do a real clean install, as it stores old operating system files for a rollback. Here’s what you need to do:
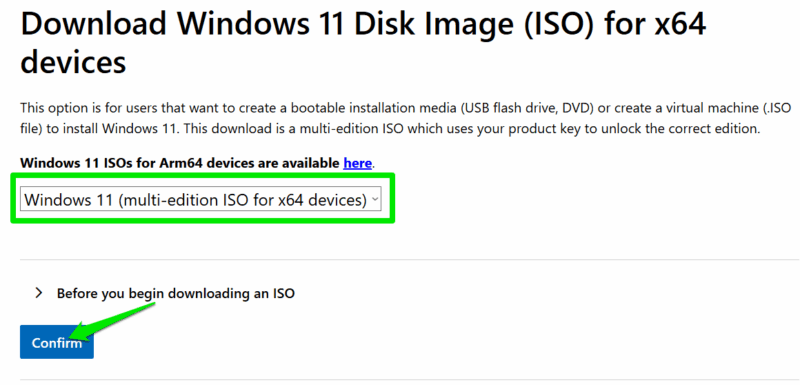
Go to the Windows 11 download page on the Microsoft website, select Windows 11 under the Download Windows 11 Disk Image (ISO) for x64 devices section, and click Confirm. Afterward, select the OS language to generate a limited-time link to download the ISO.
Once downloaded, right-click on the Windows 11 ISO file and select Mount.
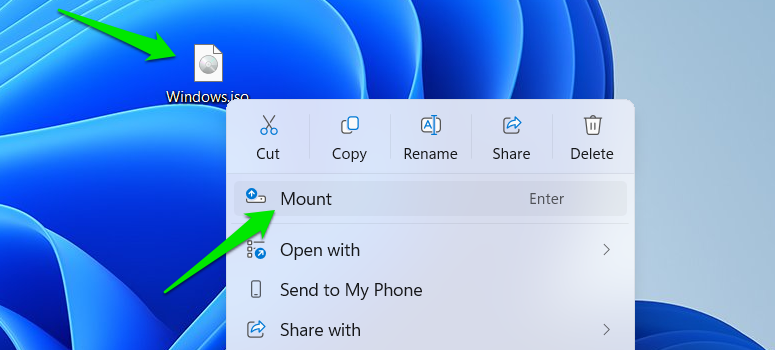
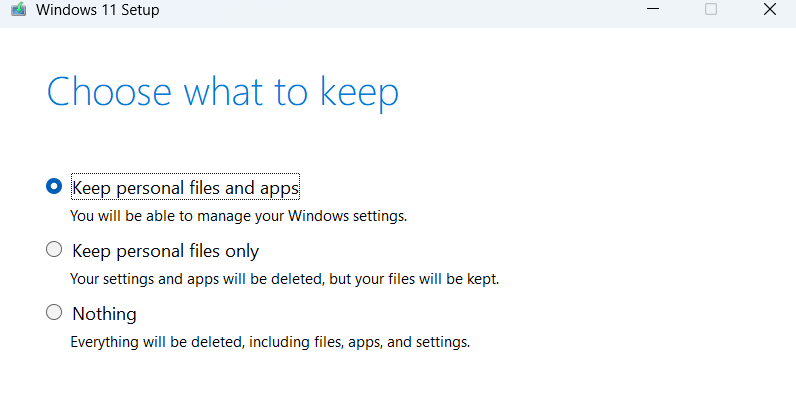
This will mount it as a drive and you can view the contents. Now, open the setup.exe file, and the installation wizard will start. For an upgrade, select the Keep personal files and apps option, and for a clean start, select Nothing. Windows will restart, and the Windows 11 installation process will initiate.
Create a Windows 11 USB Drive with Rufus
If you must create a Windows 11 USB drive, then the Media Creation Tool isn’t the only tool for this purpose. Rufus is a popular tool that can create a Windows 11 USB drive from the Windows ISO file. Unlike MCT, Rufus also gives you more customization options, including the ability to bypass Microsoft account creation and Windows 11 installation requirements.
You’ll need the Windows 11 ISO file, so make sure you download it first. Afterward, connect your USB drive (minimum 8GB) and launch Rufus. Here, click on Select and choose the Windows 11 ISO file to load.
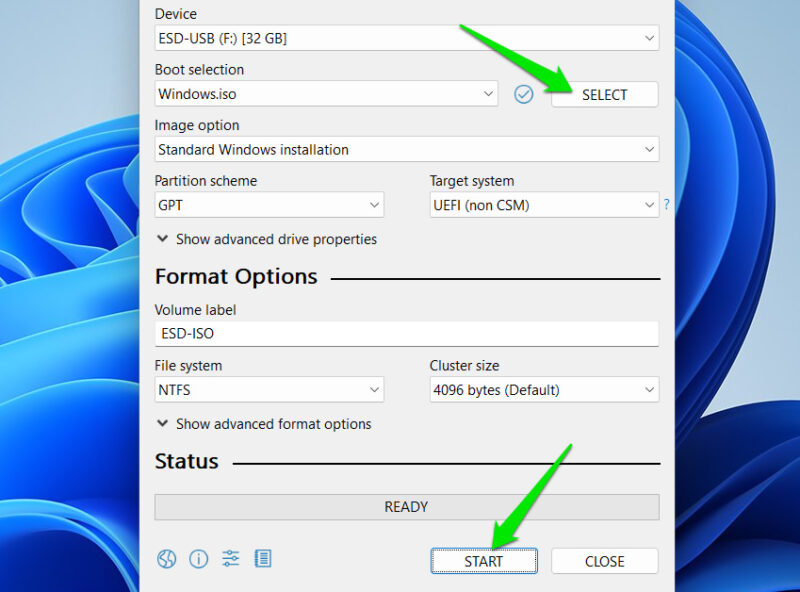
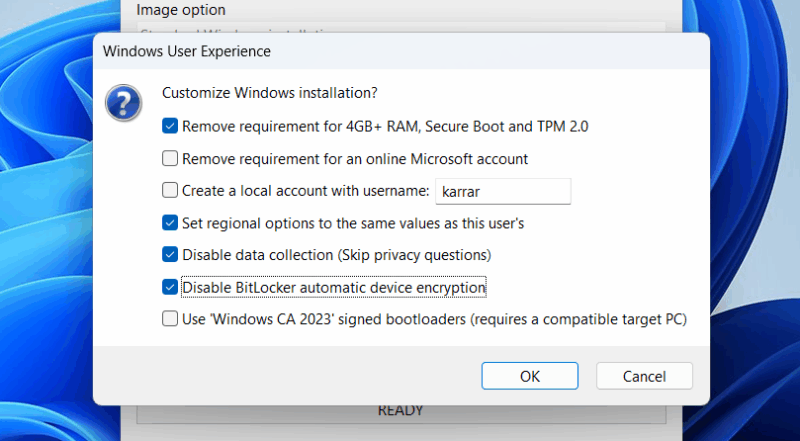
It will automatically fill all the fields, selecting settings that work best for Windows 11. For most users, the default settings are fine; you can just click the Start button. It will give you a bunch of special customization options, you can configure them as you like, and click OK to start the process.
Use the Windows 11 Installation Assistant
If your Windows 10 PC meets Windows 11 requirements and you just want to upgrade it to Windows 11, then using the Windows 11 Installation Assistant is the easiest approach. It will do all the work for you; you just need to accept the prompts.
Download Windows 11 Installation Assistant from the Microsoft website. Afterward, launch the program, and it will do the rest. It will first detect if your PC is compatible with Windows 11 installation, and then ask for necessary permissions to both download the required files and upgrade your PC to Windows 11.
Use Command Prompt to Create Windows 11 USB
For those who want to create a Windows 11 USB drive, but don’t want to use any third-party tool at all, then it’s possible to do so using Command Prompt commands. It will be a bit complicated as you need to both flash the USB and then copy the files from the Windows ISO to it. Here’s a step-by-step guide to create a Windows 11 USB installer using the Command Prompt.
Windows Media Creation Tool isn’t updated often, so there’s a good chance it will take some time till the fix arrives. Don’t wait, use these methods to upgrade to Windows 11 either directly or with a USB drive. If your PC doesn’t meet Windows 11 requirements, use Flyby11 instead to easily upgrade your unsupported PC.


