You can bring AI support directly to Visual Studio Code (VSCode) by adding ChatGPT to it. This can make coding faster and easier for you, as it acts like a smart assistant, offering ready-to-use code snippets, intelligent code completion, and quick help with debugging. You can ask coding questions and get answers without leaving VSCode, which saves time and keeps your workflow smooth. This tutorial will walk you through the steps to connect ChatGPT to Visual Studio Code.
Prerequisites for Setting Up ChatGPT in VSCode
Before you set up and use ChatGPT in Visual Studio Code, make sure the following conditions are met:
- Visual Studio Code should already be installed on your computer.
- An active OpenAI account is necessary to use ChatGPT features.
- Some ChatGPT extensions require your OpenAI API key. You can get this from platform.openai.com.
- You need a stable internet connection as ChatGPT runs online.
- Your VSCode should allow installing extensions (not restricted by admin or firewall).
If you meet the specified criteria, you can install a ChatGPT extension like “CodeGPT”, “vscode-chat-gpt”, or “ChatGPT – Code Companion” and use it to boost your productivity.
Integrate ChatGPT with VSCode
Open VSCode on your system, and go through the following steps to integrate ChatGPT with VSCode:
There are many GPT-related extensions available for VS Code, each offering different features and capabilities. You can choose the one that best fits your needs.
For example, we use CodeGPT as it allows you to connect to various AI providers to assist developers in writing, understanding, and checking their code.
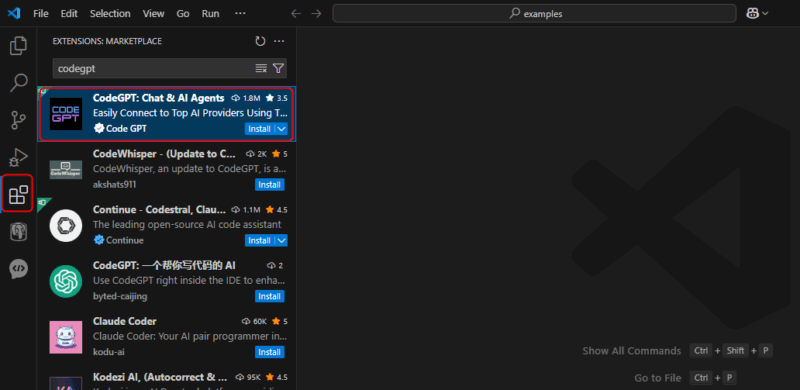
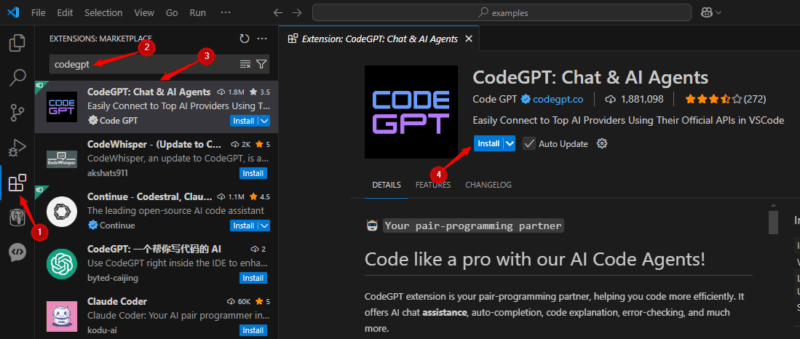
Go to VS Code’s extension marketplace, search for “CodeGPT”, and click the Install button to add the AI assistant to your development environment.
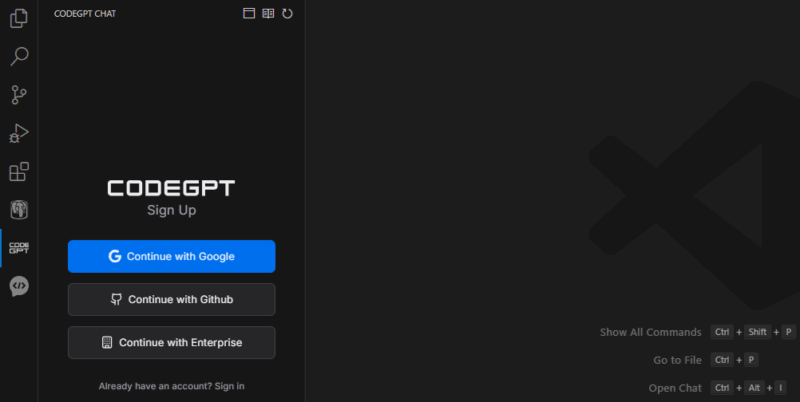
Once you install the CodeGPT extension in Visual Studio Code, you’ll see a CodeGPT icon on the left side. Click it to open the panel. From there, you can log in using your Gmail, GitHub, or an enterprise account, or create a new account if you don’t have one:
After logging in, you can adjust your settings, choose an AI model, and add your OpenAI API key to begin using CodeGPT.
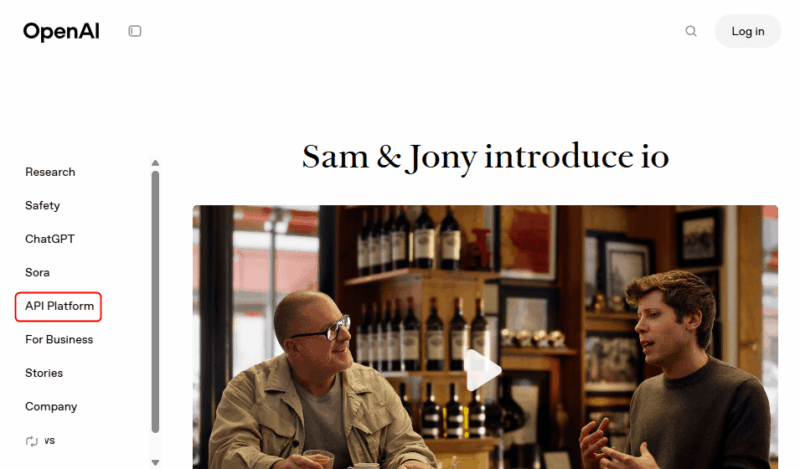
Next, open your web browser and go to OpenAI’s official site, then head over to the API Platform section.
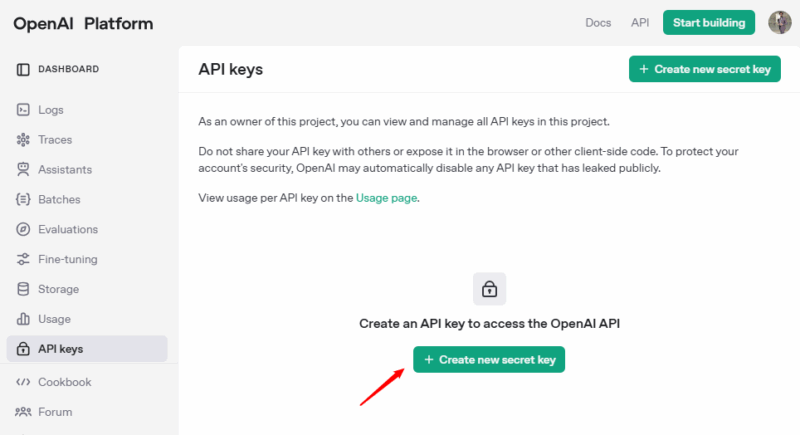
Select the “API Key” option, which will direct you to your OpenAI account page. If you haven’t created an account yet, you’ll need to sign up first. After signing in, navigate to the API keys section and select “+ Generate new secret key”:
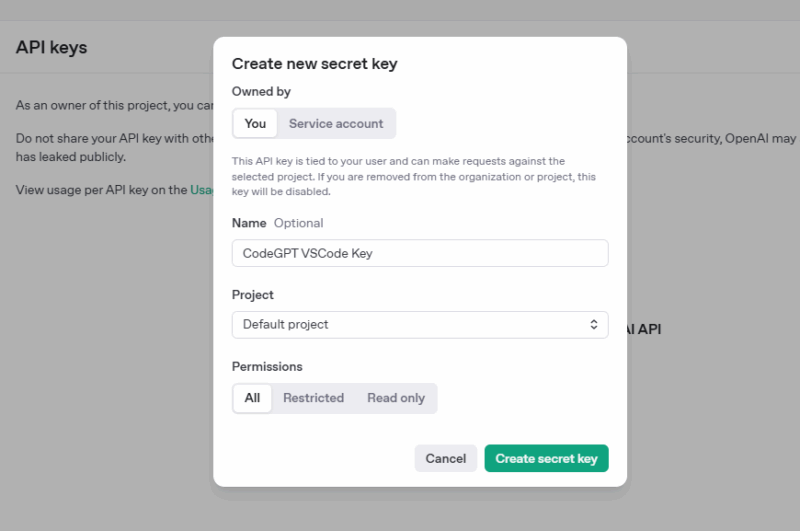
Specify a name like “CodeGPT VSCode Key” and click the Create secret key button.
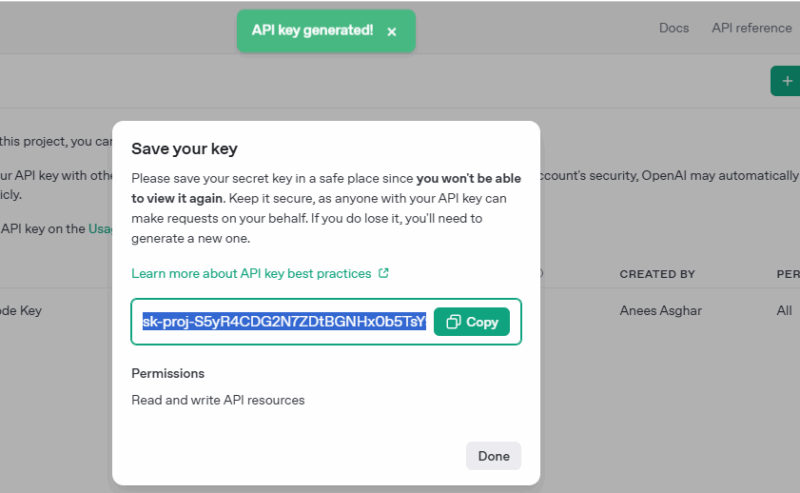
Copy the key and navigate back to VSCode.
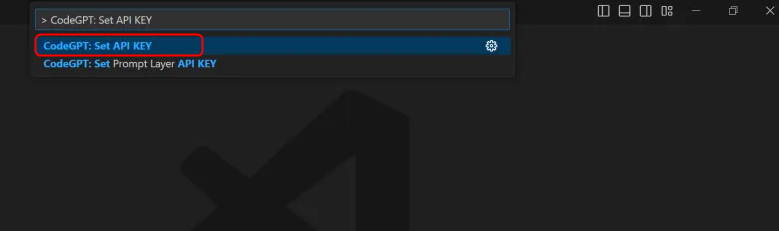
Press Ctrl + Shift + P to open the command palette and search: “CodeGPT: Set API Key”. After this, paste the OpenAI API key you copied earlier to configure the CodeGPT.
How to Use ChatGPT Inside VSCode
To use ChatGPT in VS Code, click the CodeGPT icon on the left sidebar and start using ChatGPT prompts to get AI assistance directly in VS Code. For example, in the snippet below, I asked CodeGPT about the h1 tag to quickly learn what it is and how it works in HTML:

That concludes the process of enhancing your coding workflow by using ChatGPT within Visual Studio Code. For even better results, check out 5 ChatGPT hacks I use to stay productive.