
Despite its popularity, there isn’t an official Google app to use Google Authenticator on a Windows PC. However, there are some workarounds to avoid having to constantly have your phone by your side to login.
Exporting Google’s 2FA Code to Your PC
To use Google Authenticator on your Windows PC, generate a “secret code” for Google Authenticator. This is the seed code generators used to make codes that work with Google.
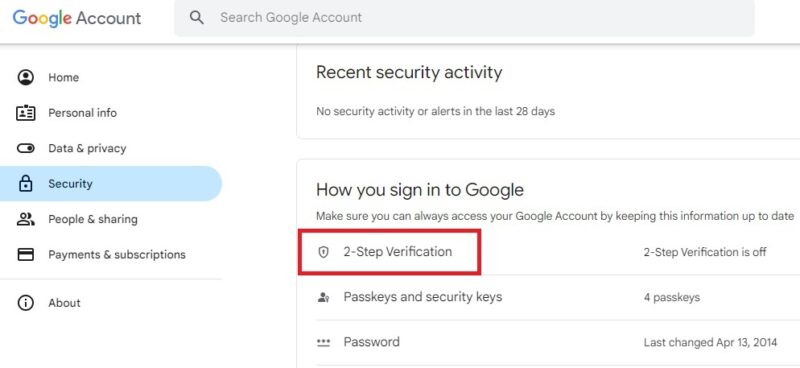
Head to the Google Account security page. Scroll down to the How you sign in to Google section, and select 2-Step Verification.
If Google knows you have a phone connected to your account, it will take you through the steps to set up a basic phone notification service. Press Get Started.
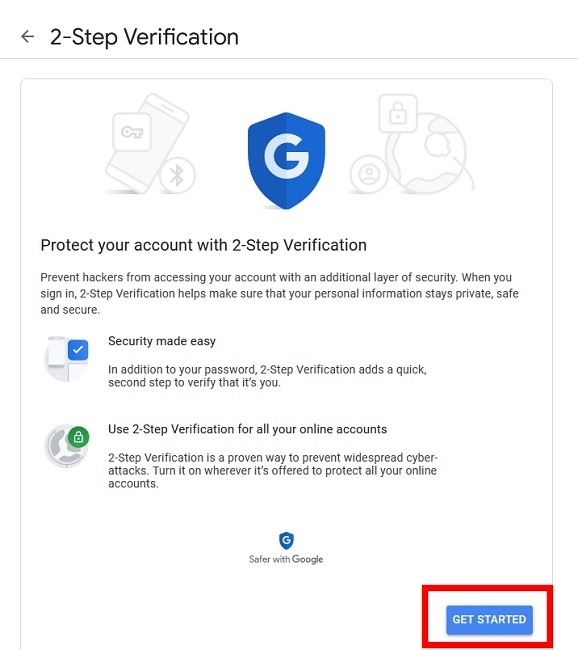
After you have completed the steps, you’ll have the chance to set up the Authenticator app. While we’re not downloading the actual app, we do need to pretend we are getting the secret key. Click Set up.

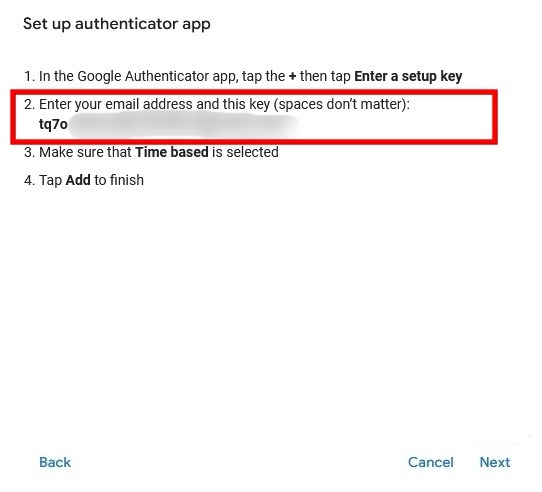
Press + Set up authenticator. Go through the prompts until it asks you to scan a QR code. Under the code, click Can’t scan it?

Look for the secret key, and copy it. This is what you’ll enter into third-party apps when they ask for a key. However, be sure to keep it a secret. If someone else gets this information, they can use it to get into your Google account!
Now that we have the code, let’s see where we can use it. Leave your Google security page open on your PC to reference it when setting up an app to use Google Authenticator. Next, you need a desktop or browser app that supports TOTP (timed one-time passwords).
1. WinAuth
If you’re worried about a third-party app stealing or leaking your code, try WinAuth. Its major draw is that it’s an open-source app that can be downloaded to your PC. Your code’s not stored in the cloud for others to hack.
Once WinAuth is running on your PC, add a new Google account.

Enter your secret code from the Authenticator app, then click the Verify Authenticator button.

Take a look at the code that has been generated under the Verify Authenticator button, and remember it for later use. Go back to your Google security settings page, where the pop-up with the secret code should still be opened. Press Next.
Enter the six-digit code generated by WinAuth, and press Verify.
If everything is done correctly, Google shows you a message confirming the app has been successfully configured. Click OK to save the changes in your Google account.
Back in the WinAuth window, click OK to save the changes in the WinAuth application.
As soon as you click OK, WinAuth opens the Protection window that allows you to set a password to encrypt the files saved by WinAuth. This ensures any unauthorized access will be blocked. Enter the password twice, and click OK to save the changes.

Alternatively, set WinAuth to encrypt files so that it can only be used on the current computer, but using password protection is much more viable.
Google Authenticator can now be used on your Windows PC using WinAuth.
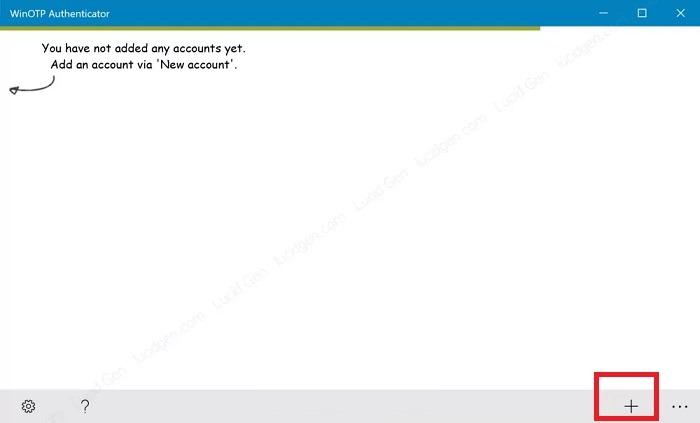
2. WinOTP Authenticator
WinOTP Authenticator is exclusive to Windows, and you can download it directly from the Microsoft Store. It’s a good alternative to Authy, which no longer supports desktops, only mobile.
Click the + button at the bottom to add a new service.
While the app claims it can read QR codes, it didn’t work so well for me, but definitely give it a try to see if it works for you. It took several tries for me.
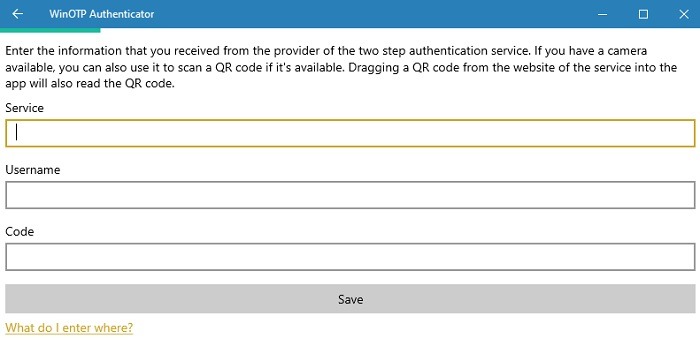
Enter the name of the service, your username, and your code, and you’re all set. For the service name and username, you can pick what you want, but make sure you’re able to tell the services apart.
3. 2 Factor Authenticator
2 Factor Authenticator currently only supports Google, Microsoft, LastPass, and Facebook accounts, but it works well as a Google authenticator on PC.
Press the + icon at the bottom to add a new account. Enter a name for the account, such as “Google,” then enter your secret key.
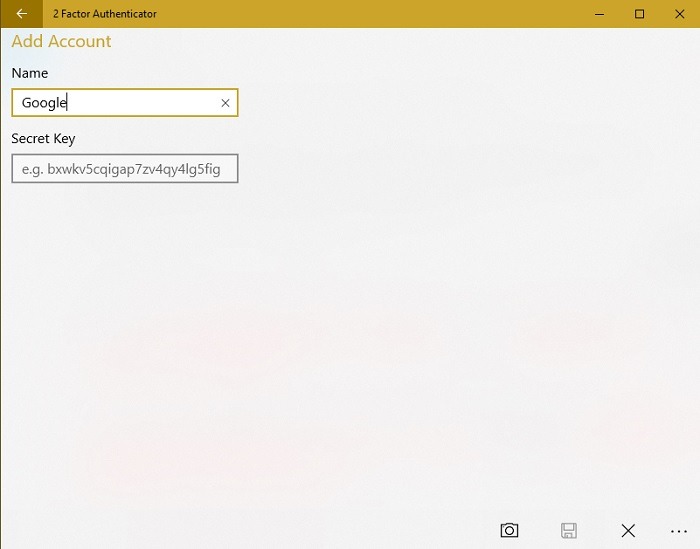
You can also use the camera icon to scan a QR code, if available. This worked better than WinOTP Authenticator – but not perfectly.
4. GAuth Authenticator
If you want to use Google Authenticator in your browser on a Windows PC, try GAuth Authenticator.
To add your authenticator to GAuth, click on the pencil in the top right. Click Add.

Enter the account name (in this case, “Google”) and the secret key.

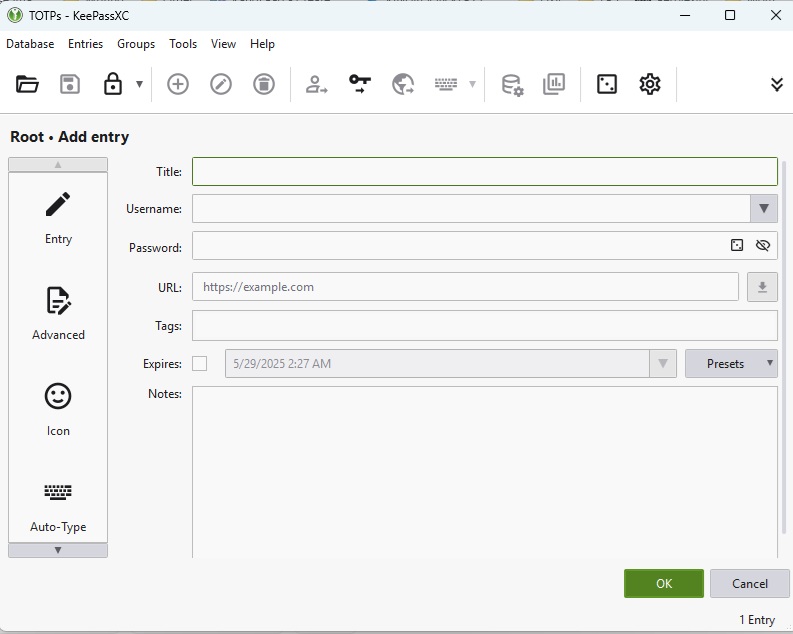
5. KeePassXC
If you want a completely local Google Authenticator on PC, KeePassXC works well. While the app is mainly known as a password manager, it can also generate and store TOTPs. But, I highly suggest storing your passwords in one database and your TOTPs in a second database. Otherwise, if anyone ever gains access to your KeePassXC app, they’ll have access to your passwords and 2FA codes in one place.
Once installed, press Create database to create a new database for your codes. Enter a database name, choose your settings, and select a password to secure it.
Next, press the + button to add a new entry. Fill out any relevant details. If you want to keep passwords and TOTPs separate, just enter a Title and URL. Press OK to save your settings.
Right-click your new entry and select TOTP -> Setup TOTP.
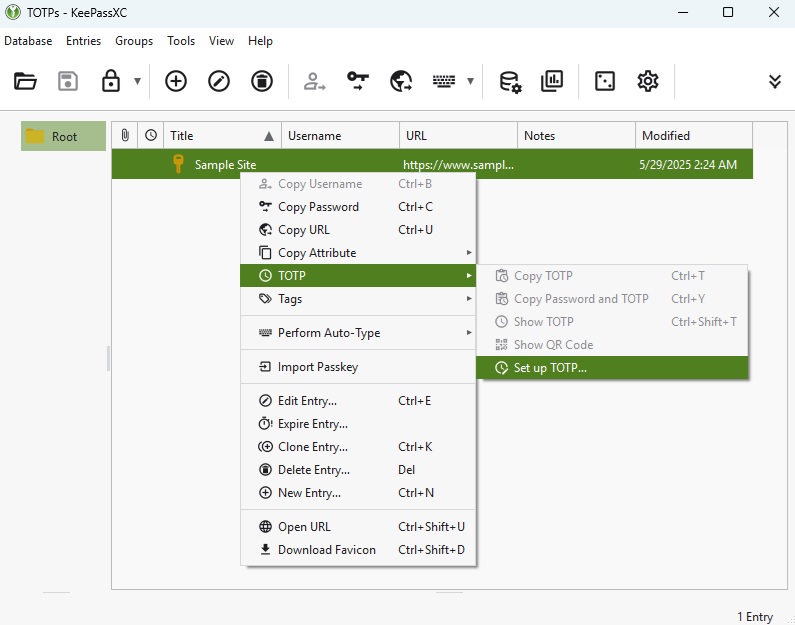
Enter your secret key that you get from Google Authenticator and press OK. Then, pop in to KeePassXC to see your codes at any time.
Tips for Using Google Authenticator on a Windows PC
For the best experience, there are a few tips you should know:
- Setup accounts simultaneously on both devices. Otherwise, you’ll need to disable 2FA on any accounts you’ve already setup and re-add them to both devices.
- If you can’t set up accounts at the same time, screenshot the key or QR code the account gives you during the setup process. As soon as you’re at your PC, enter the information into the authenticator app on your desktop or browser.
- Hang on to these screenshots as a backup of your codes, but please store the screenshots on a USB drive or external hard drive versus your phone for security reasons. Having backups of your keys/QR codes helps you avoid having to start from scratch whenever you get a new PC. The Google Password Manager, along with other password managers, already makes it easy to move over passwords.


