
Microsoft Word’s red wavy underline is a built-in feature designed to highlight spelling errors. However, for any users, the visual cue can be more distracting than helpful. If you’re tired of seeing these lines, don’t worry, we’ll show you how to make them disappear in just a few clicks.
Good to know: Microsoft Word crashing or freezing on your Windows PC? Here’s what you can do about it.
1. Attend to the Spelling Errors
The simplest way to remove the red underline from view in Word is to address the issues.
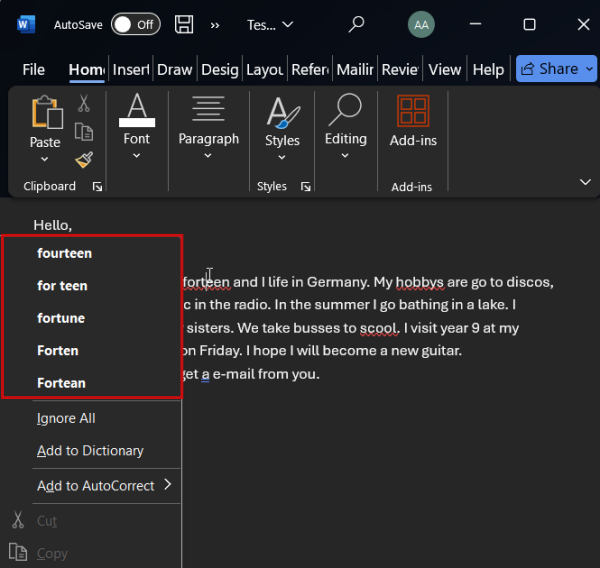
If you’re using Word on a PC, right-click on the word that has been highlighted. The context menu will display several suggestions on how to resolve the error at the top. Review them and select the option that works in the context.
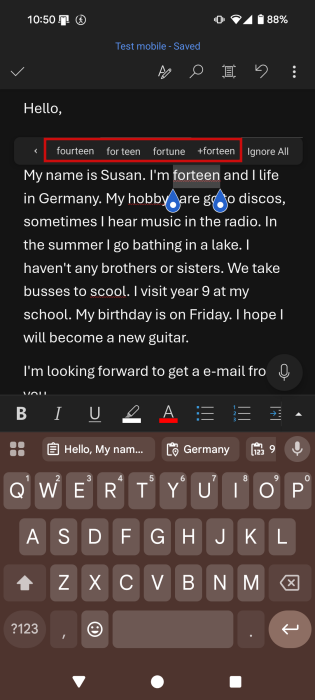
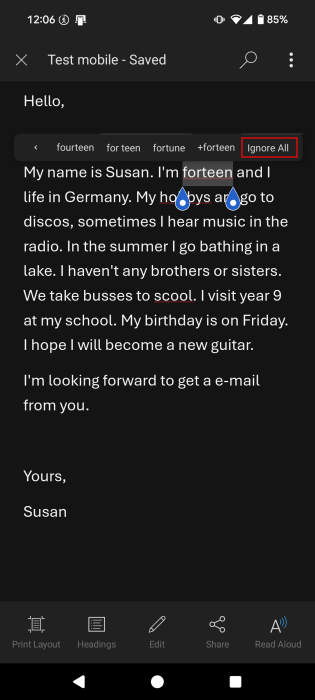
On a mobile device, long-press on the specific word to see the suggestions pop up in the small menu above.
Once you fix the spelling mistake, the red underline will automatically disappear. The downside to this method is that you have to attend to each mistake one by one. This can be superfluous, especially if you tend to re-read and review your text after you finish typing it.
Tip: here’s how to scale a document in Microsoft Word in Windows and Mac.
2. Use the Ignore All Button
If you don’t really trust Word’s proofing to work 100%, try this trick. Right-click on one of the highlighted words and select Ignore All. Word will remove the underlying line and will ignore all instances of this particular spelling showing up in the document. Now, continue on to the next word and so on. Of course, this method suffers from the same downside as the previous one.

Alternatively, if you can opt for the option to Add to Dictionary, if you’re positive the word you’re using is correct, but Word just doesn’t know about it.
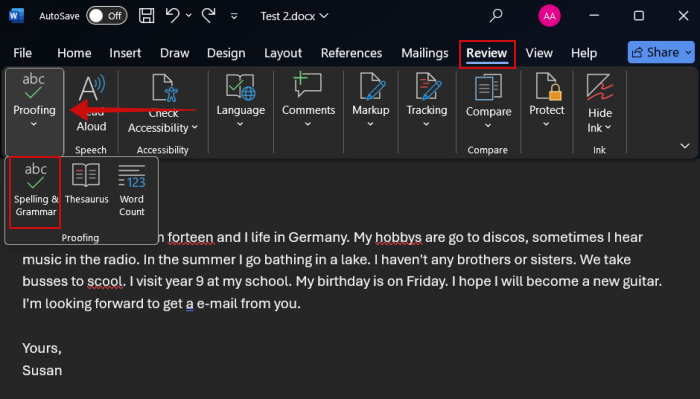
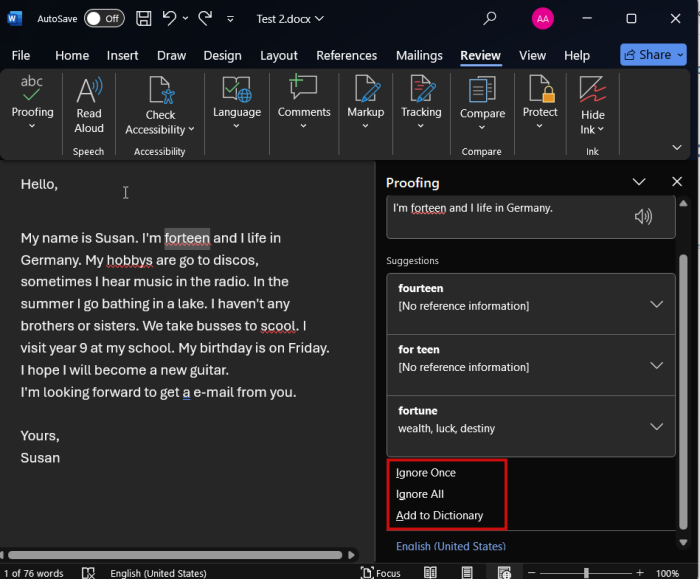
Or you can go to the Review tab in the ribbon menu. Select Proofing -> Spelling and Grammar.
All mistakes will appear in a side panel complete with suggestions as well as with the options to Ignore Once, Ignore All or Add to Dictionary.
On mobile, long-press on the word to select it and then tap Ignore All in the menu that appears.
3. Change the Language
If Word’s default proofing language is set to one language, let’s say English, and you’re writing your text in a different one (in this example, Spanish), almost all the text will be highlighted with a red underline.
In order to avoid this happening, you’ll need to change the language settings. Click on File in the ribbon menu.
Select Options at the bottom of the left-side menu.

In the new pop-up window, go to Language and then press the Add Language button in the Office authoring languages and proofing section.
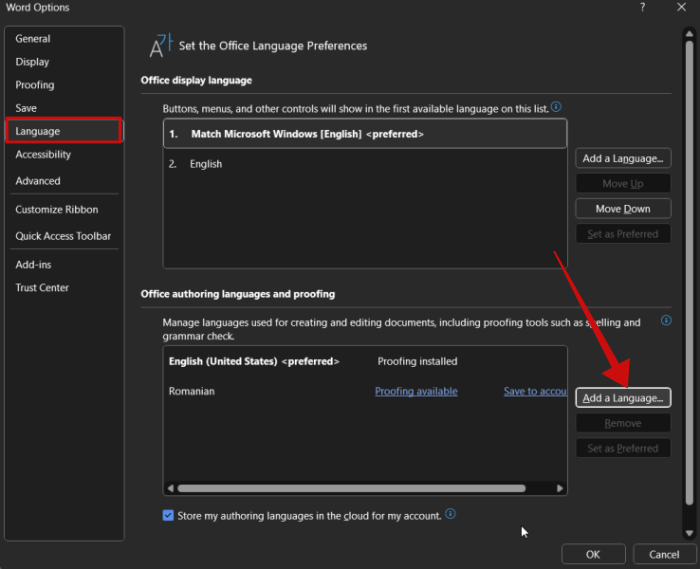
Find the language in question and press Add.

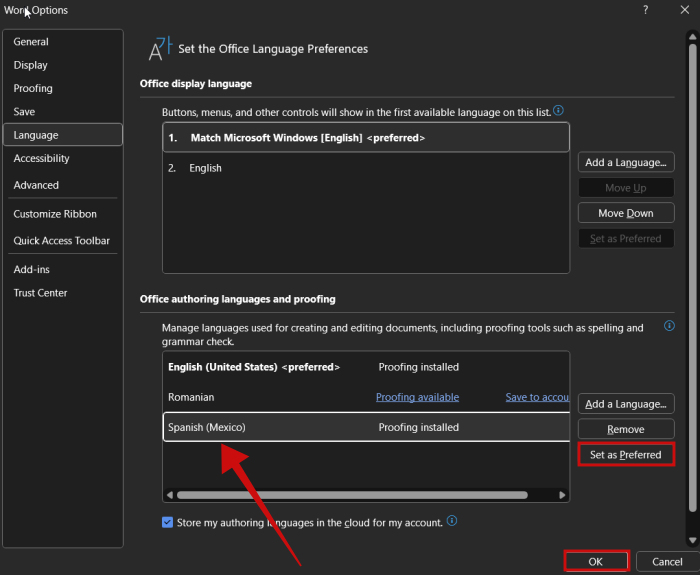
Once Word adds the new language, select it and click Set as Preferred, then OK.
Word will let you know that you need to relaunch the app in order for the changes to take effect.
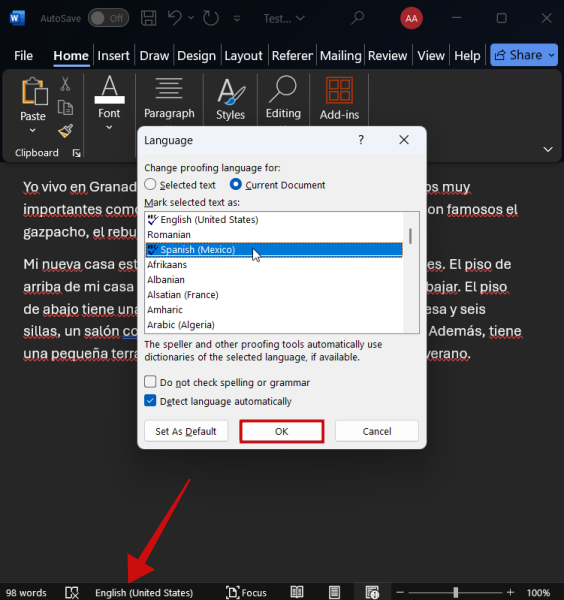
If Word doesn’t automatically detect the new language you’ve added and sticks to English, take a look at the bottom of the page. Click on English and switch to the new language (in this case, Spanish). Press OK.
If your foreign language text has some mistakes, Word will only highlight these with a red line.
On a mobile device, open the document in question and press Edit at the bottom.
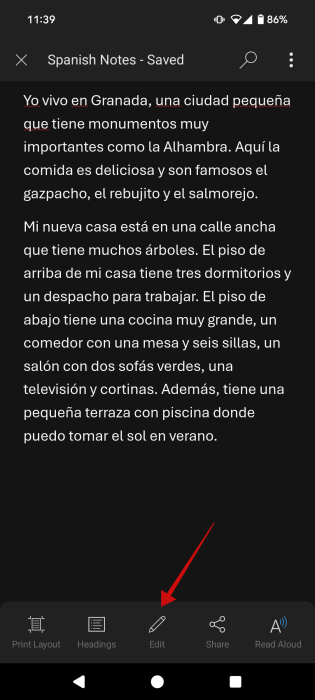
Tap on the tiny arrow icon in the format menu at the bottom.
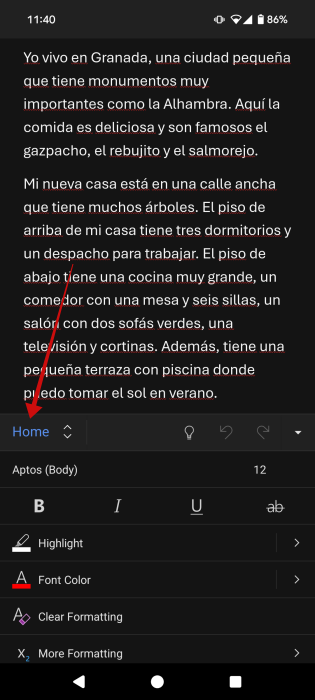
Press Home.
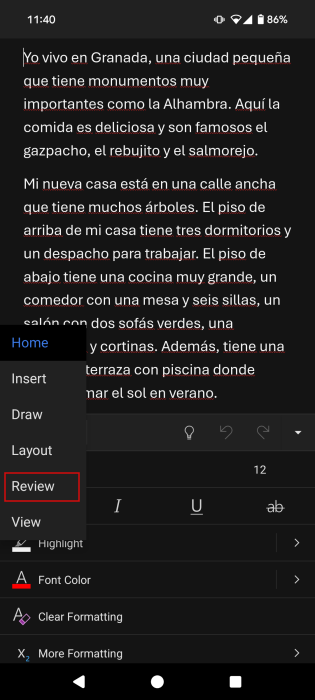
Select Review.
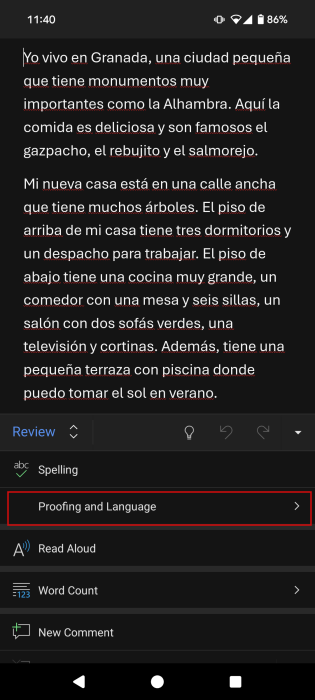
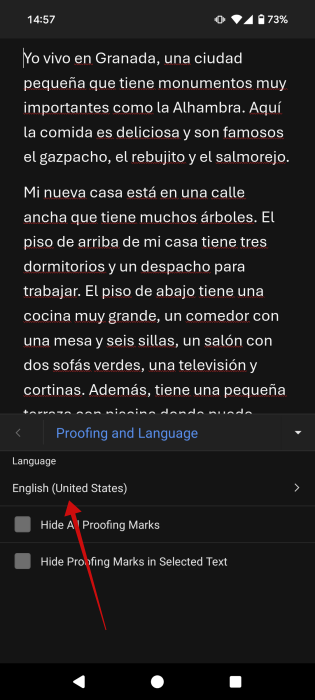
Tap on Proofing and Language.
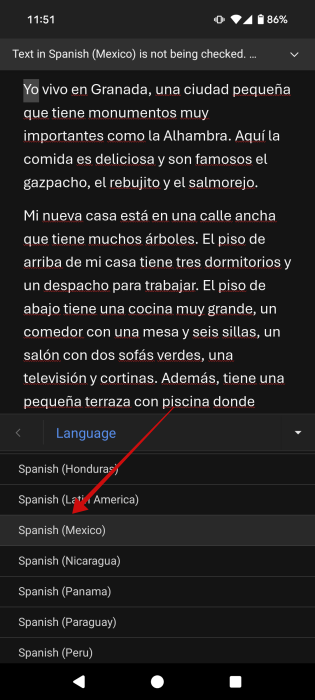
Press on English (or whatever language your Word app is currently using).
Find the language in which you’ve written the text.
At the top, you might notice a pop-up. Press Download to get the proofing tools on your device.
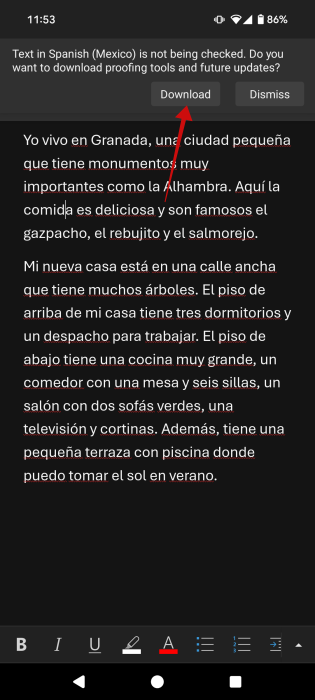
Return to the document and see if you can see any red lines. If you still can, close the app and relaunch it, then open the document.
FYI: learn how to add a background to your Word document.
4. Customize Proofing & Autocorrect Options
As a last resort, you can do away with all red underlines by customizing your proofing settings.
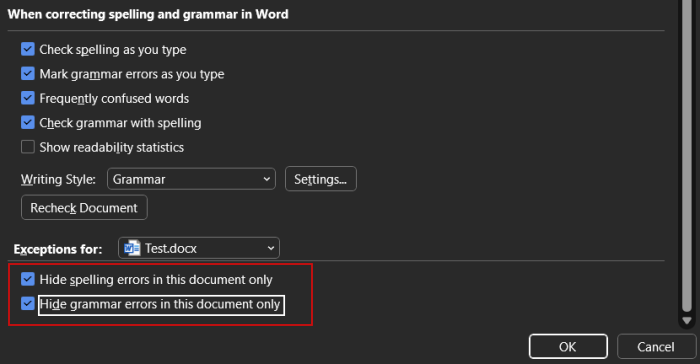
On PC, go back to File -> Account. Select Proofing in the pop-up.
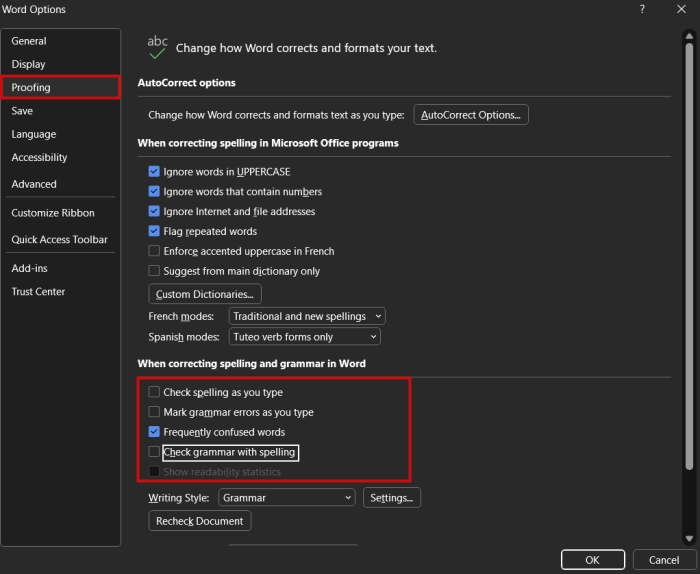
Look in the When correcting spelling and grammar in Word section. Deselect the following options:
- Checking spelling as you type
- Mark grammar errors as you type
- Check grammar with spelling
The red underlines should no longer be an issue.
Alternatively, if you want no remove the red underlines for this document only, scroll at the bottom and select the options to Hide spelling errors in this document only and Hide grammar errors in this document only.
On mobile, go back to the Review screen as shown above and select Hide All Proofing Marks under Proofing and Language.

Now that you know how to get rid of annoying distractions in Word, perhaps you’d like to keep getting up to speed with some useful tricks. For instance, check how to export a Word document as a PDF. Alternatively, learn how to create a fillable form with Word.