If you have played games on an ultrawide monitor, you know it feels a little like cheating to have such a big field of view (FOV) in games. Using custom resolutions, you can have the same advantage on your regular monitor. Even if your GPU app doesn’t support custom resolutions, you can still achieve it with a third-party app. This guide shows how to create custom resolutions in Windows to get a bigger FOV in games.
What to Expect
Let’s set our expectations straight to not create false hopes. You are about to use a resolution that people get with an expensive ultrawide monitor – of course, it will have some drawbacks.
When we force a 16:9 aspect ratio monitor to use a 21:9 (widescreen) aspect ratio, the forced scaling stretches the image a little. This means you will see blurry images with elongated text. It won’t affect gameplay much, but if you are in it for the aesthetics, you may not like it.
Also, be ready to deal with glitches and other display complications, as your monitor is not running on its optimum resolution. Thankfully, most of the issues can be fixed with a bit of tinkering (more later).
Enter Custom Resolution Utility
Assuming your GPU doesn’t support custom resolutions, we have to resort to a third-party tool. Custom Resolution Utility is a well-known free tool for creating custom resolutions in Windows and is quite easy to use. Although it can be used for overclocking the monitor, I’ll focus on creating custom resolutions specifically for better FOV in games.
Before creating custom resolutions, I recommend you create a restore point, as the process can cause many unexpected problems that could be hard to undo.
Creating Custom Resolutions
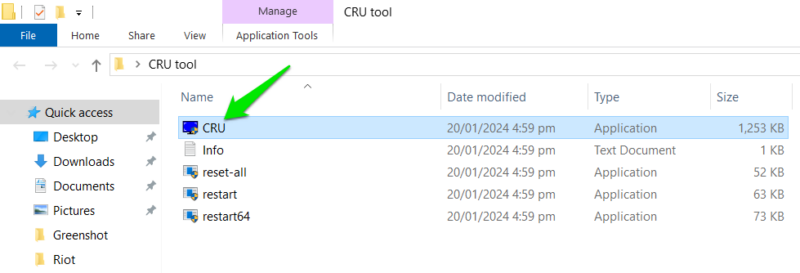
Unzip the CRU folder you downloaded to find multiple executable programs, each with its own purpose. To create the custom resolution, open the CRU app.
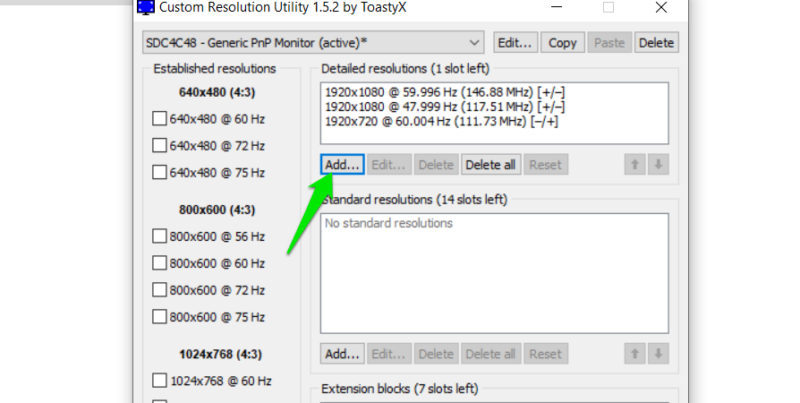
Click on Add under the Detailed Resolutions section.
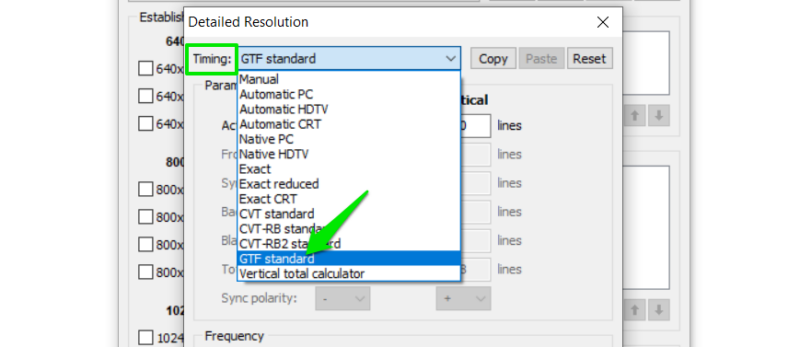
Select GTF standard from the Timing drop-down menu. Don’t worry about other options in this list. GTF standard is the safest option for non-native resolutions, as it automatically sets timing based on your monitor capabilities.
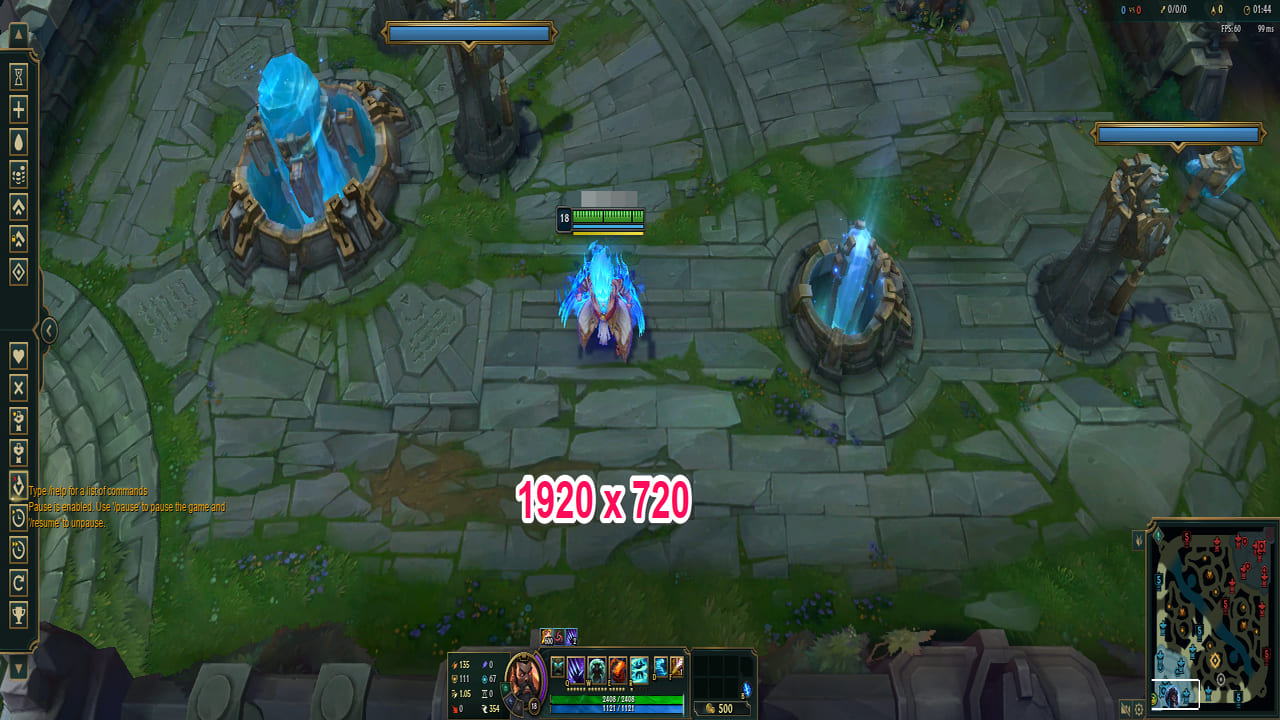
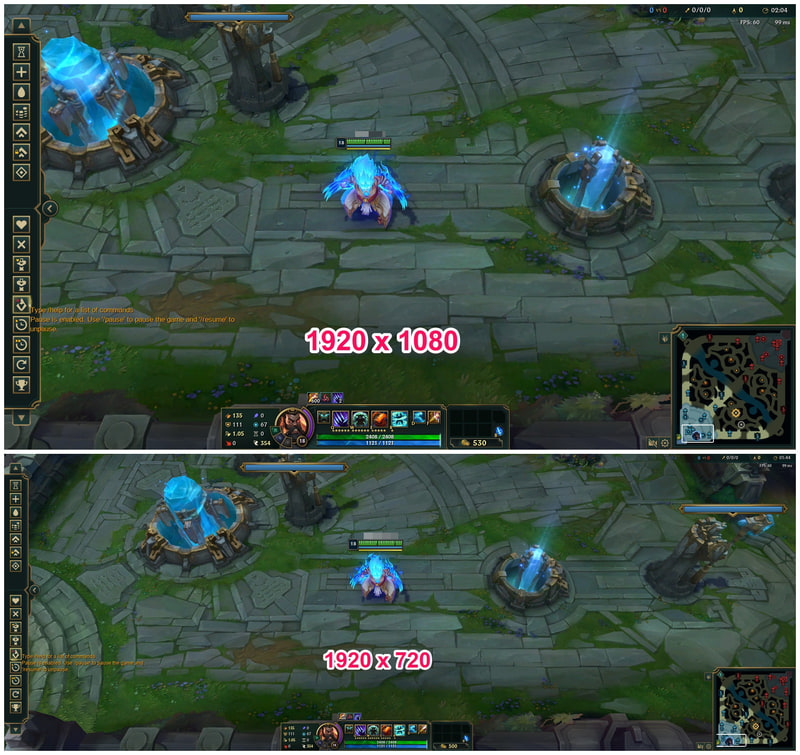
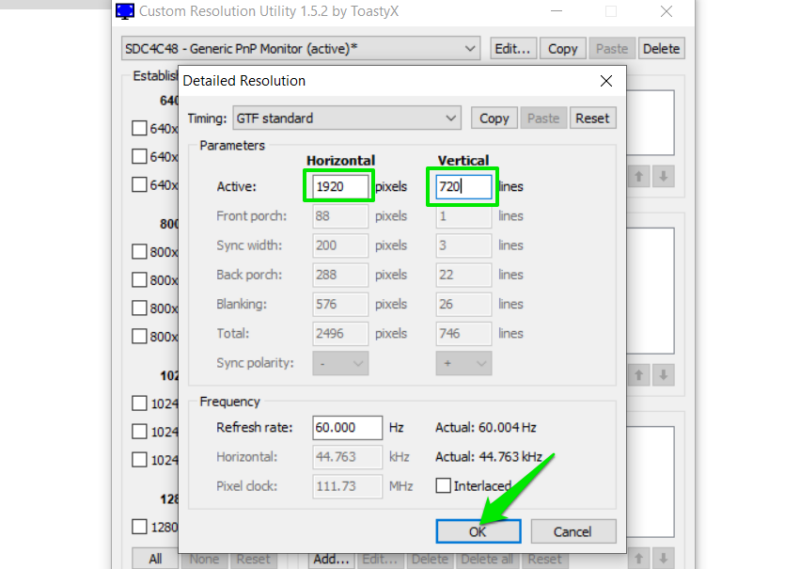
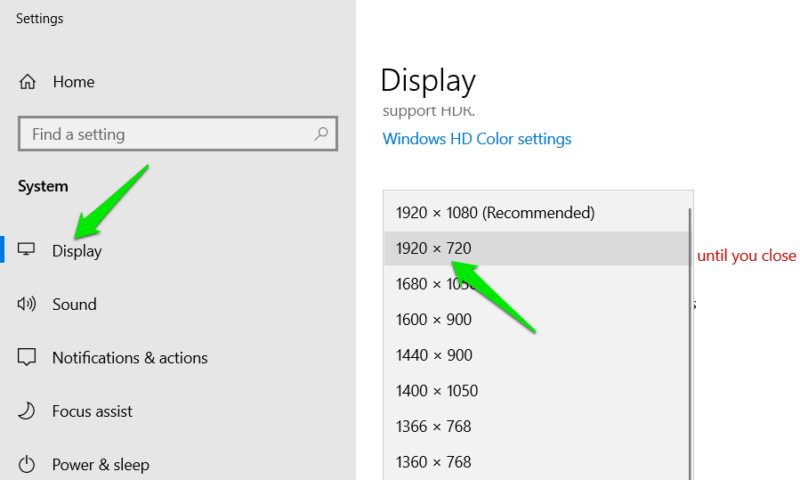
To replicate a 21:9 aspect ratio on a 16:9 monitor, 1920×720 is the closest resolution. Enter 1920 under the Horizontal section and 720 under the Vertical section, then click OK.
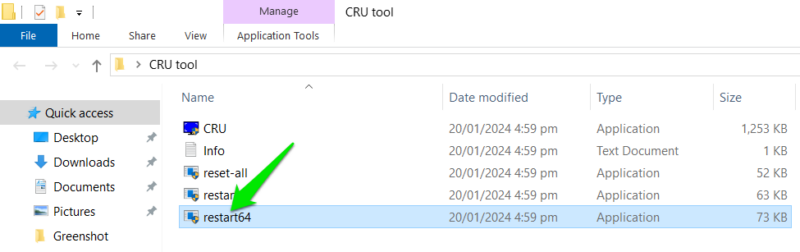
Restart the GPU for changes to take effect. Either restart the PC or execute restart64 in the CRU folder, then confirm the prompt.
This will add the new resolution to your Windows Display settings. Go to Windows Settings -> Display, and select the new resolution under Display resolution.
For most games, the resolution will become available in the game’s graphics settings. You don’t need to change the Windows resolution. However, if it doesn’t show, change the Windows resolution, and restart the game.
If anything goes wrong, the reset-all app in the CRU folder will reset all settings to default.
Troubleshooting Problems
Honestly, creating a custom resolution is the easy part. I have used CRU on four PCs and faced different problems on each, including Windows failing to start. The following are the common problems that you may face and their solutions:
- Problem: the input not supported error.
Solution: your monitor doesn’t support 1920×720 resolution. Try a bit higher height, like 1920×800, as you will still get a sufficiently large FOV. - Problem: Windows is 1920×720, but the game is opening in a smaller window.
Solution: set the game in Full-Screen mode (won’t work in window or borderless mode). - Problem: custom resolution not showing in Windows Display settings.
Solution: restart the PC. If that doesn’t work, update your GPU drivers, as sometimes outdated drivers don’t show non-native resolutions. - Problem: a Blue Screen of Death appeared.
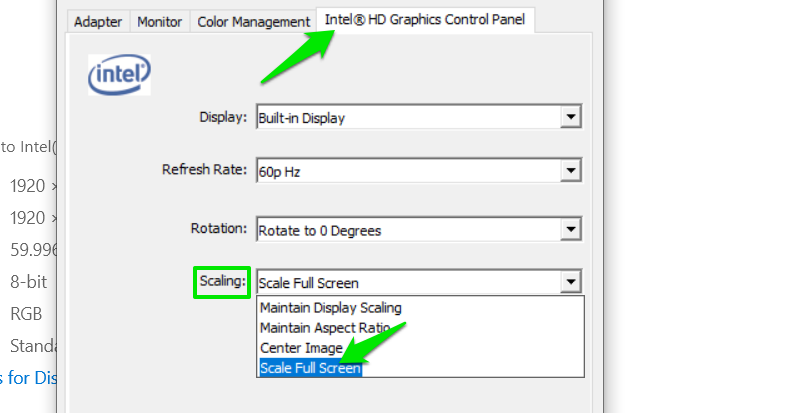
Solution 4: this has happened to me a few times right after changing settings, but didn’t happen again after a restart. If it continues, use a higher resolution height, like 1920×800. - Problem: black bars show at the top and bottom of the screen.
Solution: go to Windows Settings -> Display -> Advanced display settings -> Display adaptor properties. Under your GPU name, set Scaling to Scale Full Screen.
- Problem: the monitor only shows a black screen after a restart.
Solution: you applied an unsupported resolution without automatically resetting. Boot to Safe mode, and reset the CRU settings using the reset-all app in its folder. You can also access system restore, and restore to a stable state.
There is also a chance that you may face resolution-related issues later when you add other apps that interact with the display. However, in most cases, common screen resolution fixes will solve it.
All screenshots and images by Karrar Haider.