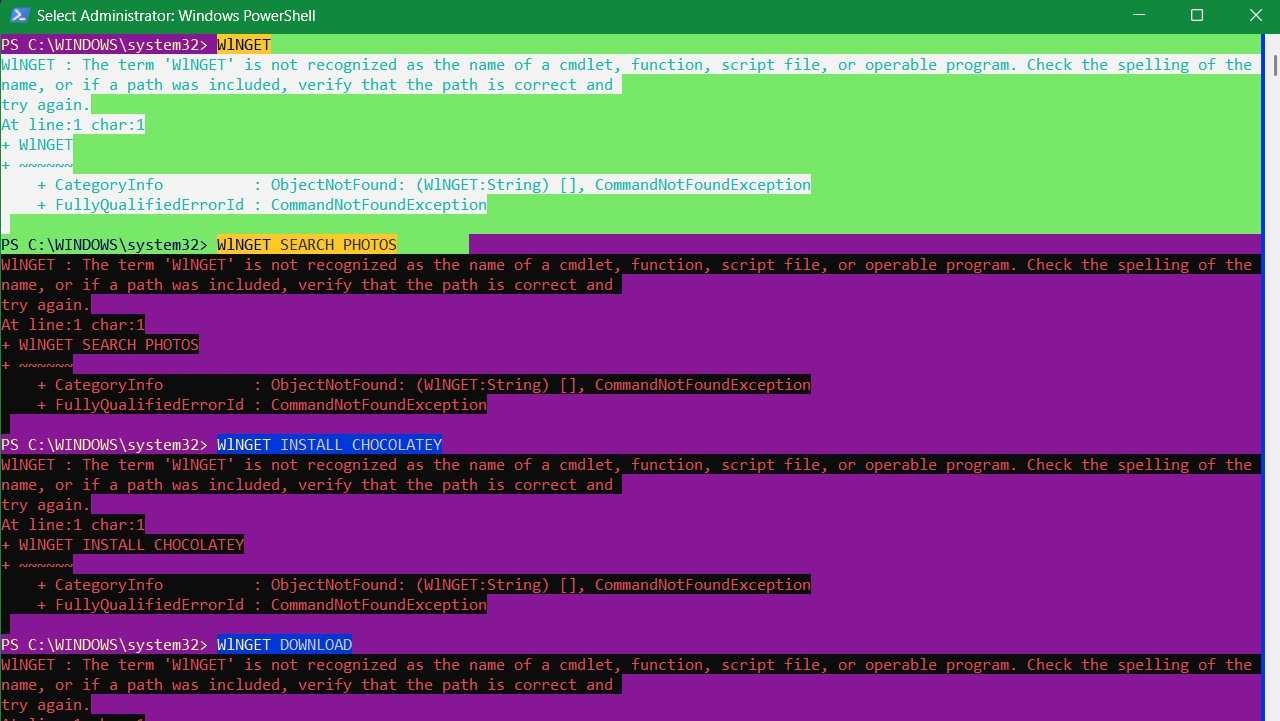
Windows users often use WinGet to install and manage applications through PowerShell, Command Prompt, and any other interpreters. Sometimes, when you run a WinGet command, you can get an error that says it is not recognized as a valid cmdlet, function, or script file. This guide shows how to get rid of this annoying error and get WinGet working again.
1. Reregister or Repair WinGet
One of the biggest causes of this WinGet error is a corrupt or misconfigured installation of the Windows Package Manager. If this is the case, you can easily fix it by re-registering WinGet, which will reset the installation and potentially fix any problems it may have.
Type PowerShell in the search box, and click Run as Administrator. Once it opens, copy and paste the following command into PowerShell:
Add-AppxPackage -RegisterByFamilyName -MainPackage Microsoft.DesktopAppInstaller_8wekyb3d8bbwe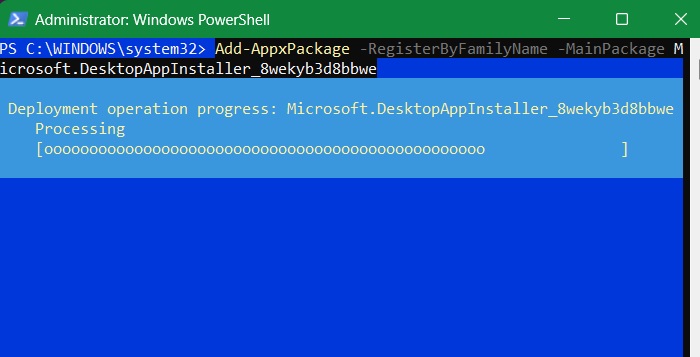
The above command tells Windows to re-register the App Installer from its official Microsoft source, which in turn will restore WinGet functionality.
Instead of a full reinstall, you can repair the existing WinGet package using the following command.
Add-AppxPackage -RegisterByFamilyName -MainPackage Microsoft.DesktopAppInstaller_8wekyb3d8bbwe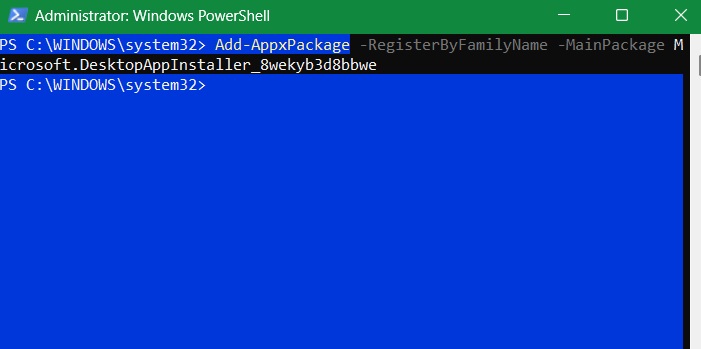
When executed correctly, Windows quickly re-registers the WinGet application and fixes Windows Package Installer issues like broken shortcuts, missing dependencies, or any corrupt registration entries.
Related: WinGet is a part of an ecosystem called Windows Package Manager. It is a command-line tool that serves as the client interface for the Windows Package Manager service.
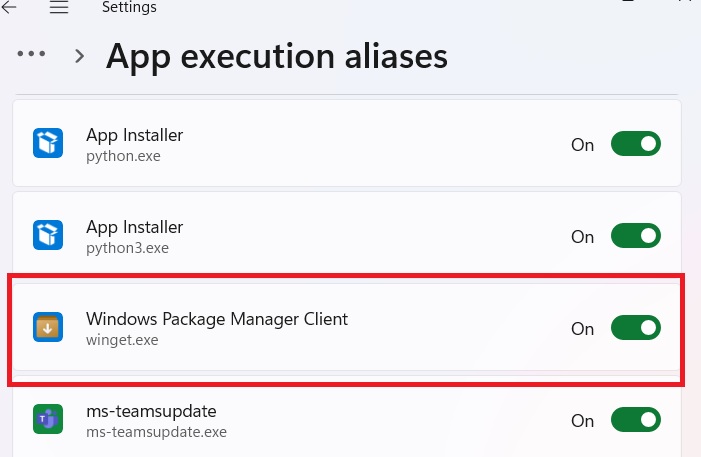
2. Enable App Execution Alias for Windows Package Manager
In the command-line context, the name WinGet is the app execution alias for Windows Package Manager.
Basically, app execution aliases are CLI commands in their shortened or abbreviated form. If you disable this feature for the Windows Package Manager, it can cause CLIs to not recognize WinGet. It can also happen due to third-party cleanup tools or system optimizers.
To enable app execution aliases for the Windows Package Manager, press Win + I to open the Settings app, head to Apps -> Advanced app settings, and click on App execution aliases.
If the toggle for Windows Package Manager Client is Off, turn the toggle back On.
Windows 10 users can find the toggle for Windows Package Manager Client by going to Settings -> Apps -> Apps & Features, and clicking on the App execution aliases link.
Tip: if you’re relatively new to PowerShell, learn these essential commands.
3. Verify You Have the Latest Version of App Installer
WinGet is a part of App Installer, a preinstalled Windows package that allows users to easily install and manage programs. If App Installer glitches out, it can lead to the Winget error. To fix App Installer, update it from the Microsoft Store.
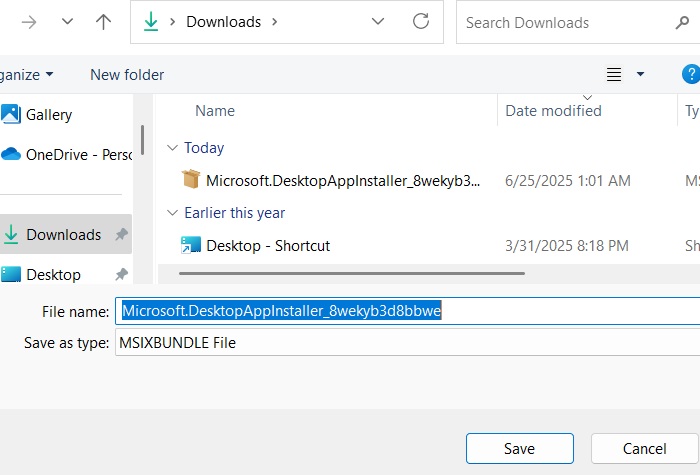
Go to the official App Installer download link, and click the big blue Download button. It will seek a PC location to download an MSIXBUNDLE file.
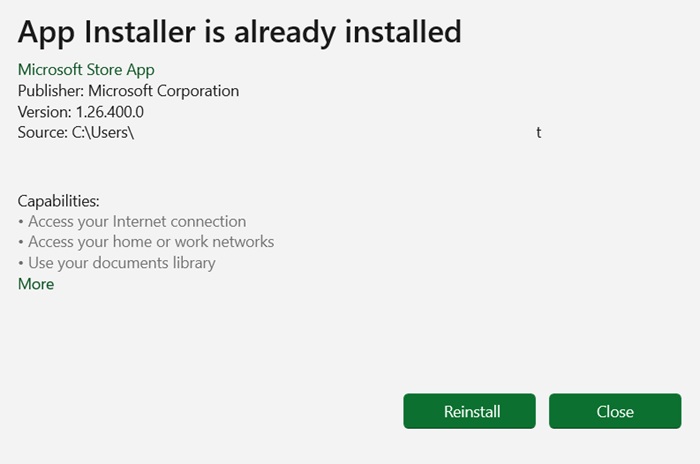
You should now see a message that App Installer is already installed. You can click Reinstall, which will fix any missing dependencies.
Otherwise, you will see an option to update through Microsoft Store.
Did you know? WinGet can be used to download a web browser on Windows without using another browser.
4. Reinstall App Installer from GitHub
If updating App Installer doesn’t work, perhaps reinstalling it can help fix whatever is causing Winget to malfunction. To do that, follow the steps below:
Go to the Windows Package Manager GitHub page.
Scroll down to the Assets section, and click on the Desktop App Installer’s MSIXBundle file to download it.

Double-click the file you just downloaded, and click on Reinstall in the pop-up window.
- Follow the rest of the instructions to complete reinstalling App Installer.
FYI: be sure to check out this list of Windows apps you should uninstall immediately.
5. Create a Path Environment Variable for Winget
When you run the WinGet command in Command Prompt or PowerShell, Windows will search the PATH variable for the file it needs to execute it. In a nutshell, this variable maintains a list of directories that contain executables for various commands on Windows. If PATH doesn’t list the directory containing the WinGet executables, you will run into the error.
To fix this, you’ll have to manually add the missing directory to the PATH variable:
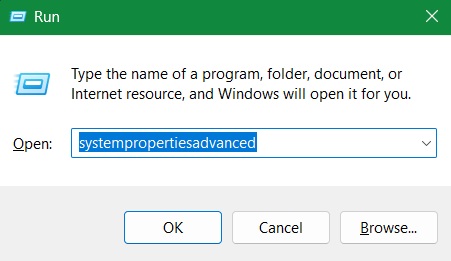
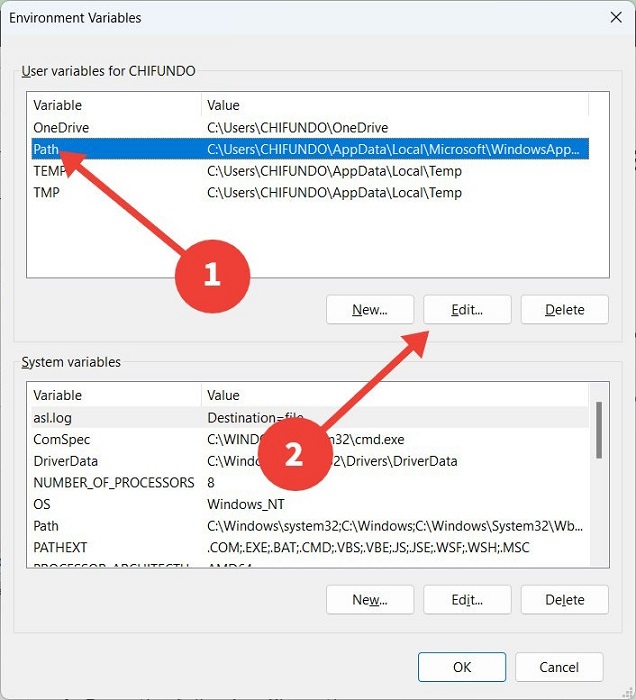
Press Win + R to bring up Windows Run, enter systempropertiesadvanced in the text box, and click OK. This will launch the System Properties window.
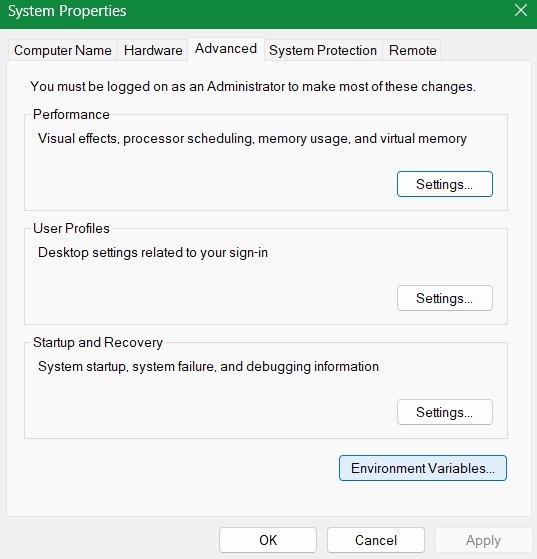
Select the Advanced tab, then click on Environment Variables.
Select the Path variable, then click on Edit to open the Edit environment variable window.
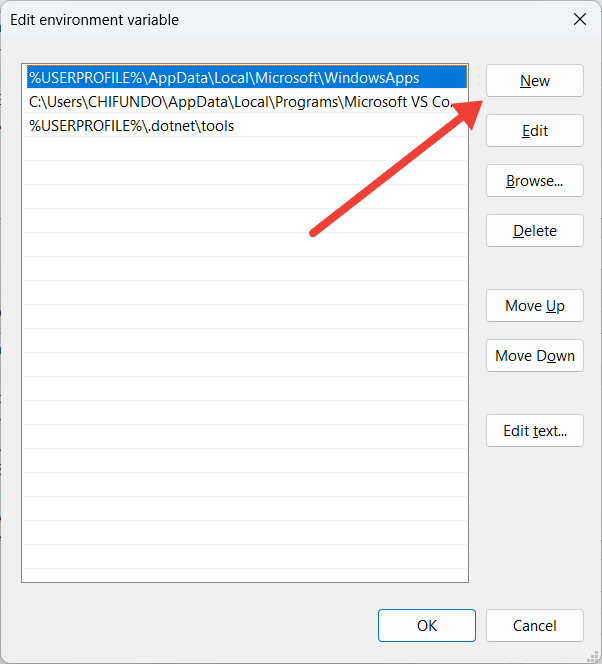
Copy the following file path: %UserProfile\AppData\Local\Microsoft\WindowsApps.
In the Edit environment variable window, click on New. There, you should paste the file path you copied just above, then click OK to save the changes.
Related: check out a complete list of Windows environment variables.
6. Enable App Package Deployment Settings in Local Group Policy Editor
On a Windows Pro/Enterprise device, open Group Policy by typing gpedit.msc in the Run command.
Navigate to the following path: Computer Configuration -> Administrative Templates -> Windows Components -> App Package Deployment.
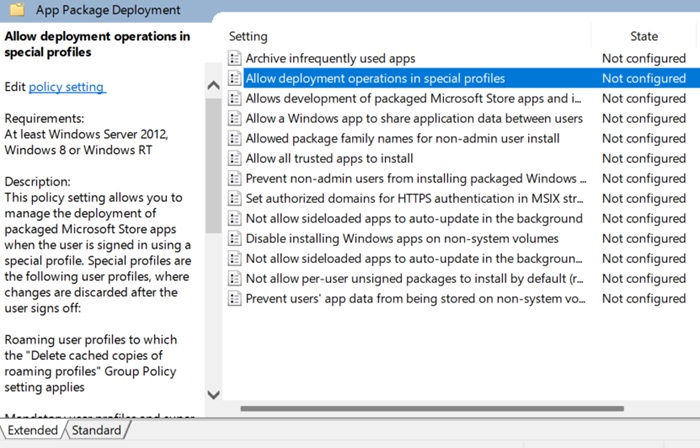
Here, you will find a Not configured status for most of the components. The ones that we need to focus on, particularly, are “Allow deployment operations in special profiles,” and “allow all trusted apps to install.” Double-click on these entities, and in the pop-up screen that follows, just click Enabled, followed by OK.
Good to know: learn the differences between Command Prompt and PowerShell.
7. Repair App Installer Cache Using Various Methods
You can repair the cache of various services. Open Control Panel and go to Programs -> Programs and Features. Look for App Installer in the list.
If you find the program listed, right-click and choose Repair (or Uninstall, then reinstall from GitHub as shown earlier.
Alternatively, you can open Run command, and type wsreset.exe. This will clear Microsoft Store cache, enabling you to operate WinGet commands smoothly.
8. Reset Your Windows PC to Factory Defaults
If all else fails, it could mean that there’s a deeper corruption or misconfiguration with your OS at hand. If you’re at a loss on what to do, resetting Windows to factory defaults can help you start afresh with the settings and configurations that can affect Winget. But before you reset your PC, make sure you back up your important data, as you’re going to lose it in the process.
Tip: learn which option is the best when doing a Windows reset: a cloud download or local reinstall.
Get Winget Working Again on Your PC
If you prefer to install things in Command Prompt or PowerShell, Winget is an essential utility. When the command-line tools on your PC can’t recognize it, it can dampen your Windows experience. By following the troubleshooting steps above, you can get it working again.
If you’re looking for an alternative to Winget, try using Chocolatey to install various applications on your Windows PC.


