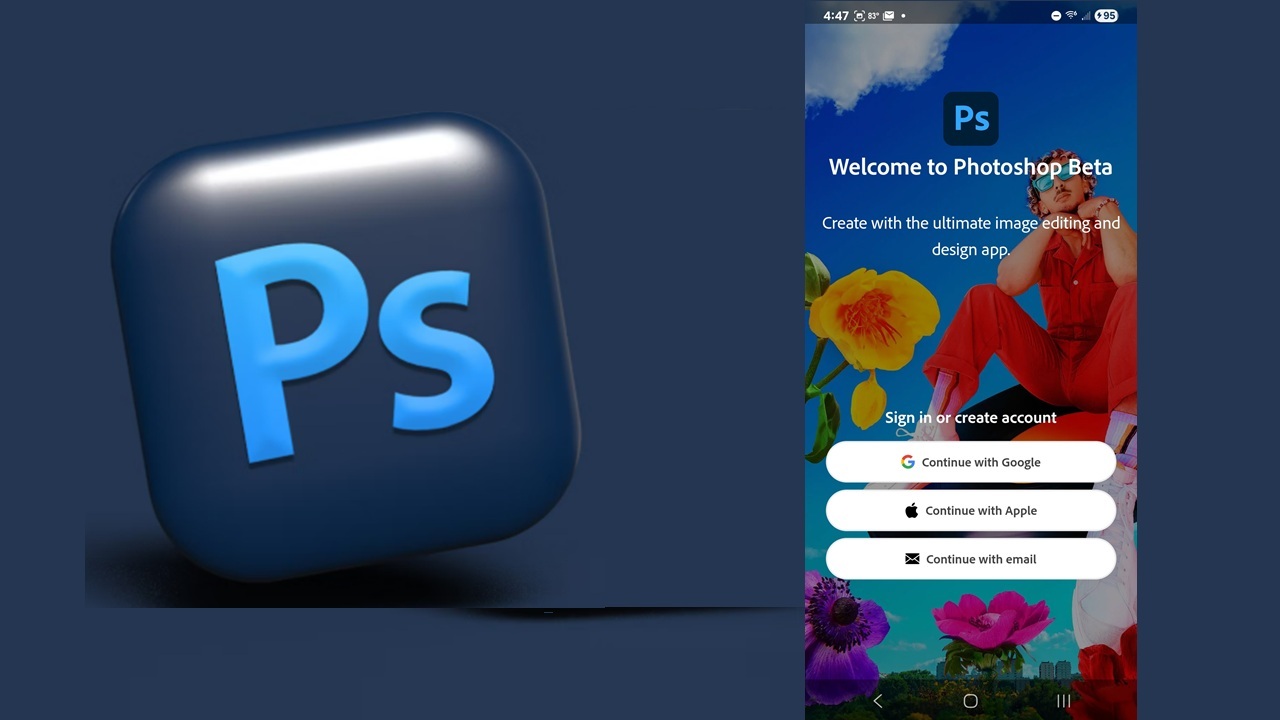
If you’ve been waiting impatiently for Photoshop for Android to arrive, your wait is finally over. Now, you’re able to use some of your favorite Photoshop tools in a convenient app versus trying to rely on your mobile browser. Plus, it’s free, at least for now.
Photoshop for Android Still in Beta
Adobe hasn’t fully committed to a professional Photoshop for all of us Android users just yet. Instead, it’s in beta, but you can grab it in the Play Store for free. You just have to allow Adobe to collect crash reports and feedback is strongly encouraged to help improve it.
All this means you should expect some bugs. If all goes well, a full official app should be released later this year. There aren’t any details on how much the app may cost going forward, or if part of it will remain free.
Getting Started With the Photoshop App
Once downloaded, login or create an account. If you already have an Adobe Creative Cloud subscription, login with that account to access anything you’ve already created in Photoshop and ensure your creations back up to your Adobe cloud storage.
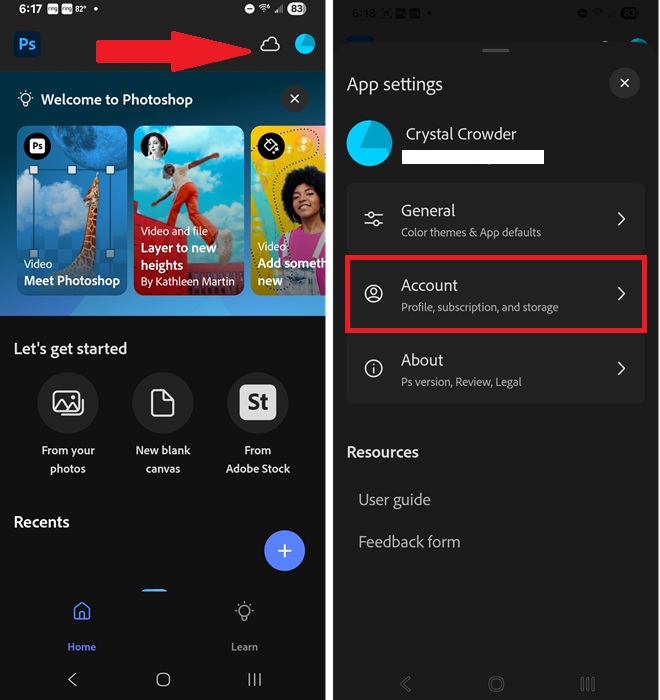
Easily manage your account and basic settings by tapping your profile icon in the top right. Your cloud sync settings are just to the left of it. In the Account section, view details on your subscription and check any monthly generative credits (10 for free each month) for AI features.
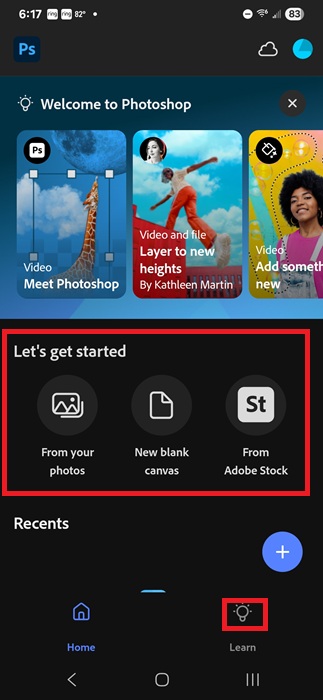
The home screen is clutter-free and includes a welcome banner with several tutorials and ideas to help you get started:
- Meet Photoshop – Intro tutorial for basic photo editing
- Layer to New Heights – Guide to layering
- Add something new – Adding to your photo using Generative Fill
- Replace backgrounds – Tips for replacing backgrounds of photos
- Cosmic Dreamscape – Step-by-step tutorial for creating the Cosmic Dreamscape
- Selections – Learn how to select portions of your photo to edit or remove
Access these tutorials at any time, even if you’ve closed the welcome banner, by tapping Learn at the bottom of the home screen.
If you’ve used Photoshop for years, you probably don’t need to bother. If you’re new, you couldn’t ask for a better set of tutorials for beginners. Of course, check out YouTube for endless tutorials, though you might not see many for the app itself just yet.
To start your first project, select one of the following:
- From your photos
- New blank canvas
- From Adobe Stock
Editing Photos with Photoshop for Android
I’m not the best at editing photos. I typically just use MS Paint (which also lets you generate AI images) to quickly crop and resize. But, sometimes I need something better, so I switch over to Photoshop. Thanks to the app, I don’t have to constantly move photos over to my desktop to make edits.
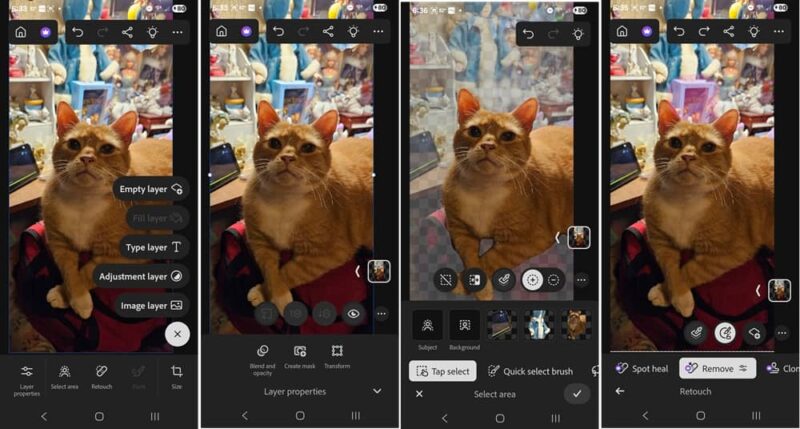
I chose a photo from my phone’s gallery to get started. The editing window is just as minimal as the home screen, which is I love. To edit, use the following:
- Tap the + to add or adjust layers
- Tap Layer properties to blend, distort, and create masks
- Tap Select area to select and isolate (or delete) specific areas of your photo
- Use Retouch to remove specific areas
- Tap Size to adjust the size
Some tools and options are currently greyed out. They’re not available in the beta test just yet. Keep checking back for updates as you never know when Adobe may add them in or even make changes to existing tools.
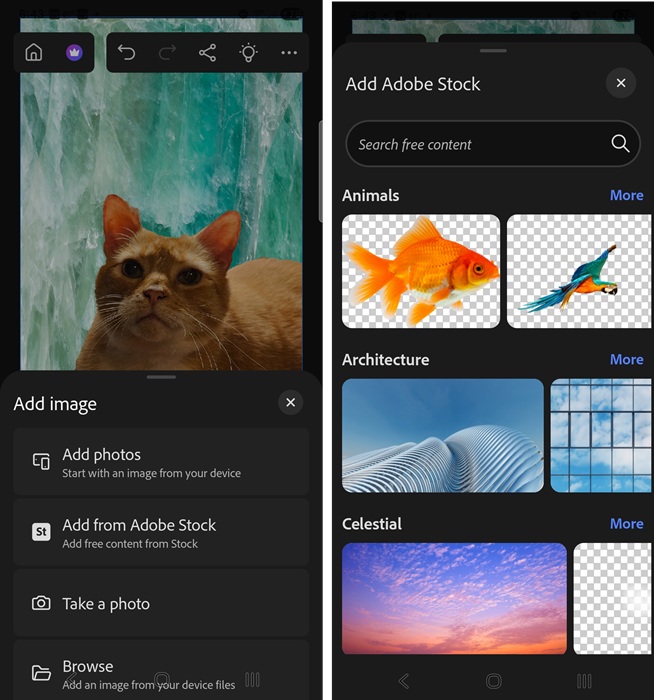
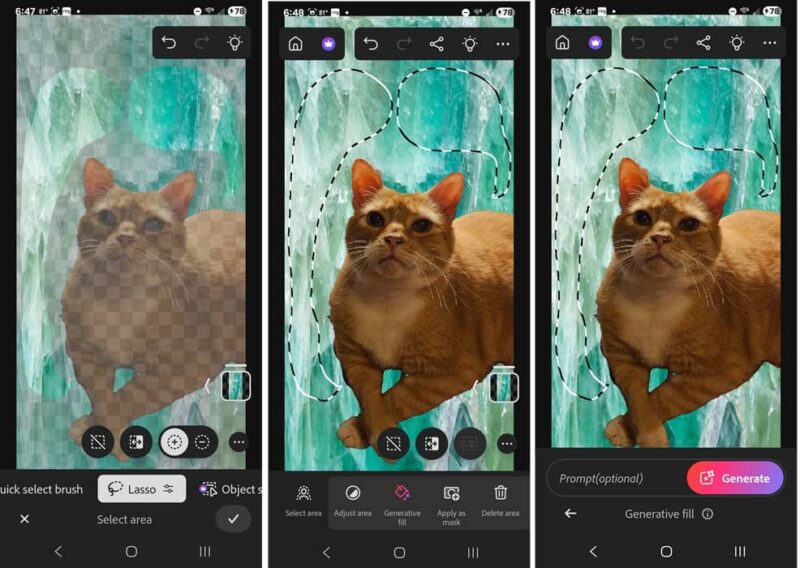
For a quick test, I used the Select Area tool to select my cat Goldie and remove the background. I then added a new image layer and chose a free stock image from Adobe. You can also use other images you already have on your device or take a photo with your camera.
Adding in Generative Fill
I then used the Lasso tool from Select Area to select an area to add in some Generative Fill to spice things up. Tap the checkmark to save each step.
Tap Generative Fill and enter a prompt. Tap Generate when you’re ready. I wanted to add in a small butterfly. This is added as another layer, making it easy to add or remove it if you want.
I was able to select between a few different butterflies, but settled on just a small monarch to add to my photo. Obviously, you can add as little or as much as you want.
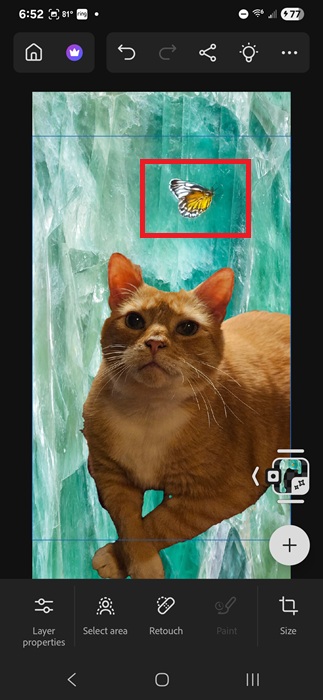
My editing skills aren’t the best, but for a quick edit that only took two minutes, it’s not terrible. Spending 5–10 minutes could easily turn this into a professionally edited photo without needing to be a professional.
Get Inspiration from Adobe Stock
One of the options on the home screen is to create a new project From Adobe Stock. If you want to create a completely new photo/image from scratch, but aren’t sure where to start, tap this option.
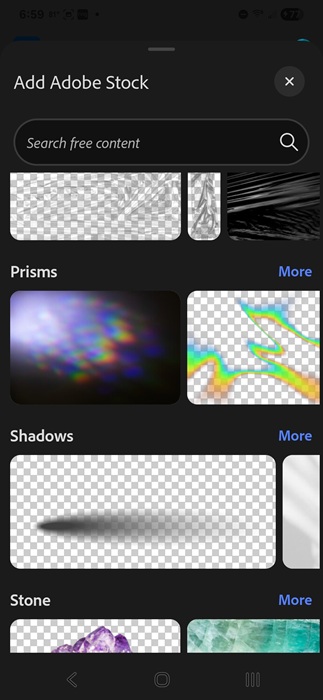
Search through numerous free foregrounds and backgrounds to quickly create unique images. Then, add in AI, your own images, or take photos. Edit colors and layers and see where your imagination takes you.
If you don’t find anything you like, consider using image search engines to find free images to use. Odds are, the app won’t be free for long, so if you may want to consider some free Photoshop alternatives.