
If you’re setting up Docker on Linux, you might encounter the frustrating “permission denied” error. This usually happens when your user account lacks access to the Docker daemon or the files and directories Docker needs. While these restrictions protect your system, they can interrupt your workflow, especially when configuring development environments.
In this guide, I’ll explain the common causes of this error and share practical solutions so you can get Docker running smoothly.
Understanding the Docker Permission Denied Error
Docker commands communicate with the Docker daemon, which runs as the root user. This is why Docker requires elevated permissions. When your user account lacks the necessary access, the system blocks the command and shows a “permission denied” error.
This error shows that the current user cannot access the Docker service. Common causes include the user not being part of the Docker group, running Docker commands without administrative privileges, or incorrect file or socket permissions that prevent communication with the Docker daemon.
Use sudo to Run Docker Commands
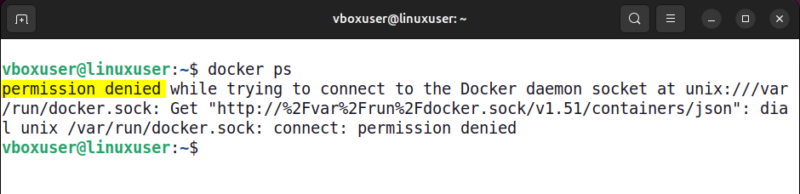
The quickest and safest way to fix Docker permission denied errors is to run Docker commands with sudo. This temporarily grants the required privileges, allowing the command to execute without interruption. For example, to list running containers, we can run the docker ps command with sudo like this:
sudo docker ps
This works instantly and is ideal for one-time tasks. However, typing sudo for every Docker command can be inconvenient for daily use.
Add User to Docker Group
While using sudo can stop the permission denied error, it still requires elevated access every time you run a Docker command. A better and more permanent solution is to allow non-root access by adding your user to the Docker group. This removes the need to use sudo every time.
Docker uses a Unix group called docker to control access to its daemon. If the group does not already exist, create it using the command below:
sudo groupadd -f dockerNext, add your current user to the Docker group with the following command:
sudo usermod -aG docker $USERAfter running the command, apply the group changes. You can either start a new group session or log out and log back in:
newgrp dockerTo confirm that your user is now part of the Docker group, check your group memberships:
groups
Finally, verify the fix by running a Docker command without sudo:
docker ps
If the command runs without permission errors, you have successfully enabled non-root Docker access. This approach is ideal for developers who use Docker regularly, as it removes repeated permission issues and provides a clean, hassle-free workflow.
Fix File and Socket Permissions
If adding your user to the Docker group doesn’t solve the issue, the problem may be file or directory permissions. Docker relies on specific files and directories to communicate with the daemon. Incorrect ownership or access rights can block commands.
In that case, start by checking the Docker socket file, which is the main communication channel between Docker and the daemon. This socket should be owned by root and belong to the docker group.
ls -l /var/run/docker.sock
If the ownership is incorrect, fix it with the following command:
sudo chown root:docker /var/run/docker.sockNext, make sure you own the hidden “.docker” directory inside your “home” folder. Docker uses this directory to store configuration and authentication data. If the ownership is wrong, update it recursively so all files inside belong to your user:
sudo chown -R "$USER":"$USER" $HOME/.dockerAfter that, grant read and write permissions to the group to ensure smooth access:
sudo chmod -R g+rw "$HOME/.docker"Remember that Docker creates the “.docker” directory only after you log in to Docker Hub using docker login. If the directory does not exist and you see a “No such file or directory” message, you can safely ignore it.
After these corrections, Docker should communicate properly with the daemon.
Grant Containers Access to Hardware Devices
Some Docker permission errors occur when containers try to access hardware devices such as USB ports, GPUs, or sound cards. In these cases, Docker may block the request and show errors like “permission denied: /dev/ttyUSB0”.
To allow access to a specific device, start the container with the --device option:
docker run --device=/dev/ttyUSB0 your-imageIf the container needs full access to host devices, you can run it in --privileged mode:
docker run --privileged your-imagePrivileged mode is commonly used for IoT projects, GPU workloads, or USB and serial device access. But it should be used with caution because it grants the container full access to your host, which can be risky with untrusted images. Prefer --device for limited access whenever possible.
Restart Docker Engine
Sometimes, Docker errors can be resolved simply by restarting the Docker service. Restarting ensures that Docker refreshes its processes and clears temporary issues that might be causing problems.
To restart Docker, open your terminal and run the following command:
sudo service docker restartThis command does not display any output when it runs. To confirm that Docker has restarted successfully, check its status with:
service docker statusLook for the Active field in the output. If it shows active (running), that means the Docker service is running properly.
After this, you can test if the previous error has been resolved by running a Docker command. For instance, try listing the running Docker containers:
docker psIf the command executes successfully and shows your images, it indicates that Docker is working correctly and the error has been fixed.
Wrapping Up
Docker permission errors on Linux can be frustrating, but they don’t have to slow you down. Most of the time, running commands with sudo, adding your user to the Docker group, or fixing file and socket permissions will get things back on track. For containers that need hardware access, the --device flag or privileged mode comes in handy. And sometimes, a simple Docker restart is all it takes.
With these fixes in place, Docker will run smoothly, letting you focus on building and managing containers without constant interruptions.


