
Whether you’re capturing blooming flowers, bustling city streets, or the changing skies, transforming still images into a dynamic sequence adds life and motion to your memories. You can easily create stunning time-lapse videos from your collection of photos on Windows without needing any expensive or complex video editing software. In this guide, we’ll show you how to create time-lapse videos on Windows.
Why Turn Photos into Time-Lapse Videos
Time-lapse videos take a series of photos captured over days, weeks, or even months, and compress them into a video of a few seconds or minutes. Not only are they great for mesmerizing art, but they are also very useful for recording real‑world transformations, conveying progress at a glance, and making long-duration projects instantly shareable. Below are some common uses of time-lapse videos:
- Track weight-loss or fitness journey by taking a daily selfie and converting months of progress into a minute-long video.
- Capture nature events like a sprouting seed, blooming flower, sunsets, or cloud movements.
- Record complex art projects like painting a canvas or sculpting clay.
- Record your hair growth to measure growth speed over time.
There are many more uses of time-lapse videos. Next, let’s look at how to create one quickly on Windows.
Creating a Time-Lapse Video
To create a time-lapse video, you’ll need the sequence of photos ready and available in Windows. We recommend putting all of them in a single folder to make it easier to import them. You might also want to adjust the names if you want to change the sequence of the final time-lapse video. For most people, the sort by date taken option will work fine, but for customization, adding numbers at the end of the name will help adjust the sequence.
We will use the Time Lapse Creator app for this as it’s completely free and very easy to use. To create a time-lapse, click on Import Folder and select the folder that contains all the photos. If you only want to import specific photos, then click on Import Files instead.
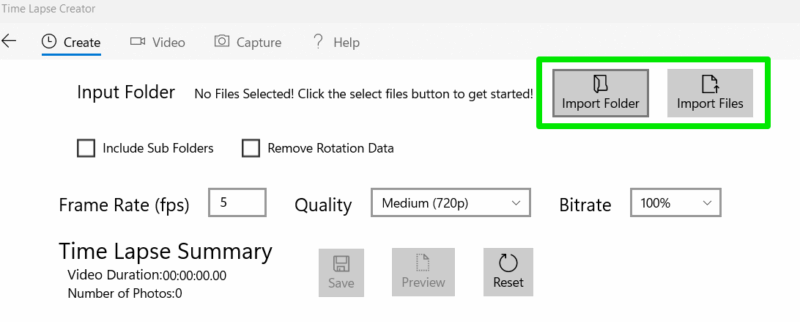
The tool has a bunch of settings to adjust that will apply when you click the Preview button. Frame Rate (FPS) is the most important one, as it decides how many pictures are shown per second. The FPS depends on the total number of photos you have and the duration of the video you want. Generally, try to get enough photos to create a 24-30FPS video for your preferred duration, like 600 photos for a 30 FPS time-lapse video of 20 seconds duration.
Quality and Bitrate directly decide the size of the end video and visual quality. In our testing, if both were at maximum, the end video size was slightly less than the original size of the photos provided. Be careful with decreased quality and bitrate, as it’s very aggressive and you will notice a drop in quality even at medium settings (with a big decrease in file size as well).
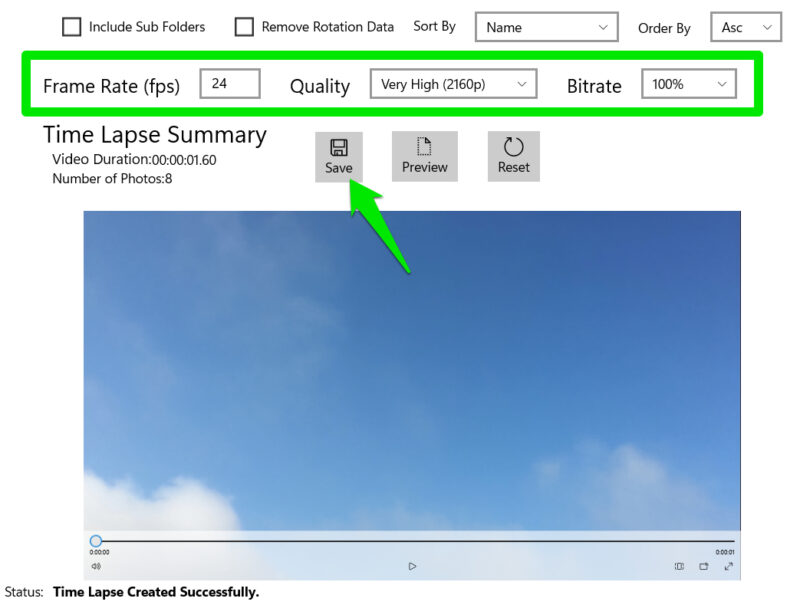
When you are done, click on Save, and you can save the video in the MP4 format. Time Lapse Creator also has options to create a time-lapse from a video and capture photos from your webcam, but they aren’t as powerful as dedicated tools for this purpose.
Alternative Time-Lapse Apps For Windows
Apart from Time Lapse Creator, there are also some other handy time-lapse creation tools for Windows that have their own unique features.
Here are some of the most reliable Windows time-lapse apps that are free:
- MakeAVI: a simple yet powerful time-lapse maker that lets you crop frames, adjust the photo sequence, and save them in AVI format, uncompressed for the highest quality.
- Time Lapse Live: a bare-bones app with only the option to select photos and set FPS. Great if you want a no-fuss solution.
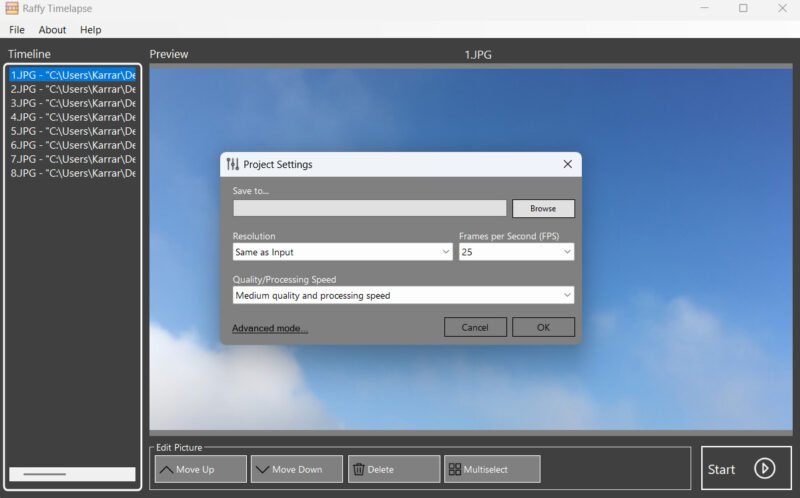
- Raffy Timelapse: allows you to manage multiple projects simultaneously and has an automatic settings system that applies the best settings based on images provided.
For best results, make sure the photos have a consistent focus and surroundings; otherwise, it will look like a really fast photo slideshow. Also, make sure you use a proper file-sharing method when moving photos from your phone to your PC to avoid any loss of quality.


