Google Photos has been busy rolling out a wave of new features recently, making the popular app smarter and more versatile than ever. While Android users are starting to see its new AI-powered editor, iOS users aren’t left out either. There’s a fun new option to turn your favorite photos into custom stickers. Here’s how you can make yours in seconds.
Good to know: take Google Photos’ new tools for a spin by getting up to speed on how to turn your photos into videos using the app.
Using Google Photos to Make Stickers from Your Photos on iPhone
Interestingly, the feature is currently only available for iPhone users, but not Android ones. Before you try this, ensure you update your Google Photos app to the latest version by visiting the App Store and searching for the app. If an Update button is available, tap it to get the latest version.
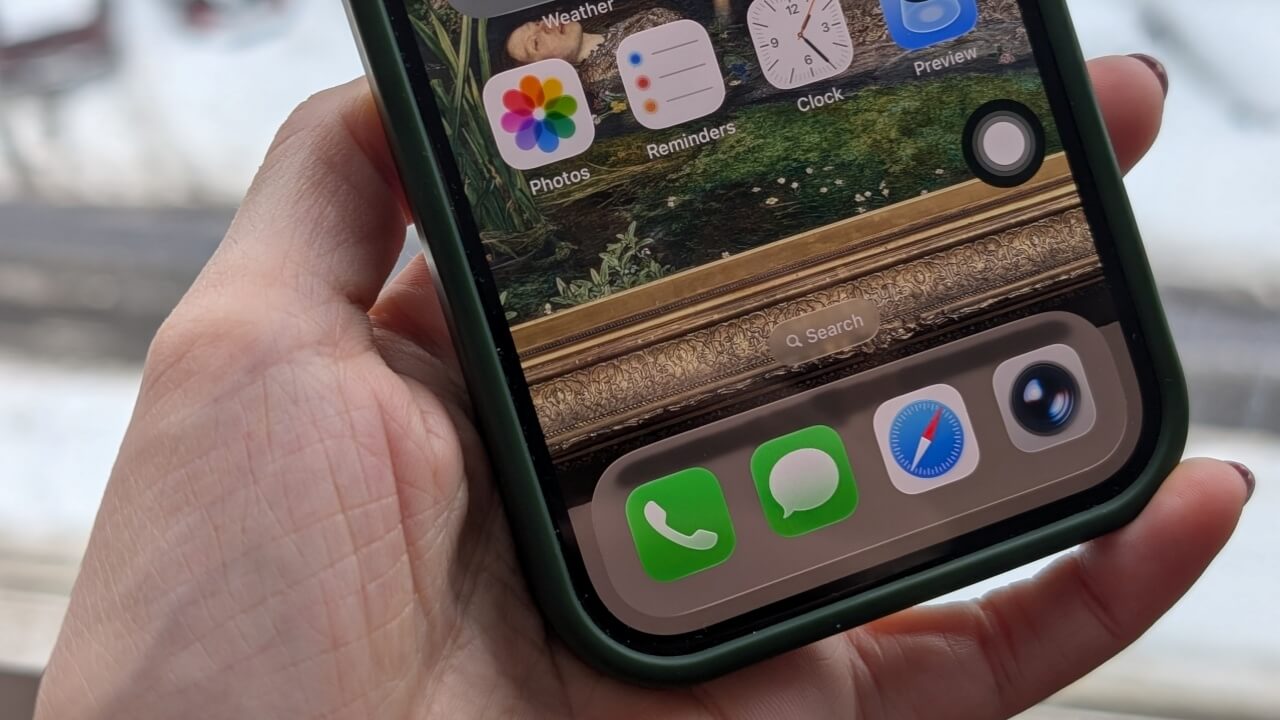
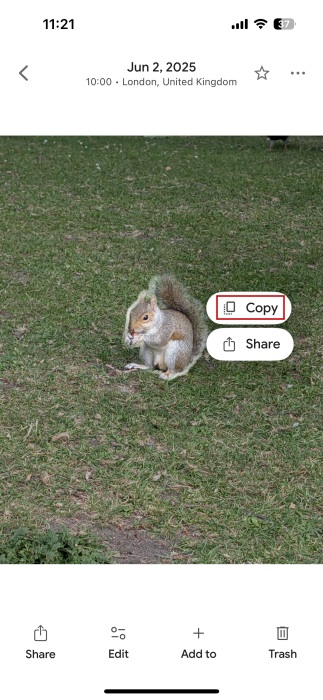
Now, open the Google Photos app on your iPhone and find a photo with a subject you’d like to turn into a sticker. Tap on it to open it in full view.
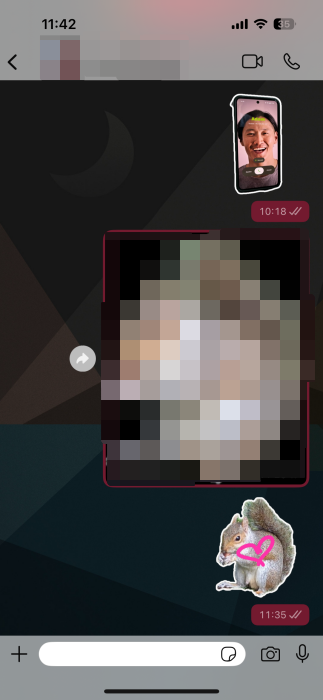
Long-press on the subject. A tiny menu will show up with two options. Tap the Copy one. You can also opt for Share if you just want to send the sticker one time.
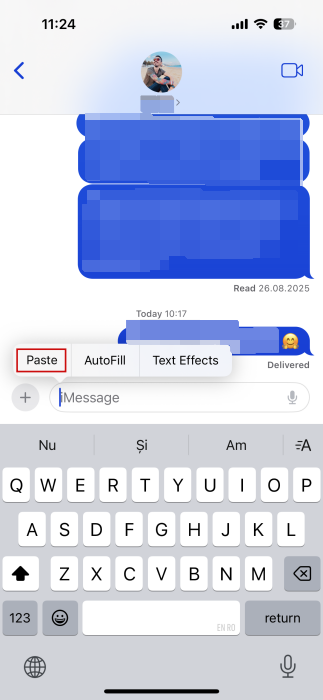
Now, switch to a texting app like Messages to share your new sticker. Long-press in the message bar and select Paste.
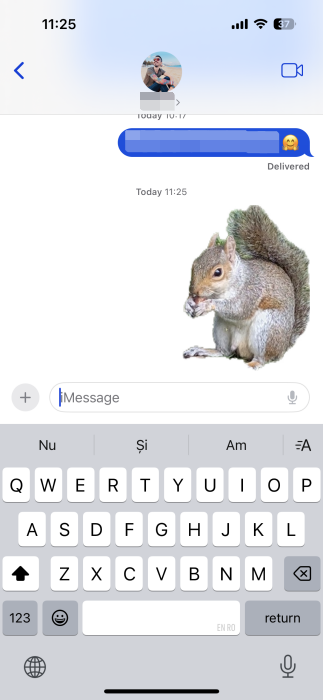
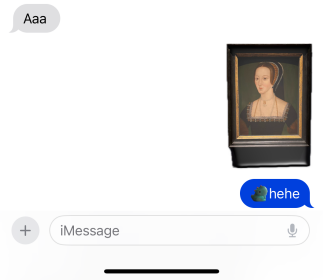
Add text if you want, and press the blue arrow to send the sticker to your chat buddy. In Messages, the sticker is shared as a photo.
Note that Google Photos doesn’t let you save the sticker for later use. Nor will the sticker show up in the Stickers section on your iPhone (accessible through your virtual keyboard).
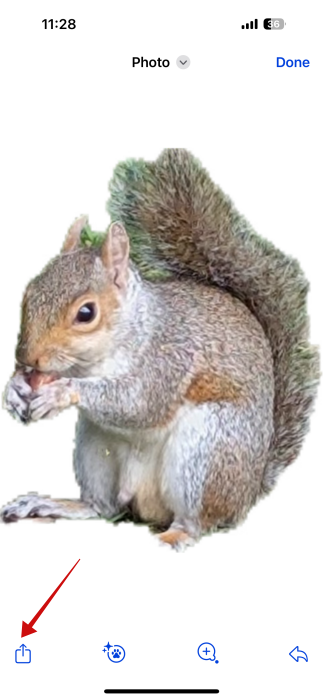
The best you can do if you want to preserve the sticker for later use is to save it as a photo. Tap on it in the conversation.
Tap again on the screen to bring up a series of options. Press the Share button.
Select Save Photo in the menu that appears.
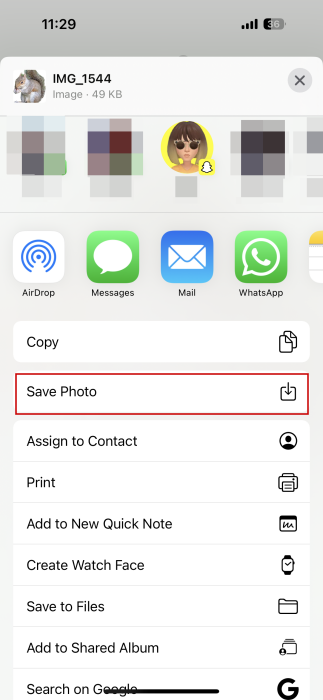
The sticker will now show up in your Photos app.
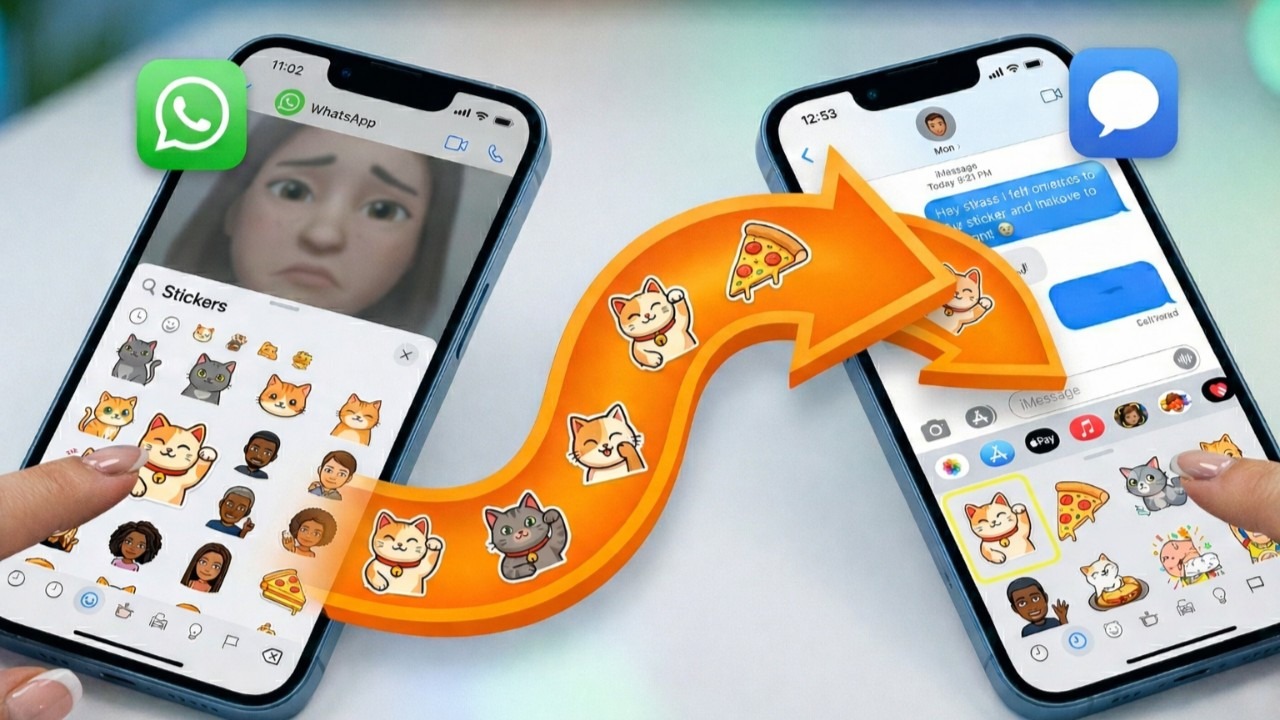
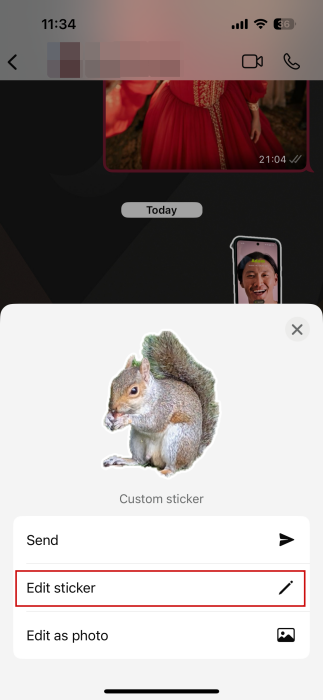
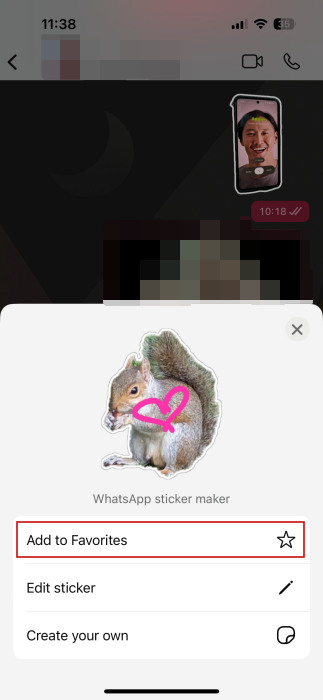
Alternatively, you can try sharing the same sticker on a chat app such as WhatsApp. When you paste one, a menu appears that allows you to Edit the sticker or Send it as it is. A third option to Edit as photo exists, but on WhatsApp, you can send your creation as a sticker instead of a photo, so we opted for this option.
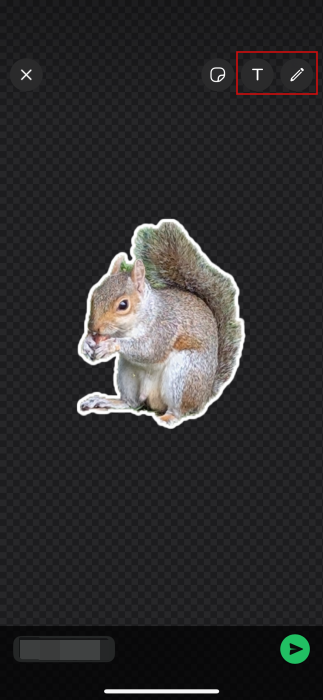
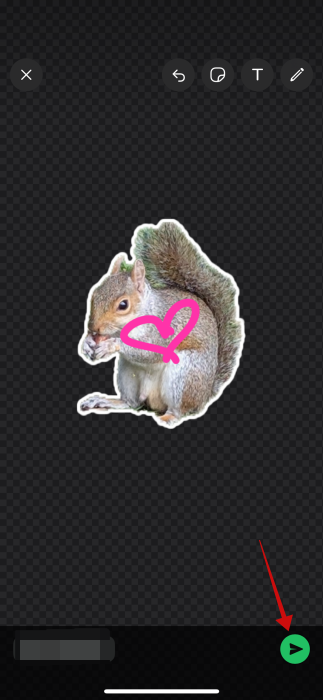
Tap one of the icons at the top to doodle on the sticker or add some text.
Press the arrow icon at the bottom to send it in the chat, once you’re done.
Unlike on Messages, the cutout will show up as a sticker in the conversation.
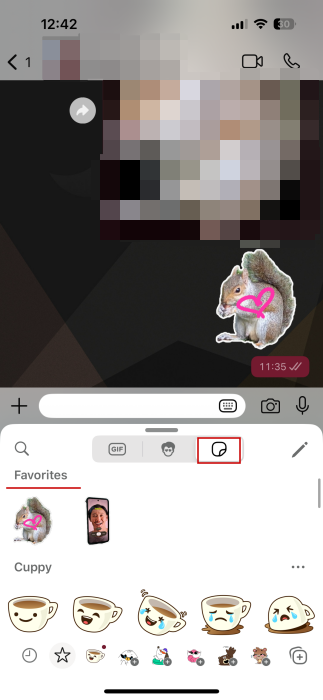
On WhatsApp, it’s also possible to save the sticker for later use. Long-tap on it in the conversation and select Add to Favorites.
Now, whenever you press the sticker icon in WhatsApp, you’ll find your new sticker under Favorites. Learn more about how to use and manage WhatsApp stickers.
Tip: here’s how you can easily give your Google Photos an Ultra HDR makeover.
Alternative on iOS: Use the Photos App
If you’re a regular Messages user and you don’t really like the fact that you can’t save your Google Photos stickers to your Sticker library on iPhone, try this alternative. Use the native Photos app instead, which comes preinstalled on your device. The resulting stickers will integrate well with Messages.
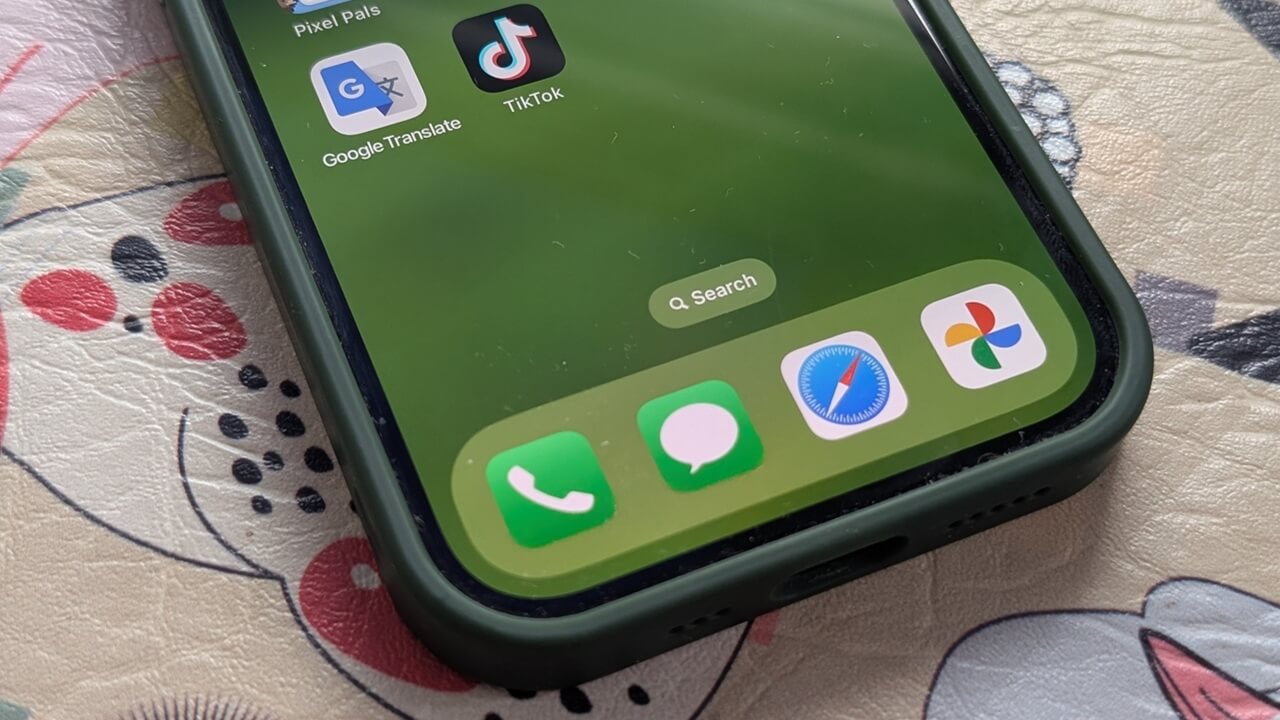
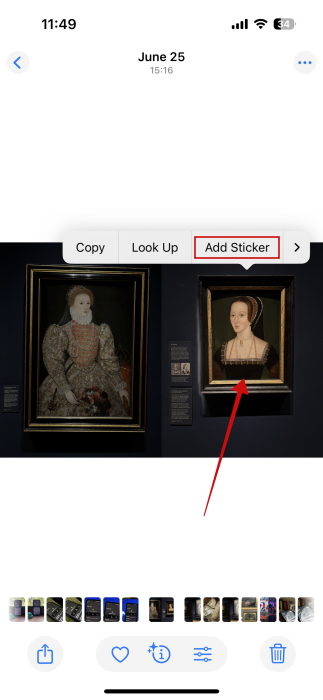
Open the Photos app and find an appropriate picture.
Long-press on the subject you wish to transform into a sticker. Select Add Sticker in the tiny pop-up menu that appears.
The Sticker will automatically be added to your Stickers gallery. You can press Add Effect from there.
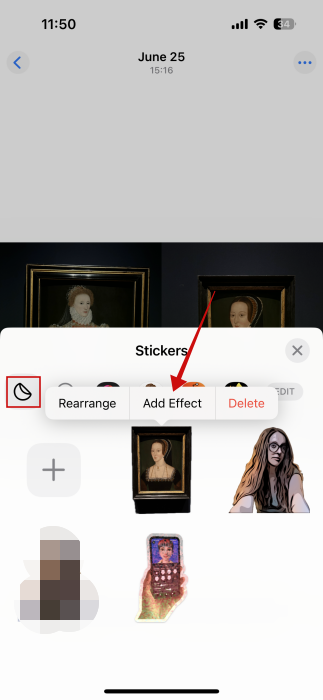
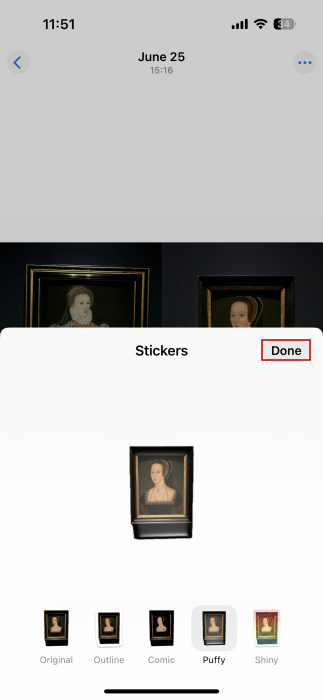
Go through the alternatives and select your preferred option, then press Done.
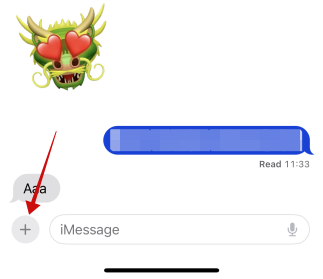
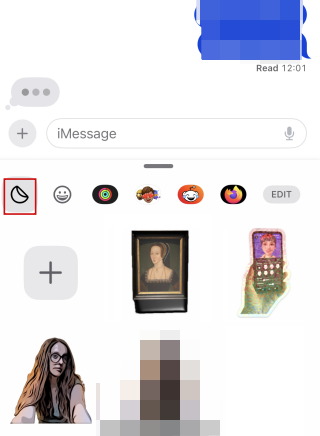
Now switch to the Messages app. At the bottom, press the + button.
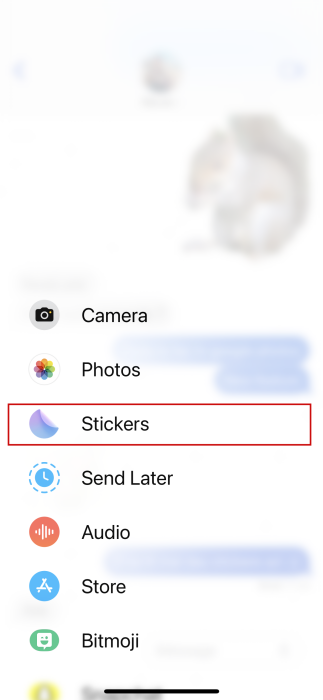
Select Stickers.
Tap on the sticker icon if it’s not already selected. You should view your custom sticker collection.
Note: you might have to tap the arrow on the left underneath the message box to exit the sticker pack you’re currently viewing.
Press any to insert it into the conversation.
Alternatively, you can create a new sticker straight from Messages. Bring up the Sticker section as explained. Press the + button to upload an image from your Photos app.
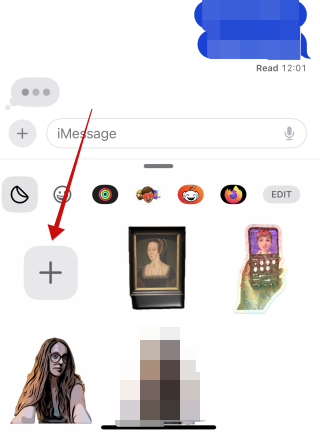
Once you select it, your iPhone will automatically create the sticker. Press Add Sticker to save it.
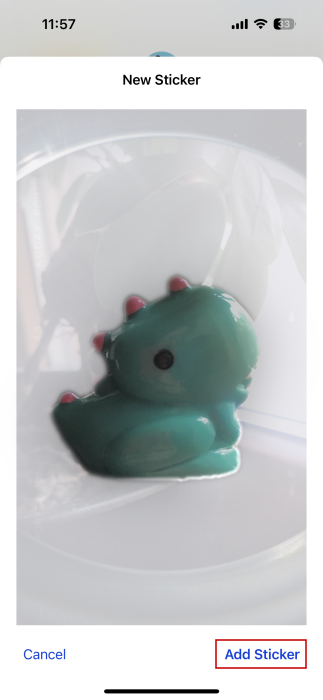
Depending on the size of the resulting sticker, you can also add text beside it on the same line.
By the way, if you want to make your messages even more fun, read on about how to animate text, emoji, and even stickers on your iPhone.
Armed with these new stickers, you can easily import them into your Instagram stories, so you can give your posts a personal, unique twist.