
Tracking how many hours we spend in front of a screen can be useful for productivity. Windows offers built-in tools to monitor usage patterns, while third-party apps and browser extensions provide deeper insights. This guide covers the various ways to check screen time on a Windows PC.
Good to know: learn how to record your Windows screen with these tools.
1. Check Screen Time Using Settings
Click the Start menu at the bottom of your screen, and select the Settings icon. Tap on Power & battery -> Battery usage in the System tab if you’re using Windows 11.
You’ll find a similar option in Windows 10 under Settings -> System -> Power & sleep –> Battery.
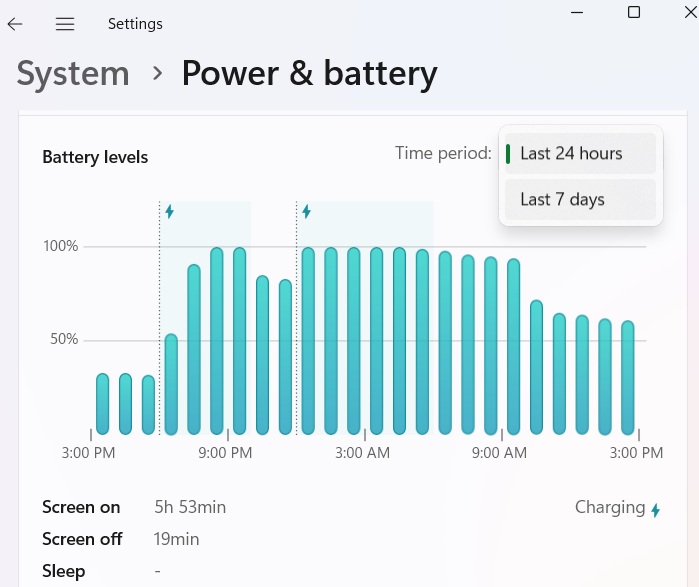
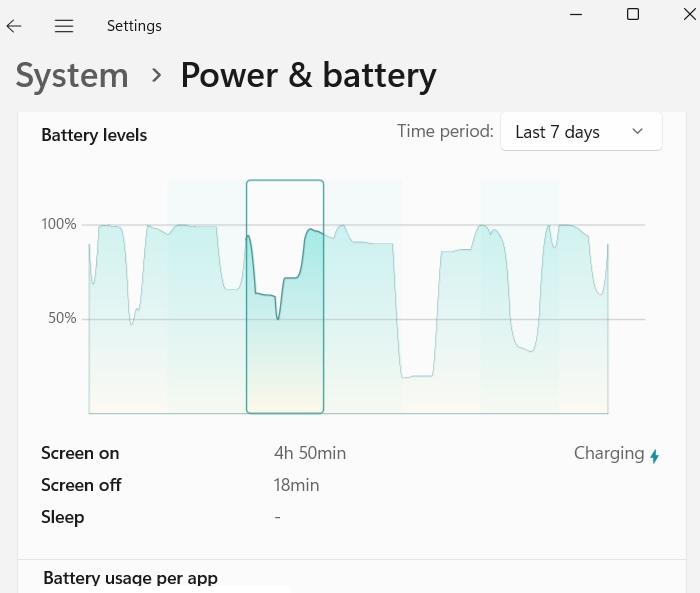
To get more information, click the drop-down box above the Battery levels graph, and select the Last 7 days option.
You will see a detailed graph that gives the daily average of the Screen on/off time and Sleep time. Clicking on any date in the graph lets you see the screen time you spent in Windows for that specific day.
Related: check out this ultimate guide to the Task Manager in Windows.
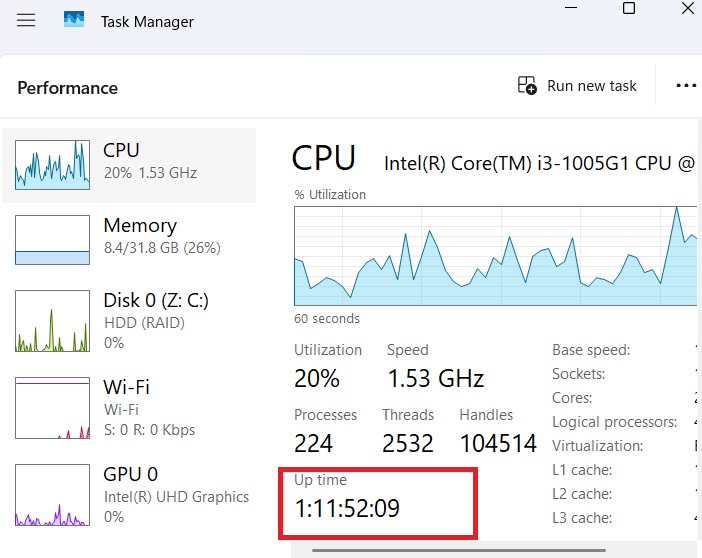
2. Track Screen Time Using Windows Task Manager
If you’re looking for a direct answer to “how much time I’ve spent on my PC,” this method is fast and easy.
Right-click the Start Menu icon, and click Task Manager from the list of options. You can also open it by typing Ctrl + Alt + Del, or Ctrl + Shift + Esc (directly).
Click the Performance icon (a graph symbol) in the Task Manager dialog box. Below the performance graph of the CPU, the Up time field displays how long your PC has been running since the last restart (not shutdown).
Tip: connect your PC to the correct Wi-Fi network automatically.
3. Check Screen Time Using Wi-Fi Status
To check how much time you’ve spent on your screen since the last time you powered on your Windows device, the Wi-Fi status can provide a useful clue.
Launch Control Panel. Click View Network status and tasks under the header Network and Internet. Now look under View your active networks, click your current Wi-Fi network. A new Wi-Fi Status pop-up menu will open. Check near Duration to find out the total screen time since the last bootup.
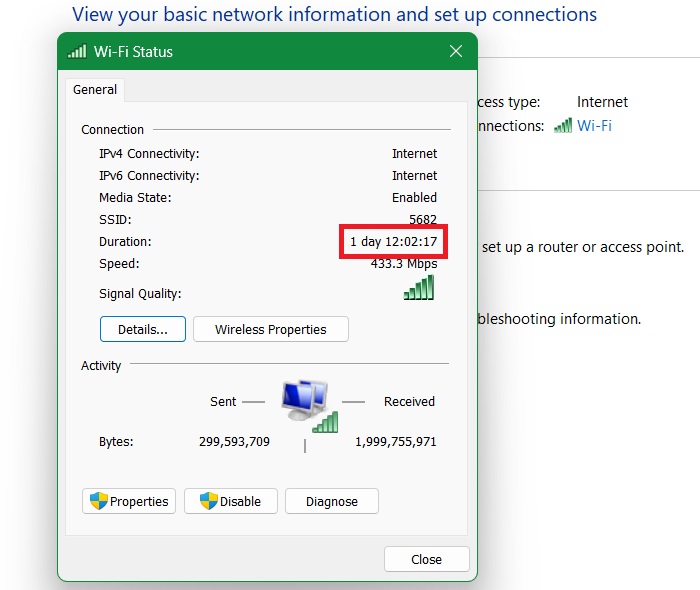
This method will only work if you did not change your original Wi-Fi network on the device.
Tip: learn what to do if Windows can’t find Powershell.exe.
4. Check Screen Time with PowerShell
You can also use PowerShell to find out how much time you spend on your Windows computer on a certain day. It gives the most accurate data expressed in various time units including days, hours, minutes, and up to milliseconds.
Run PowerShell in administrator mode. Type the following command, and press Enter.
(get-date) - (gcim Win32_OperatingSystem).LastBootUpTimeThe time elapsed since the last bootup of your Windows computer will be shown.

The PowerShell window also gives a glimpse into login timestamps, helping track active screen time.
Get-EventLog -LogName Security | Where-Object {$_.EventID -eq 4624} | Select-Object TimeGenerated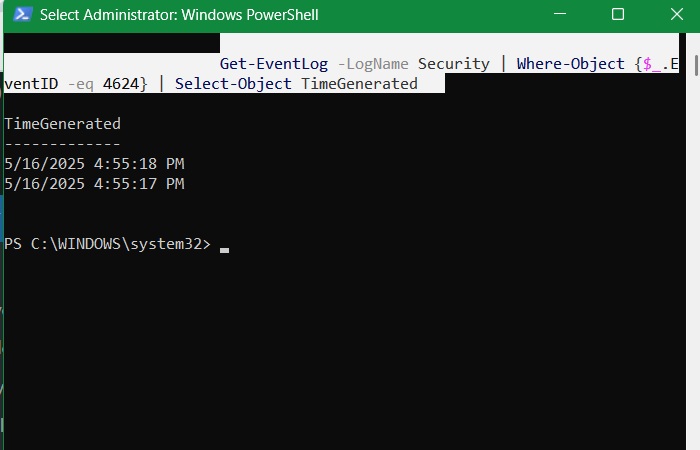
If you want to check all your sleep and wake events, PowerShell gives you a line by line item list.
Get-EventLog -LogName System | Where-Object {$_.EventID -eq 1} | Select-Object TimeGeneratedNote: the PowerShell method will not work for you if you’re not in the habit of turning off your computer every day. Learn which method is better: putting your PC to sleep or shutting it down.
5. Use the SystemInfo and PowerCfg Commands in Command Prompt
Unlike PowerShell, the Command Prompt does not give you the screen time directly. But it still gives a lot of useful data by checking system uptime and battery reports.
Run “cmd” in administrator mode, and check the system boot time from the System Info on your device. This gives you a total estimate of how much time has elapsed since your last Windows bootup.
systeminfo | find "System Boot Time"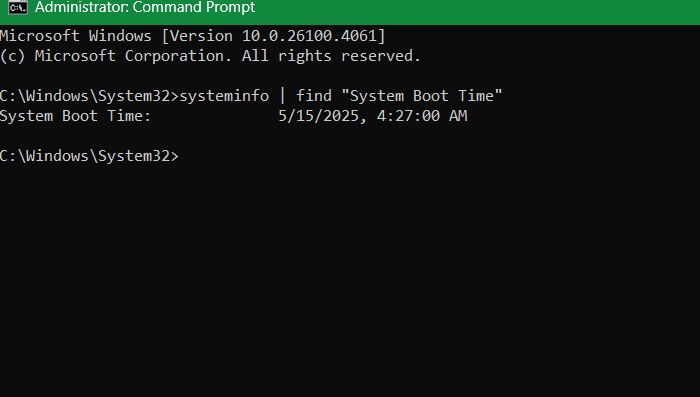
“Powercfg” is a more useful command worth memorizing, as it gives more detailed screen time statistics. First, view the sleep study reports using below. It gives you an indication of active and sleep periods.
powercfg /sleepstudyTip: find out some of the useful command Prompt tricks that you should use.
6. Analyze Screen Time and Wake Up Time With Event Viewer
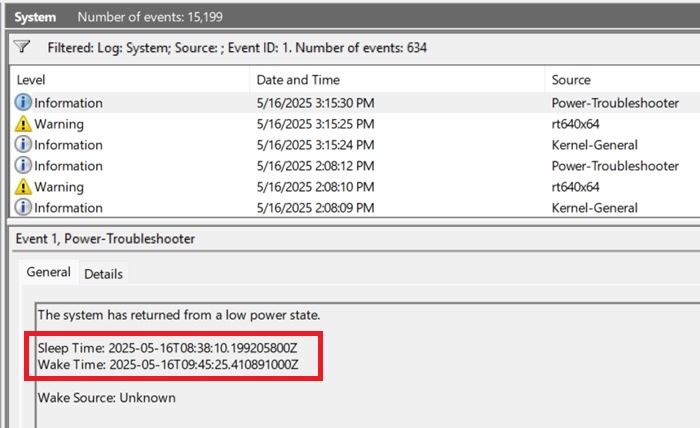
Open the Event Viewer, and navigate to Windows logs -> System. It will tabulate all the events for your system. On the rightmost panel, click Filter Current Log.
A new pop-up window opens. Under the All Event IDs, enter value “1”, which gives Power-Troubleshooter activities. Look under the General tab, and you will find the Sleep Time, and Wake Time for your device.
Also, in the Event Viewer, go to Windows Logs -> Security, Here, check for Event ID, 4624. It gives all Logon instances on your device. To learn how to use the Event Viewer properly, follow our tips.
7. Use Performance Monitor to Keep Track of System Uptime
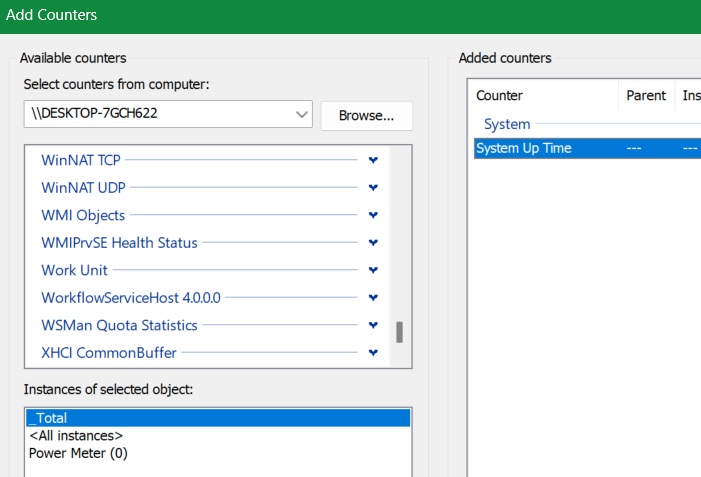
Windows has a little known Performance Monitor tool that gives you a counter to measure the system uptime. You can launch it from Run command by typing perfmon or from the search menu.
Next, go to Monitoring Tools -> Performance Monitor. Click the green plus button Add counters, which will open a new window. Here, under the various Available counters, select System Up Time, and add it to the list of Added Counters.
As soon as you click OK, the System Up Time counter will do a live tracking of how long your system is running.
FYI: learn how to view devices on your Windows network and what to do if you can’t.
8. Use Microsoft Family Safety Account
Want to know how much time your child (or another account) spends on the computer? Set up a Microsoft Family Safety account, then invite other accounts you wish to monitor.
To view the screen time for each individual in your family, click on your child’s or the person’s name in the group. You can also limit their screen time from the Family Safety page.
Tip: want to share your favorite games with your family? Learn how to do that with Steam Family Sharing.
9. Check Screen Time via Apps and Extensions
All the methods listed above will help you check the approximate screen time you spent on your computer. However, if you need to calculate the exact time you worked for invoicing purposes, you will need to make use of third-party time-tracking software.
Clockify is a free Web-based tool for Windows that helps you to track work hours across projects. You’ll have to remember to start the timer when you begin a work session, and stop it when you take a break or finish for the day. If that’s not your cup of tea, check out other time-tracking app alternatives, such as Harvest and Timely.
If most of your time is spent on a browser, extensions like StayFocusd can track browsing time. You can also use Focus Assist companion apps such as RescueTime, which lets you know how much time you’re spending in front of the PC, and away from it.


