

Are you looking to add an extra layer of security to your WordPress blog? Would you like to protect your blog from spammers and hackers, while giving your users added protection as well? If so, one of the best things that you can do is to add two-factor authentication to your blog.
Two-factor authentication adds an additional method of logging into your blog; a method that no one else has access to besides the user. Any hacker can easily figure out a username and password, which is why this single method of logging into your blog is not suffice.
With two-factor authentication, your users can verify their account via:
- Phone – they’ll receive a phone call with a pin to enter on your blog
- SMS – they’ll receive a text message with a passcode to enter on your blog
- Mobile app – they can use a mobile app, which will generate a passcode or send a push notification with a passcode, which they’ll need to enter on your blog
To add two-factor authentication to your blog, the easiest method is with the plugin Duo Two-Factor Authentication.
Here’s how to install and set up two-factor authentication with the Duo plugin:
1. Go to your WordPress dashboard to search for, install, and activate the Duo Two-Factor Authentication plugin.
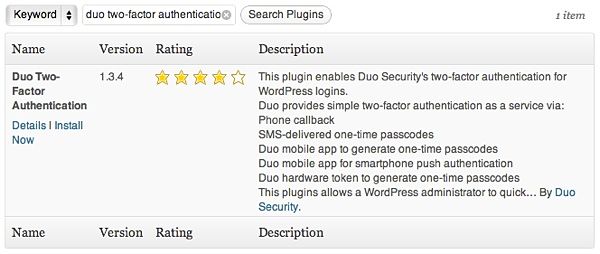
2. Go to the plugin’s settings page, which you can find under the Settings menu in your dashboard.
3. If you don’t have one already, you’ll need to sign up for an account on Duo Security’s website; a direct link is provided on the settings page.
It’s important to note here that Duo Security is free, but with limitations; you can only have up to 10 users using two-factor authentication. If you plan on having more than 10 users, it will cost you a small fee per user.
4. Once you fill out and submit the first half of the sign up form, you’ll need to click on the activation link in your email.
Once you click the activation link, you’ll be able to fill out the second half and finish up the sign up process.
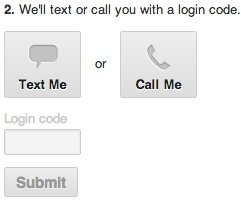
5. Duo Security will also need to call or text you with a login code; choose your preferred method. Enter the login code once received, submit, and you’ll be done with the sign up process.
6. Now you’ll need to get your integration key, secret key, and API hostname to enter on your blog.
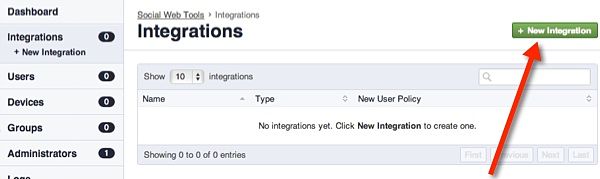
To get this, you’ll need to create a “New Integration” on the Duo Security website.
7. From your Duo Security dashboard, go to Integrations and click the “New Integration” button to get started.
8. For “Integration type,” choose WordPress and then enter a descriptive “Integration name.” Click on the “add integration” button to finish.
9. On the next page, you’ll see your integration key, secret key, and API hostname. Enter these credentials on the Duo Two-Factor Authentication settings page on your blog.
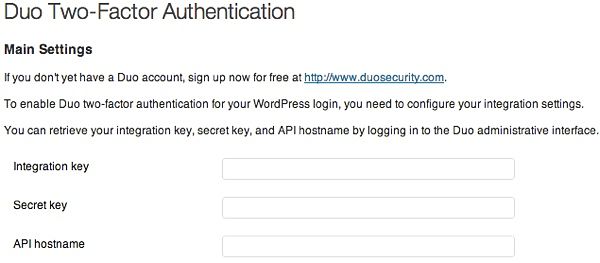
10. Select the user roles that two-factor authentication should be enabled for: admins, editors, authors, contributors, subscribers. Save your changes.
11. Now you’ll want to go back to the Duo Security website so that you can customize the settings for your integration. You can choose the new user policy, visual style and enter a custom voice greeting. The Settings tab in Duo Security also has some useful features that you’ll want to customize.
12. The next time you (or any other user roles you’ve enabled) log into your blog, there will be an enrollment process after you submit your username and password in the login form.
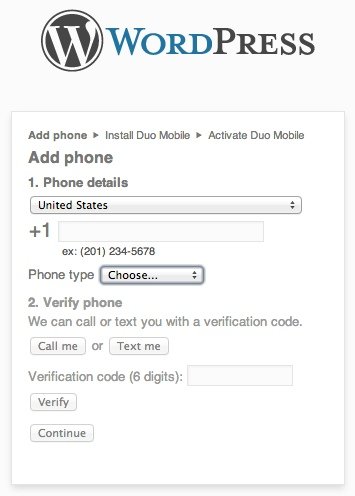
13. The enrollment process involves adding and verifying a phone number. You’ll also be prompted to download the Duo Security mobile app, although it’s not required.
14. Once the enrollment is complete and you’ve verified your phone number, you’ll only see a prompt similar to this from now on when you login:
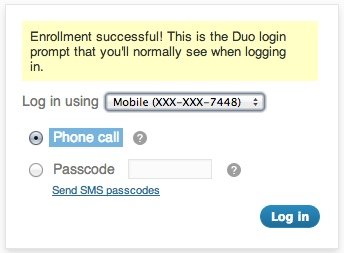
That’s it. Your blog is now protected with two-factor authentication. Remember that you can manage your users and other settings from the Duo Security website.